

Azure
1. Access to Authentication at Alloy
1.1 Granting Access to the Self-Serve Setup
Before clients can configure SAML/SCIM, the agent must either have Admin access or be granted access to a role with the following permissions below via “Roles” to “Authentication Settings”

1.2 Configuring a Default Role
Before you can use SAML, you MUST configure a default role for your users in the Alloy settings. This role will determine the permissions that your user has when they first log in.
The first time a user logs in using SAML SSO, they will be added to the Alloy system as an "Agent", and will be given this default role. Agents with Admin permission can then go in and assign them a different role, if they need additional privileges.
-
Be sure that you have Admin permission in Alloy, and log in to your dashboard.
-
Navigate to Settings in the sidebar, and then select Roles from the list.

-
On the Roles page, you should see a list of roles. By default these include "Admin" and "User," but your organization may have configured different ones.
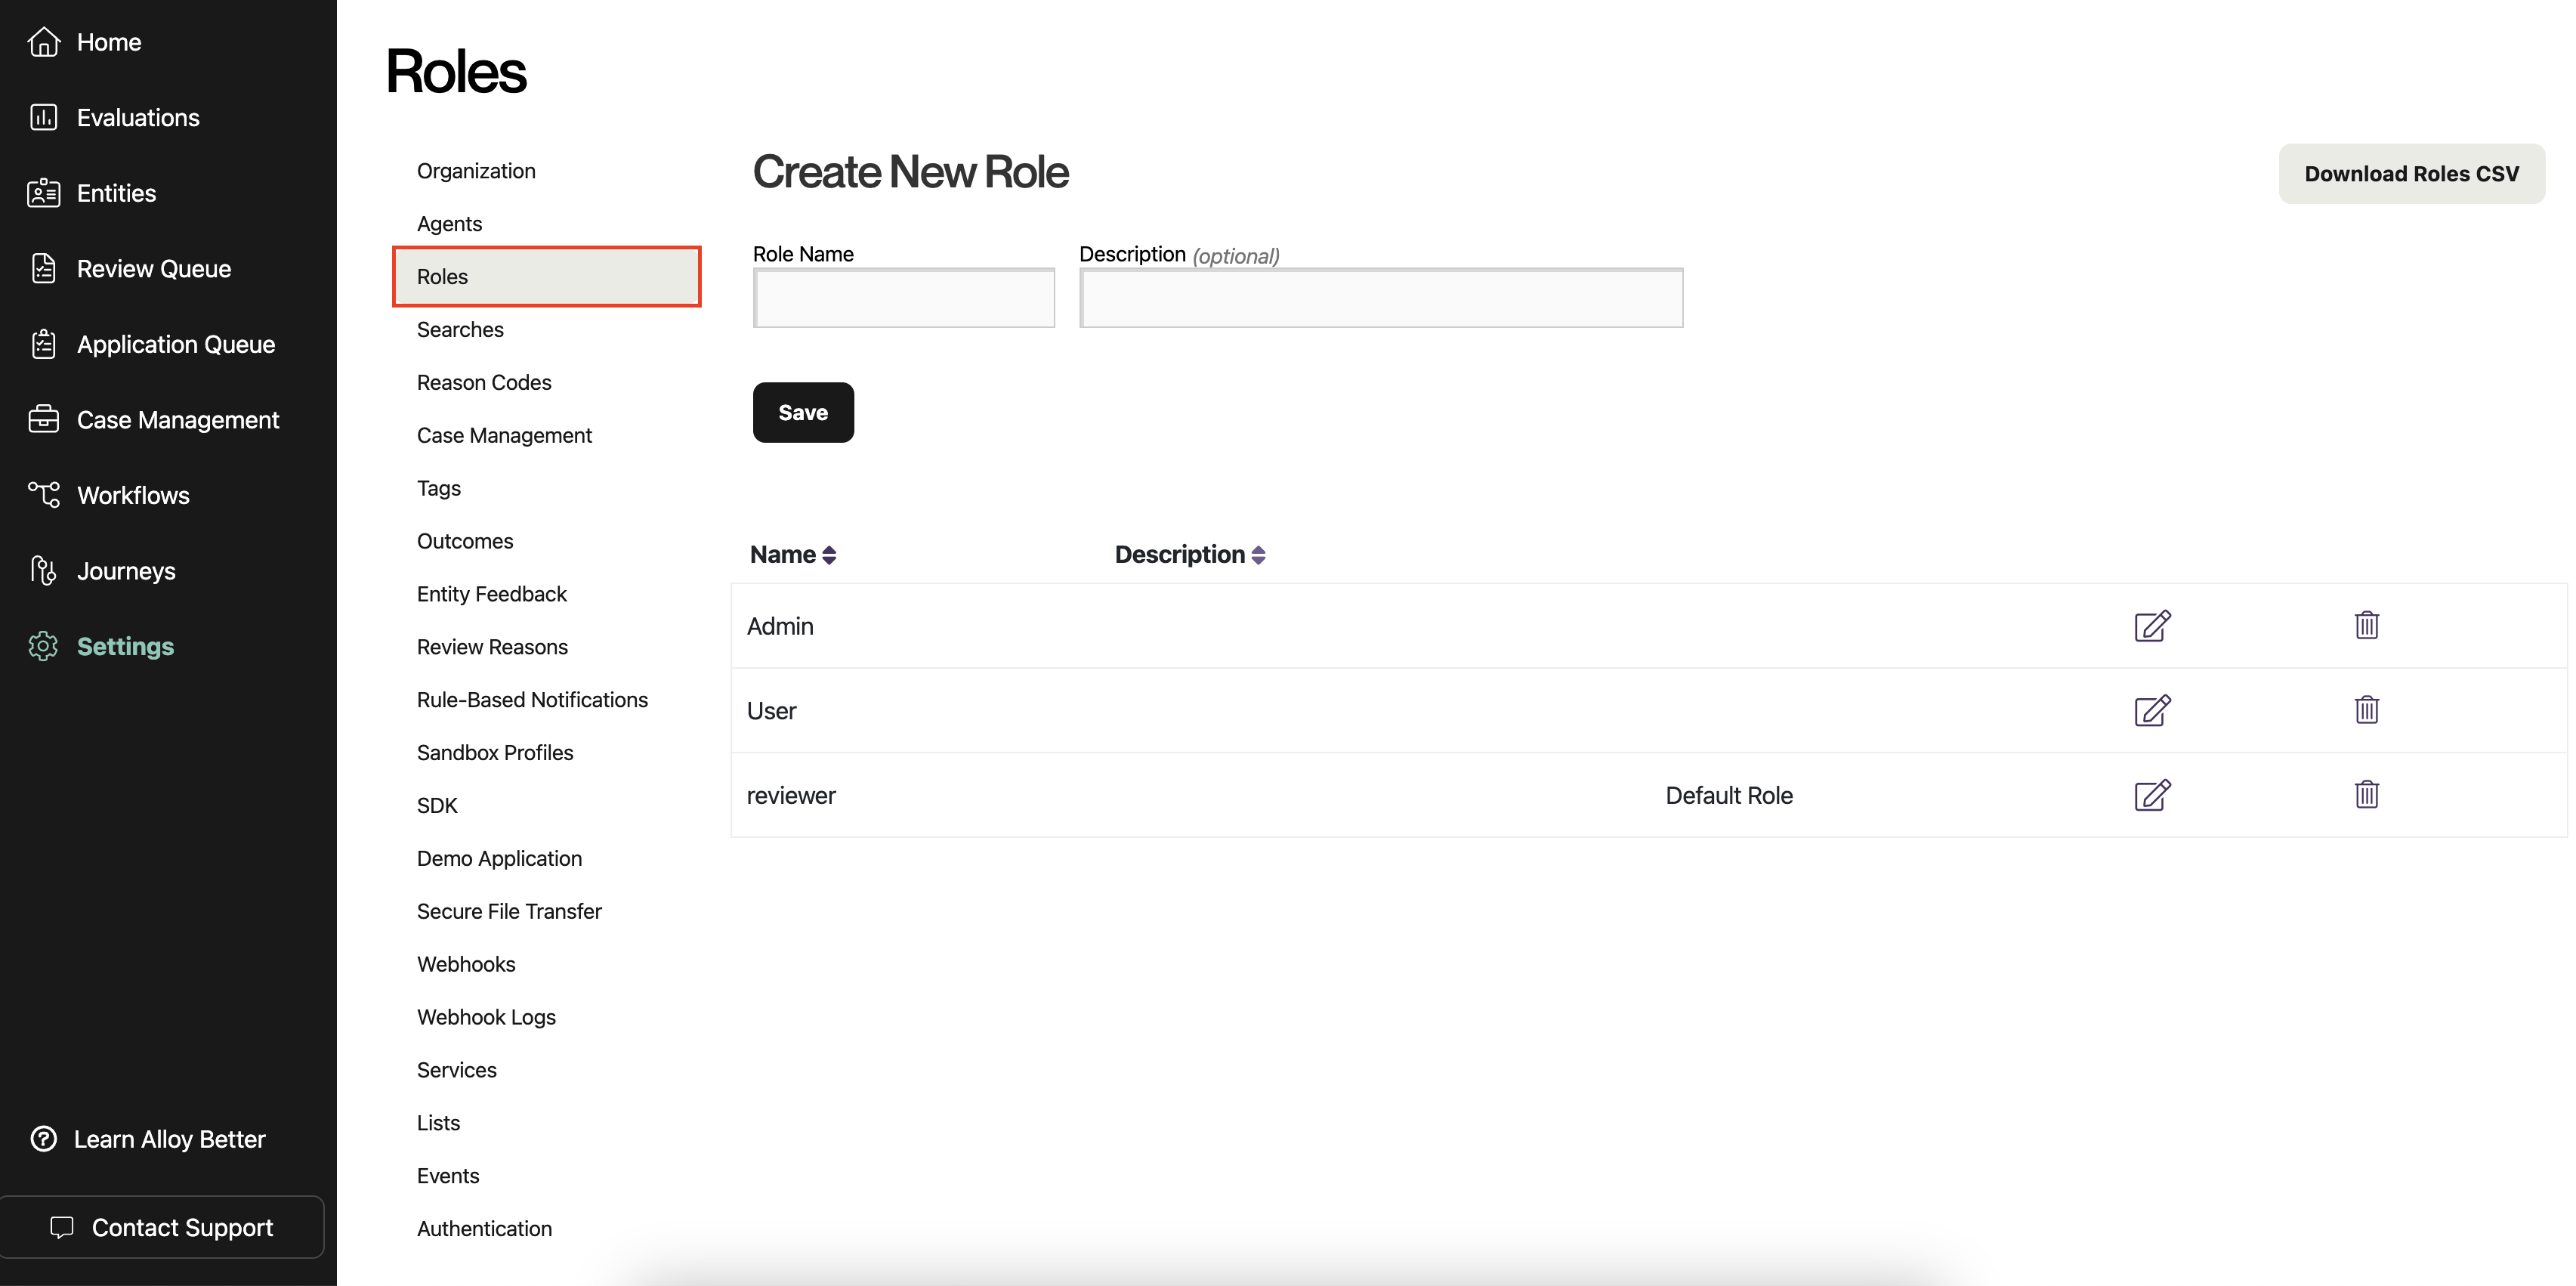
-
Select the role that you want to designate as the default for new SAML users. Click the icon with a pencil to edit the role. (You could also create a new role first, by filling out the form at the top and clicking "Save.")

-
Check the box labeled "Designate this role as the organizational default for new users," and apply your changes by clicking "Save."

-
You have now set a default user role for your org, and are ready to use SAML! Notice the addition of the "Default Role" label that will tell you your default role, when you return to this page in the future.

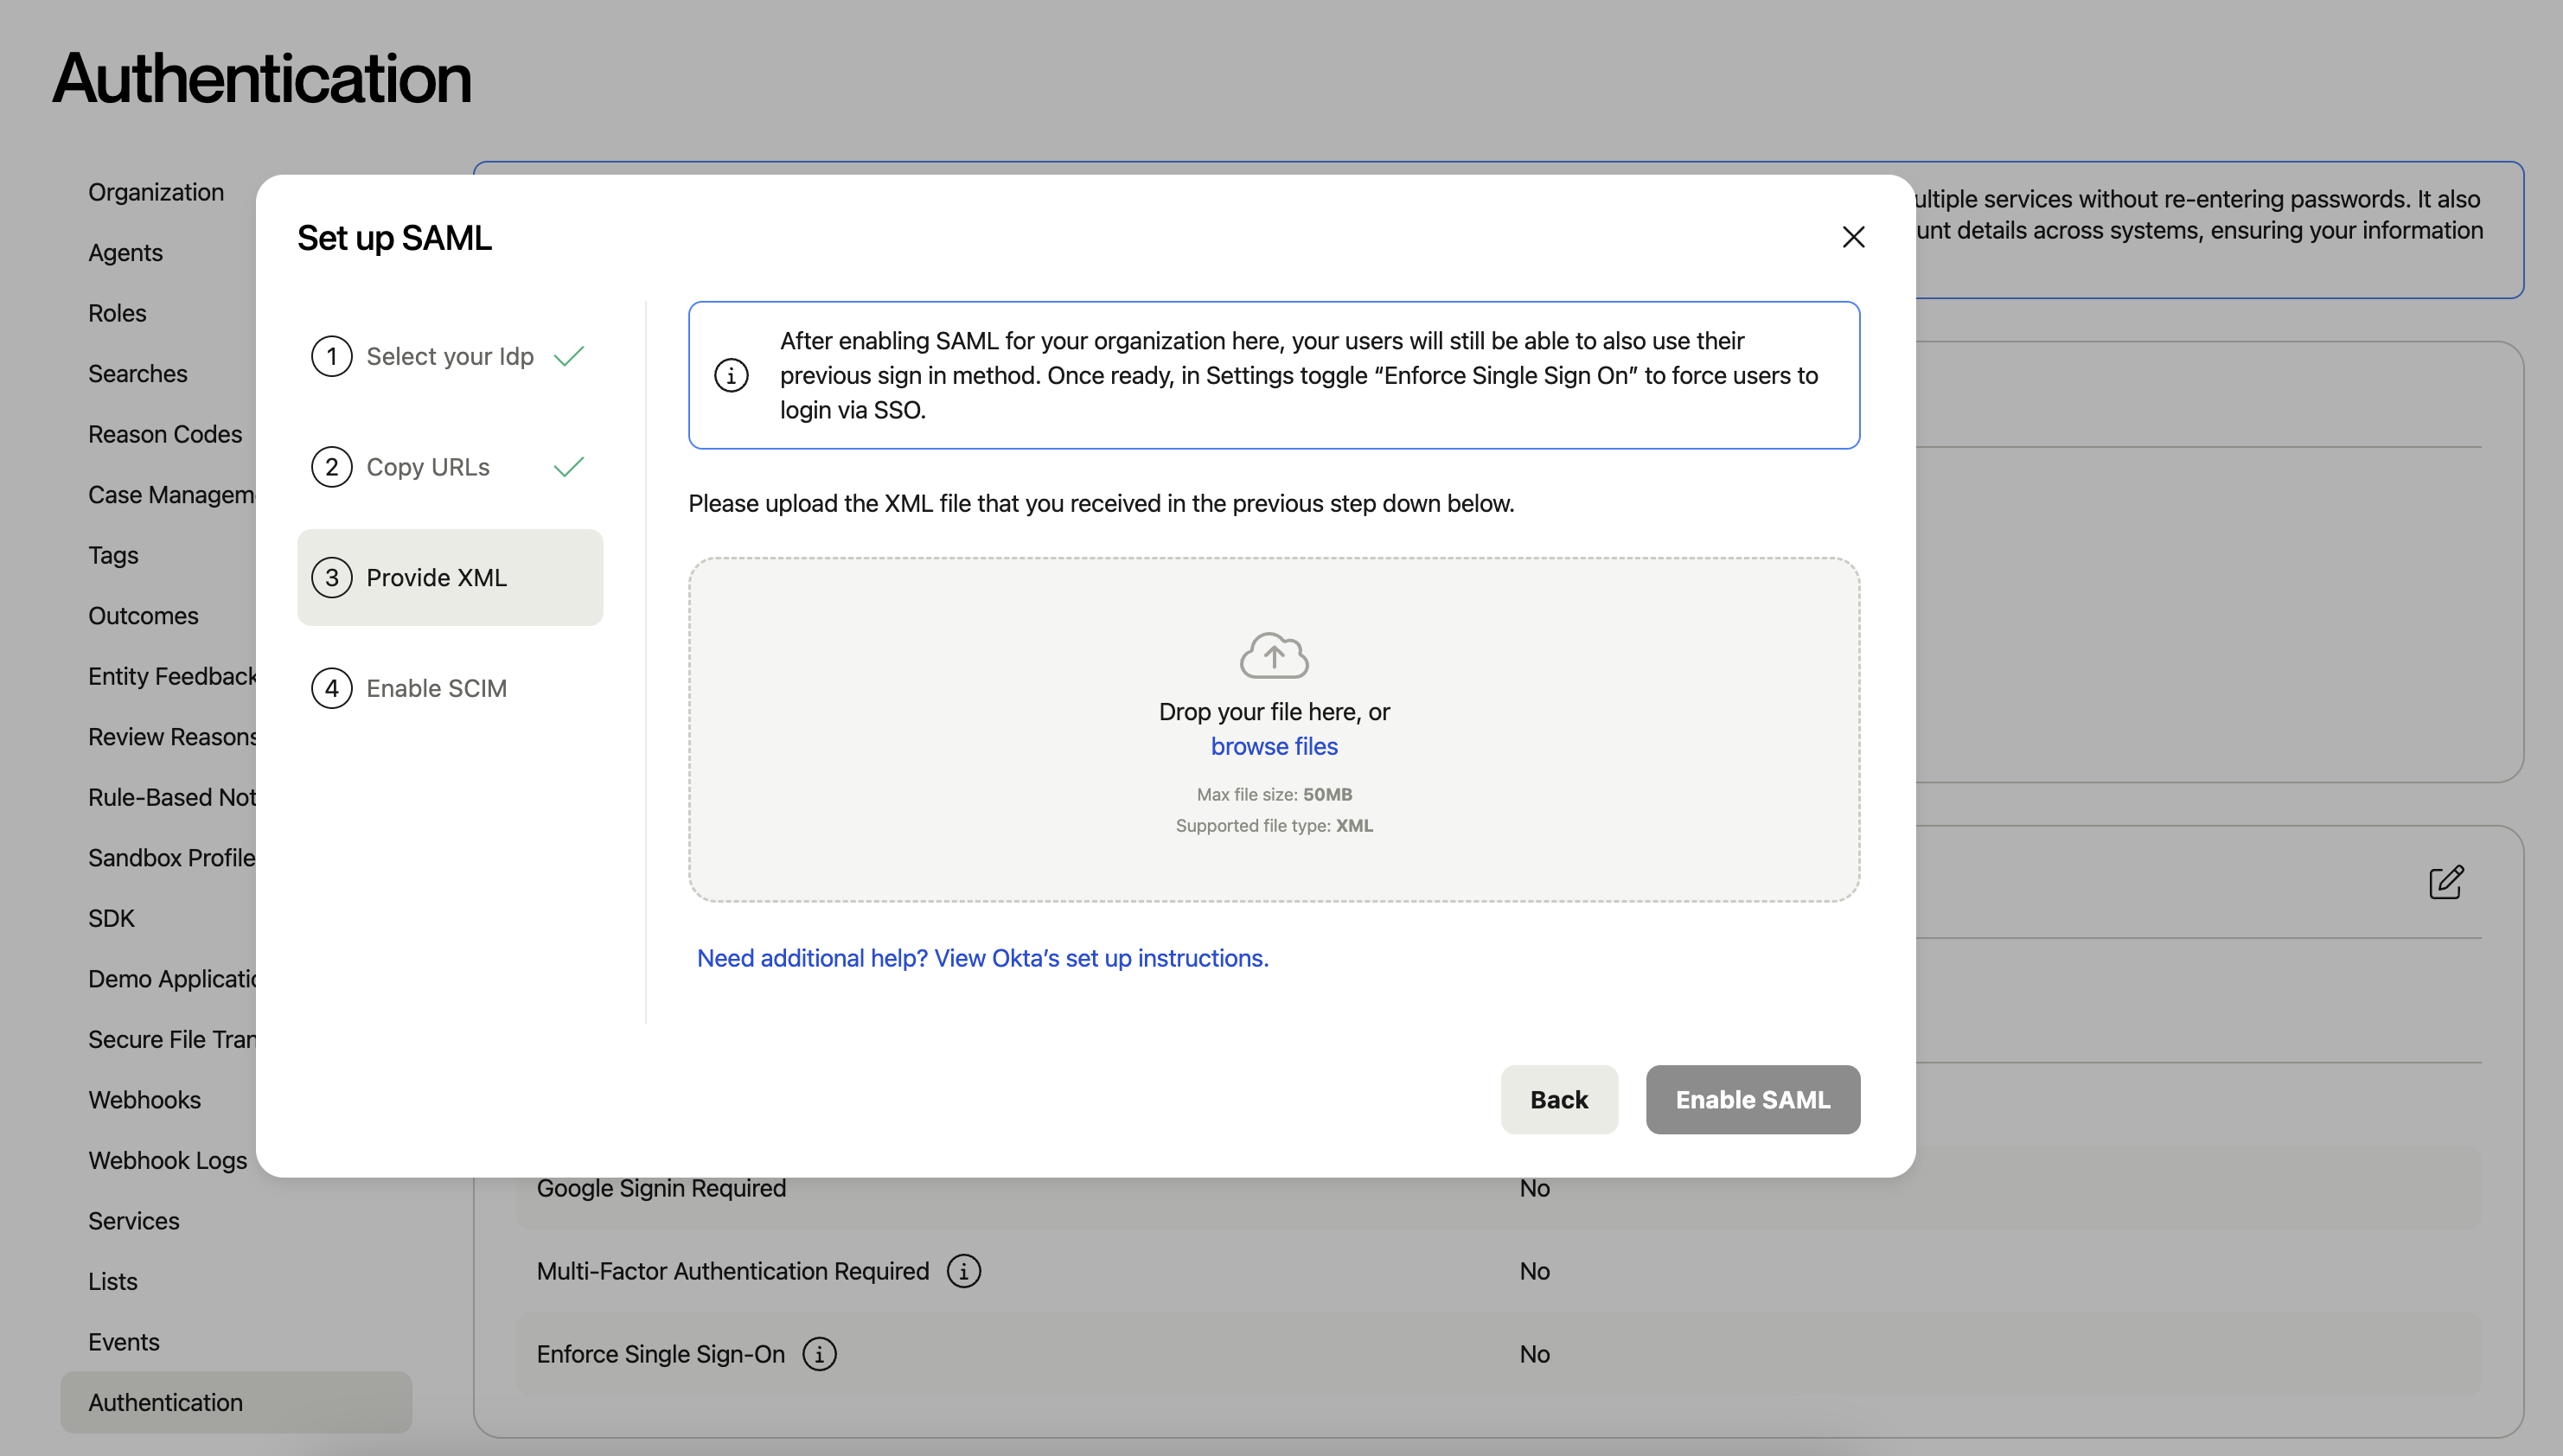
1.3 Setting up SAML
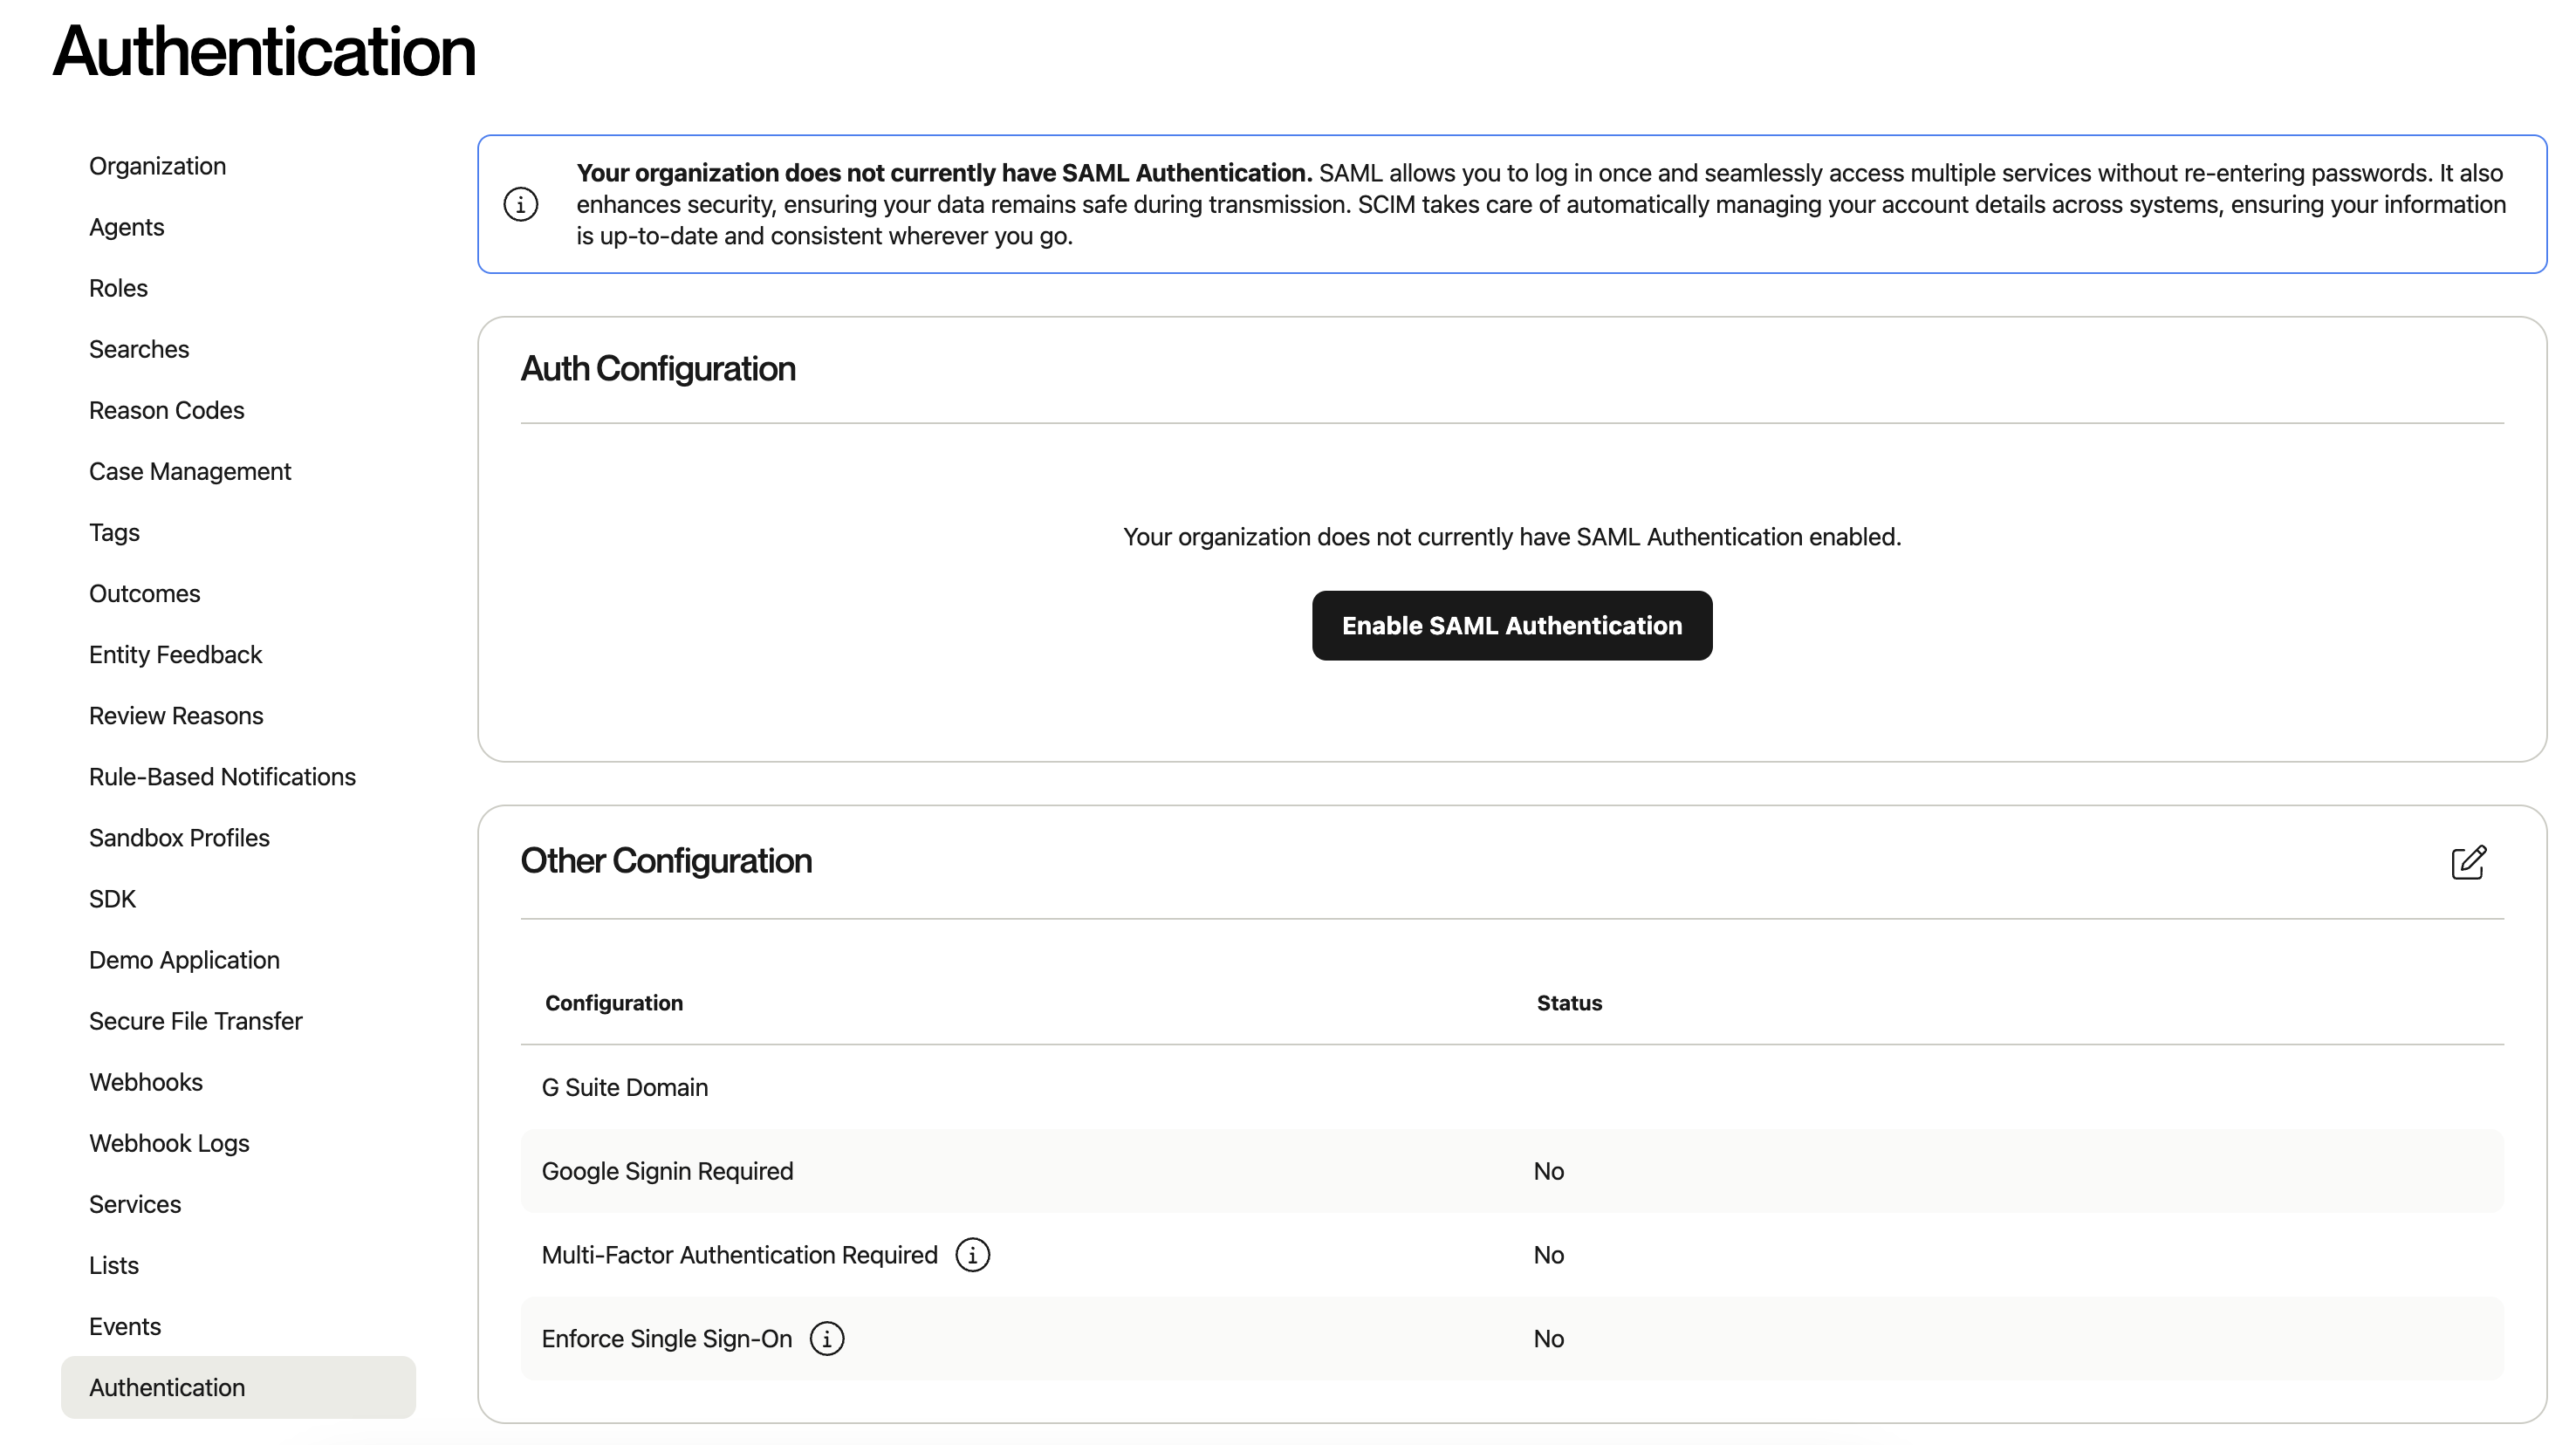
Once your access has been configured, go to “Authentication”. And, select “Enable SAML Authentication”.
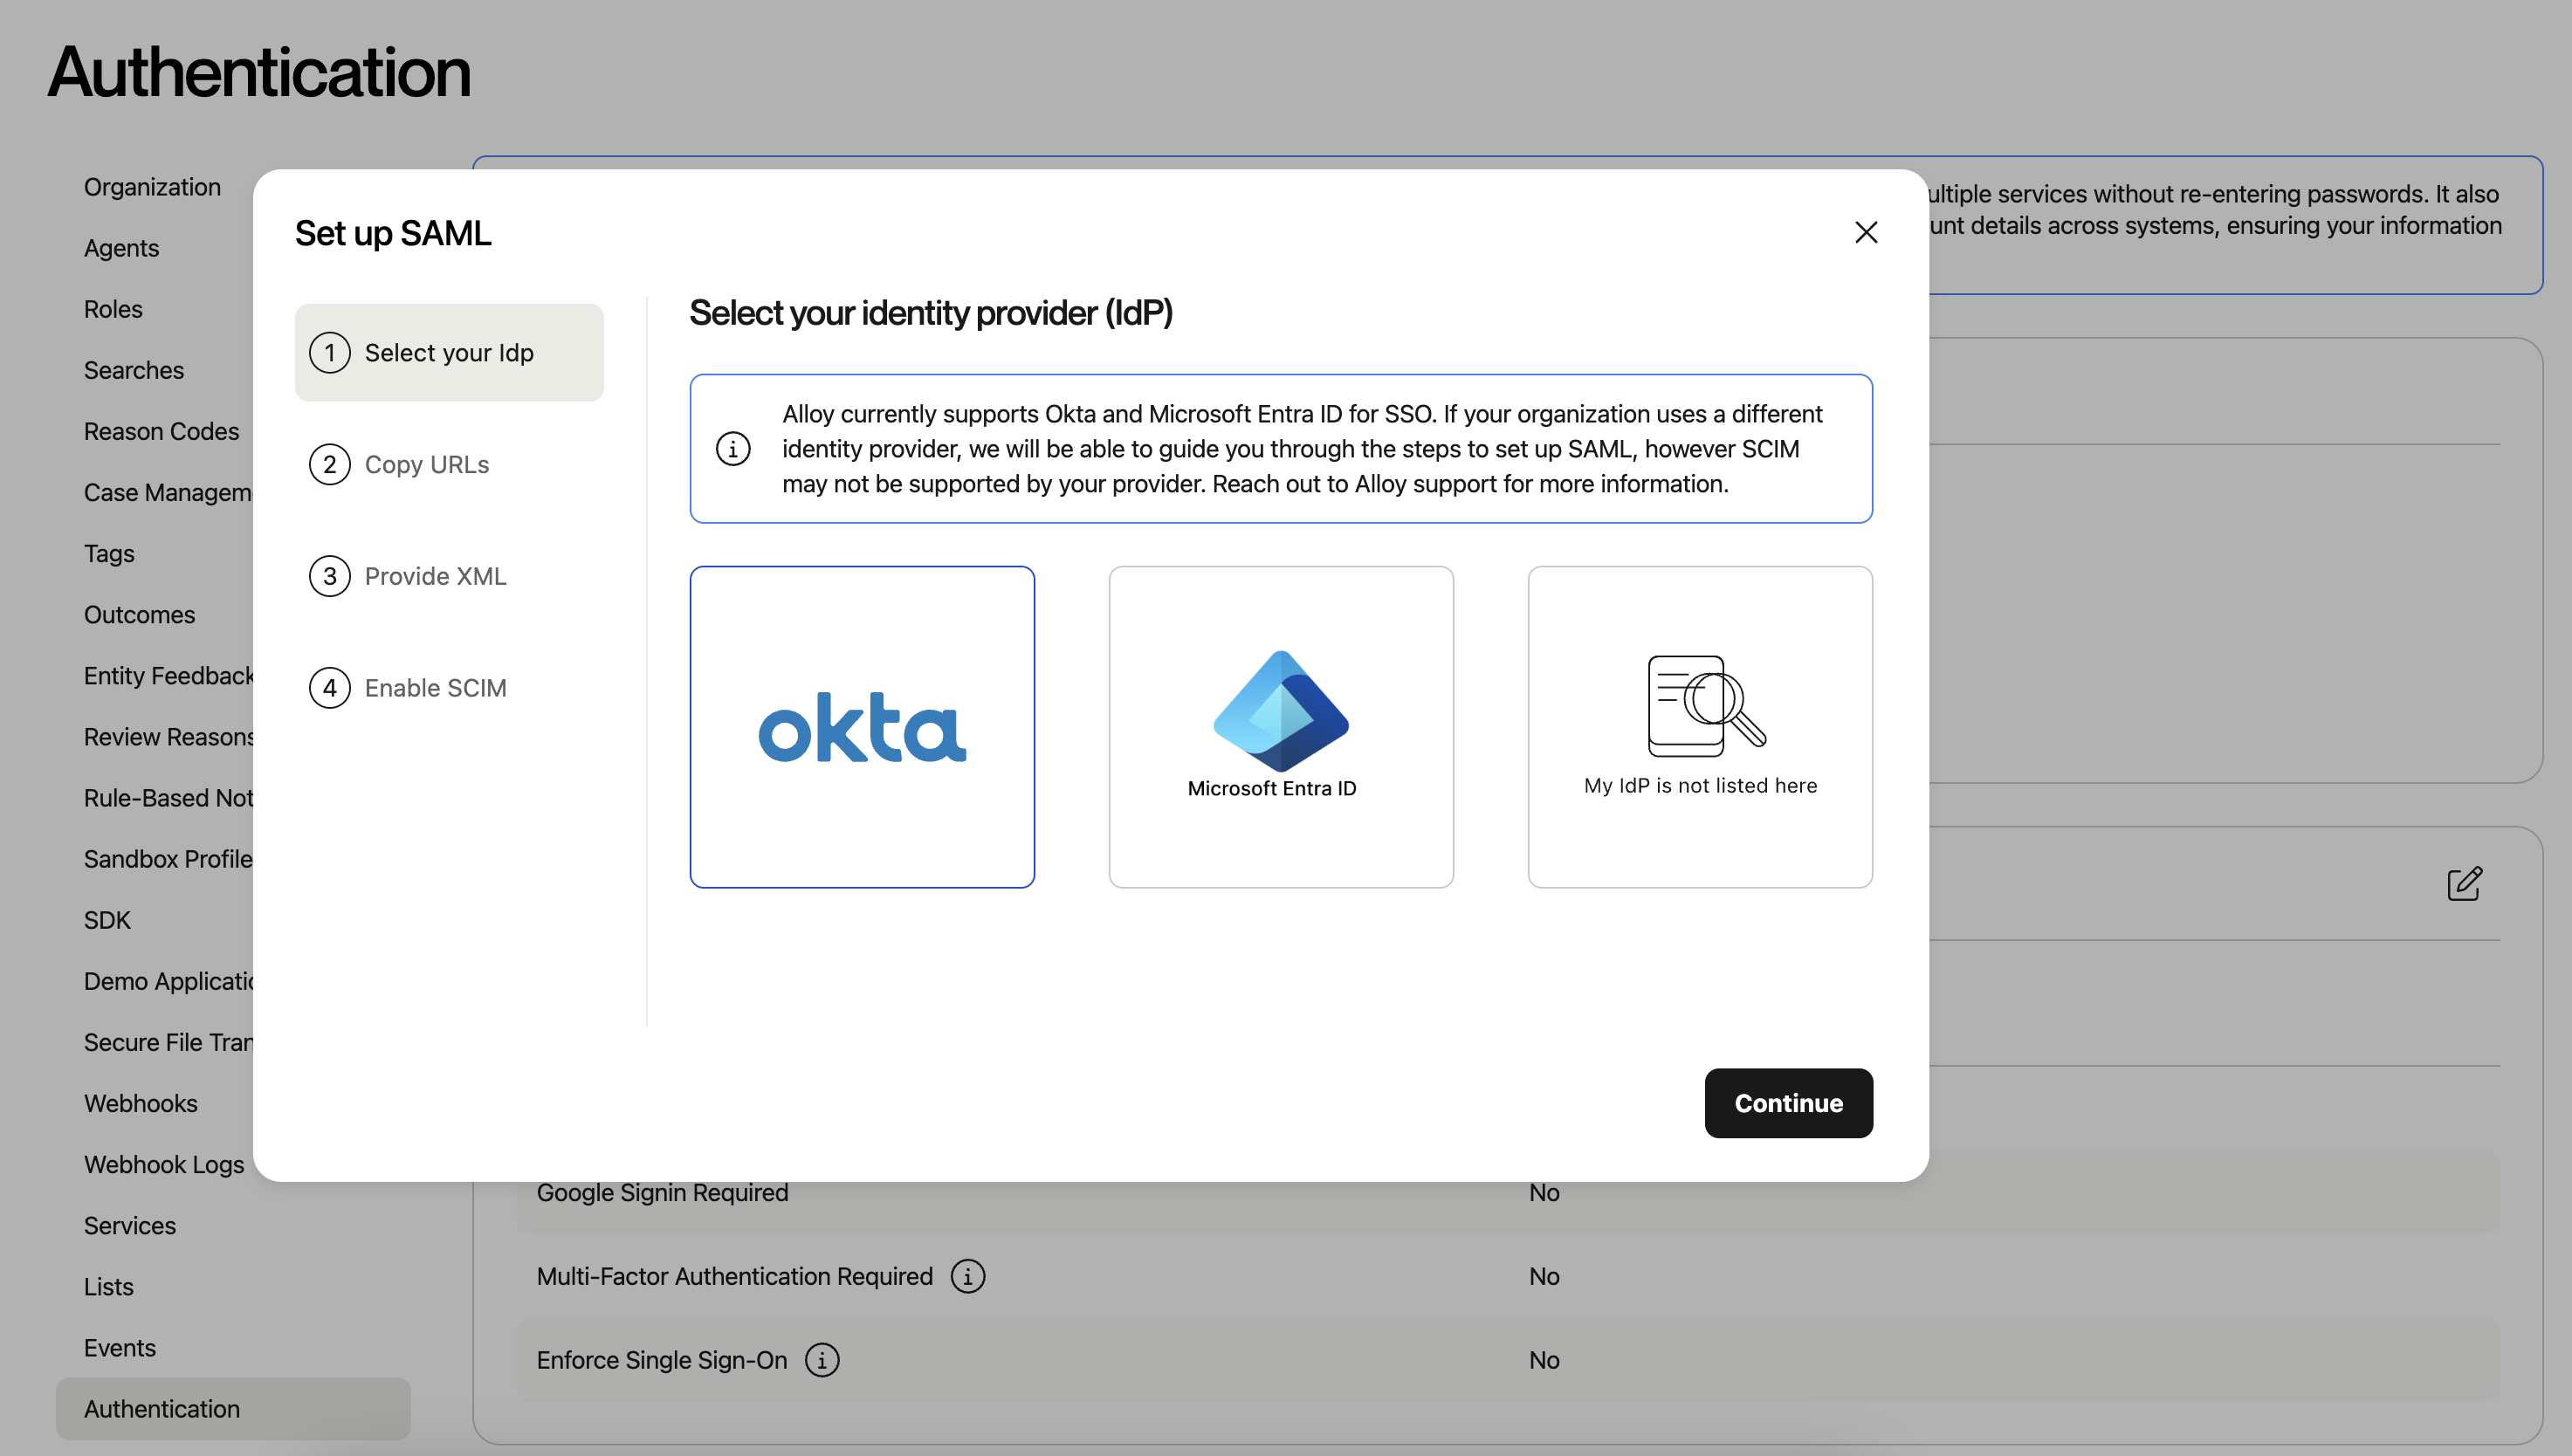
Select your identity provider, and then “Continue”. (Note: If you are not using Okta or Microsoft Entra, you can still go through the generic SAML setup flow with your identity provider)
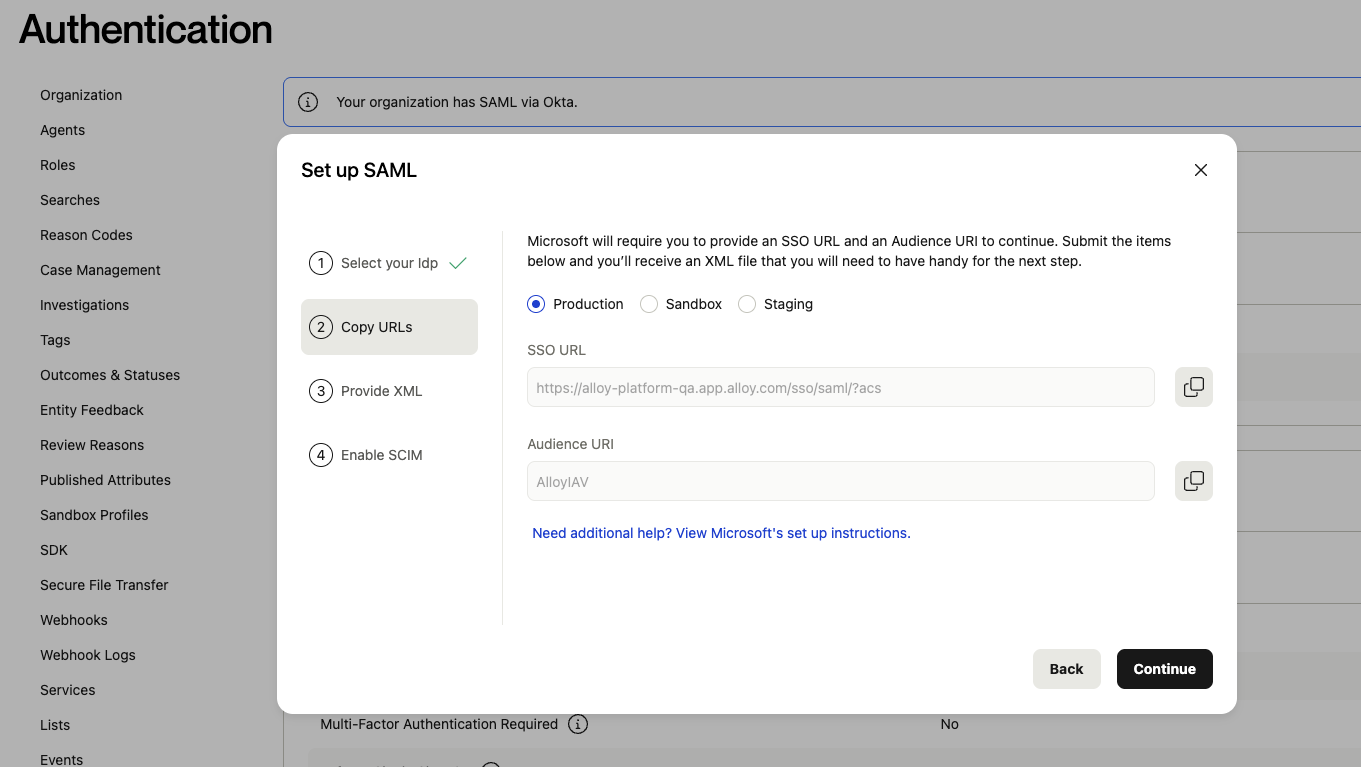
Take note of the SSO URL and Audience URI. Audience URI is the identifier and SSO URL is the Reply URL in the Entra ID configuration
2. Add Alloy to Entra ID
2.1 Create an application on the Azure Active directory

2.2 Go to the "Set up single sign on" → "SAML"
.png")
2.3 Update the Basic SAML Configuration
- Add the
Audience URIfrom step 1.3 as an Identifier. - Add
SSO URLfrom step 1.3 as Reply URL.
.png")
2.4 Update the Attributes & Claims
firstName: user.givenname
Email: user.userprincipalname
lastName: user.surname
phone: user.telephonenumber
"Phone" is optional
.png")

2.5 Download the ‘Federation Metadata XML’
Alloy will need to upload this Metadata to Alloy's system.
.png")
Note: Certificate Ordering in Metadata
When configuring SSO using a metadata XML file, be aware that the XML may include multiple certificates, including inactive or expired ones.
Alloy's current behavior is to parse multiple certificate entries, but only store the first one. If the first certificate in the metadata is expired or inactive, SAML login will fail due to invalid signature validation.
To ensure a successful setup:
- Always verify that the first certificate listed in the XML is the active one.
- Alternatively, upload only the active certificate by removing any expired or inactive <ds:KeyDescriptor> blocks before uploading.
The IDP does not annotate certificate status in the metadata — it is up to the administrator to ensure the correct cert is prioritized.
3. Upload the Metadata XML to Alloy’s system.
After you’ve entered the SSO URL and Audience URI into your identity provider, you’ll receive an XML file from your identity provider.
4. After the Metadata XML is uploaded to Alloy’s system, we may start testing sign in.
4.1 Add the user to the App that was just created in the Entra ID.
.png")
4.2 Test SSO with the user that is assigned to the App.
.png")
5. Other Authentication Settings
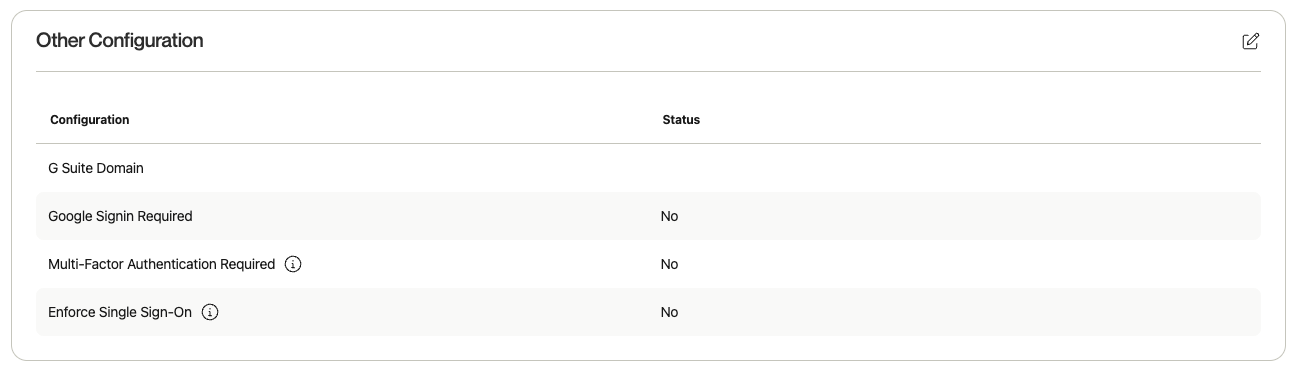
- G Suite Domain - If you’d like to give your users the ability to login via google SSO, you can enter the G Suite Domain they should be using.
- Google Signin Required - This will force users to log in via Google SSO.
- Multi-Factor Authentication Required - If your organization does not have SAML enabled, you can require that each user log in using MFA.
- Enforce Single Sign-On - If SAML is enabled, all users will be forced to log in with SSO. If disabled, users will be able to log in via SSO or credentials.
5.1 SAML Exceptions
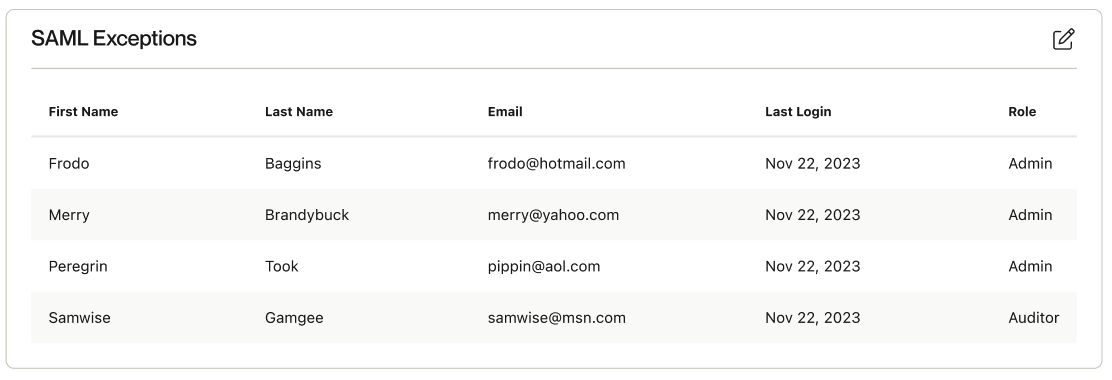
If you’d like to grant users the ability to log in via credentials when Enforce Single Sign-On is on, you can configure this via the “SAML Exceptions” section
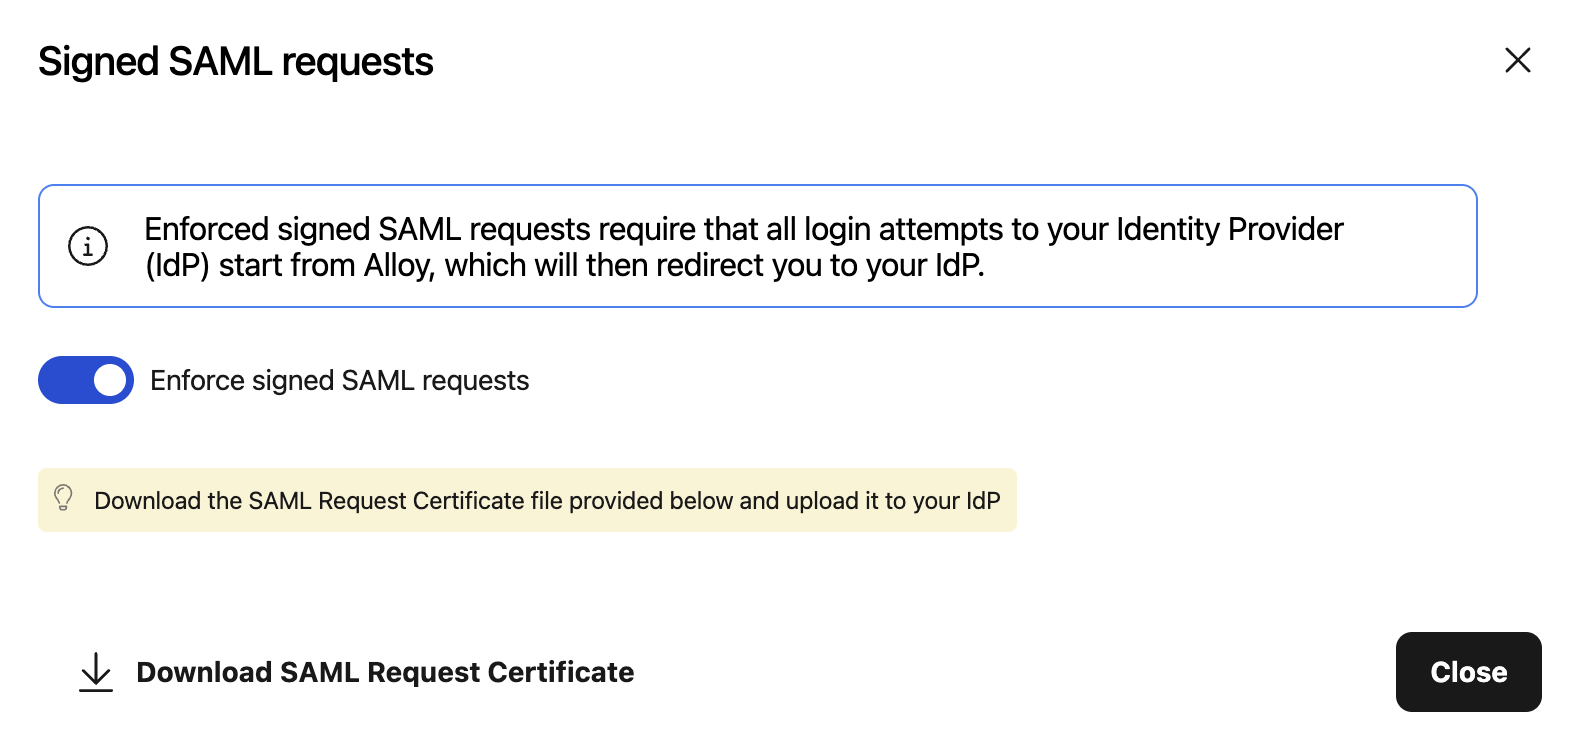
5.2 Enforcing Signed SAML Certificates
Note: enforcing signed SAML certificates will disable any sign in request launched from the IDP. Users will be required to “Sign-in via SSO” from Alloy login first and be redirected to the IDP.
-
In Authentication Settings > Auth Configuration > Signed SAML Requests
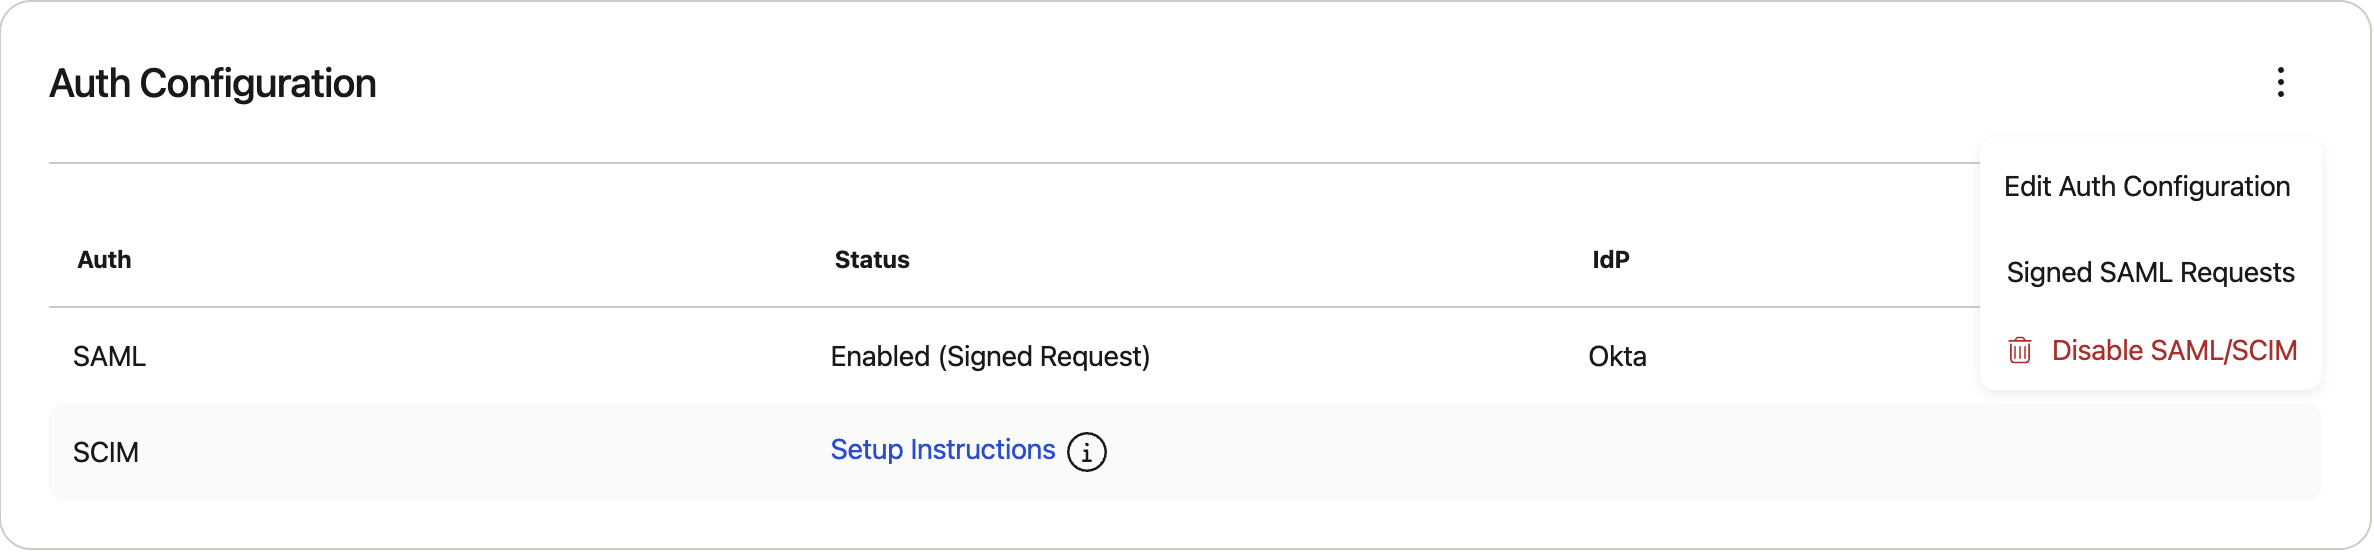
-
Enable "Enforce signed SAML requests" and download the SAML Request Certificate
-
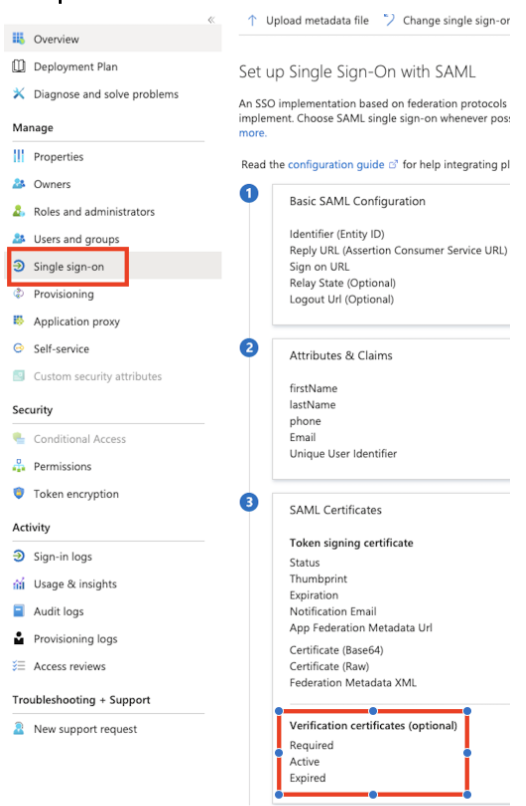
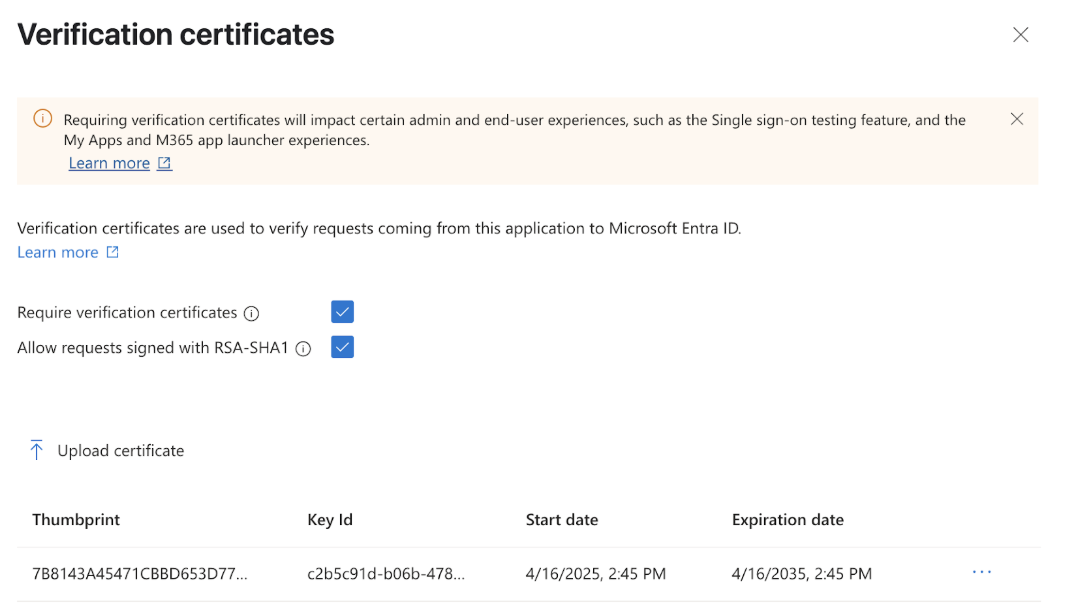
Upload the certificate in Microsoft Entra admin center under Alloy's Application settings > Single sign-on > (3) SAML Certificates > Verification certificates (optional), and toggle "Require Verification certificates".
FAQ
How to Configure SCIM
SCIM is only supported for clients who currently use Okta and Microsoft Entra
Once you’ve successfully set up SAML, you can configure SCIM.
If the providedTest sign inflow produces errors, a manual test can be performed using theUser access URLon the AzurePropertiestab page.
Configuring an Additional SAML Application in Azure AD
Yes, you can configure a fourth SAML application within the same Azure AD tenant.
Because Azure AD requires each SAML application to use a unique Entity ID (Audience URI), an additional Audience URI must be used when configuring a fourth application or a custom-named application (the UI provides three specific Audience URI's).
Configuration Steps
- Create the new SAML application in Azure AD using the same settings as your existing production configuration.
- When configuring the Entity ID (Audience URI), use:
AlloyIAVFourthor define your own Audience URI. - Complete the SAML setup and upload the metadata XML as part of the configuration process.
- After the metadata has been uploaded successfully, contact Alloy Support to complete the final configuration for the new application.
Notes
- This requirement applies specifically to Microsoft Azure AD due to its unique Entity ID constraints.
- Okta does not have this limitation and can support multiple SAML applications without requiring a unique Audience URI provided by Alloy.
Updated about 1 month ago