Microsoft ADFS
Steps to configure ADFS
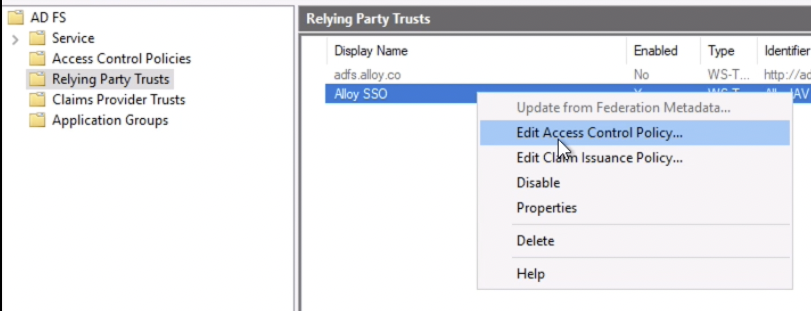
In the AD FS dialog, head into the Relying Party Trusts section on the left panel to add a new party trust. This opens up a wizard to configure a new party trust.
- Click on
Claims awareon the welcome window, and click Start - Under “
Select Data Source”, choose the last option to enter data about the relying party manually, and click “Next”. - Enter the following information under each step of the wizard by (Click Next to move forward):
- Step: Specify Display Name
- Display name: Alloy SSO
- Click Next
- Step: Configure Certificate and click Next
- Step: Configure URL
- Choose the second option to “Enable support for the SAML 2.0 WebSSO protocol.
- Relying party SAML 2.0 SSO service URL: https://app.alloy.co/sso/saml/?acs.
- Click Next
- Step: Configure Identifiers
- Relying party trust identifier: AlloyIAV
- Click Add and the option will now show up as a valid identifier in the list view.
- Click Next
- Step: Choose Access Control Policy
- Choose an access control policy: Permit everyone
- Click Next
- Step: Ready to Add Trust and click Next to Finish
- Step: Specify Display Name
- Right-click on the newly added Relying Party Trust and choose “
Edit Claim Issuance Policy”

1. Click on “Add a new rule“
2. Step: Choose Rule Type and click Next
3. Step: Configure Claim Rule
    1. Claim rule name: Make Email Adress Available for NameID
    2. Attribute Store: Active Directory
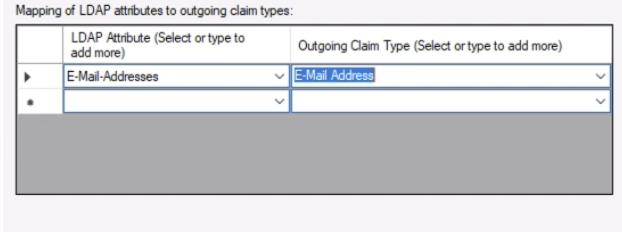
    3. Under Mapping of LDAP attributes to outgoing claim types, add the following items, and choose Finish.
        1. E-Mail-Addresses -> E-Mail Address

4. This takes you back to the Claim Issuance Policy window.
5. Select the new rule and choose “Add rule”
6. Step: Choose Rule Type: Transform an incoming claim
    1. Click Next
7. Step: Configure Claim Rule
    1. Claim rule name: Transform Email to NameID
    2. Under Rule template: Transform an Incoming Claim, choose the following options:
        1. Incoming rule type: **E-Mail Address**
        2. Outgoing claim type: **Name ID**
        3. Outgoing name ID format: **Email**
    3. Click Finish
8. This takes you back to the Claim Issuance Policy window.
9. Select the new rule and choose “Add rule”
10. Step: Choose Rule Type: Send LDAP Attributes as Claims
    1. Click Next
11. Step: Configure Claim Rule
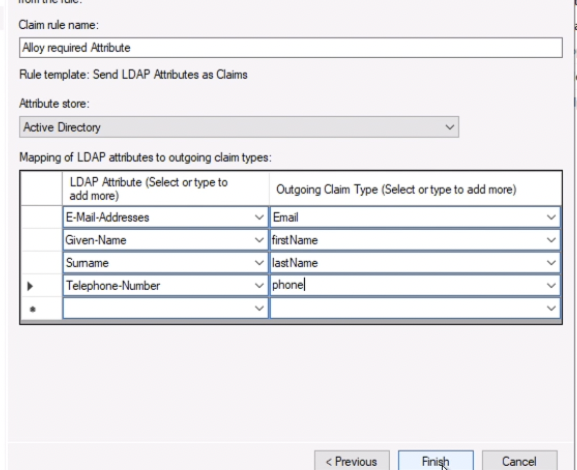
    1. Claim rule name: Alloy required Attribute
    2. Attribute store: Active Directory
    3. Under Mapping of LDAP attributes to outgoing claim types, add the following items, and choose Finish.
        1. E-Mail-Addresses -> **Email**
        2. Given-Name -> **firstName**
        3. Surname -> **lastName**
        4. Telephone-Number -> **phone**
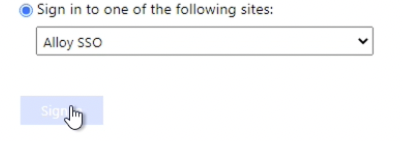
12. Click Apply and exit out of the dialog by clicking OK- Go to your browser to log into Alloy using ADFS using your Single Sign-On page, and sign in with the Active Directory user account credentials

FAQ
Unable to open the Idp initiated Single Sign-On page
If you are unable to open the IdpInitiatedSignon page (ex. https://<your hostname>/adfs/ls/IdpInitiatedSignon), you may need to check if you have enabled it by going to PowerShell and checking if is True,
(Get-AdfsProperties).enableidpinitiatedsignonpage
if it's False. turn it on by running
Set-AdfsProperties -EnableIdPInitiatedSignonPage $true
Obtaining the FederationMetadata XML file
You will be able to find the SAML FederationMetadata XML from the server that has the following URL format:
https://<your hostname>/FederationMetadata/2007-06/FederationMetadata.xml
Updated 5 months ago