

Azure
1. Enable SCIM
-
Open the application that is configured for SAML in the Entra Id admin dashboard. Then select Provisioning on the left sub-nav
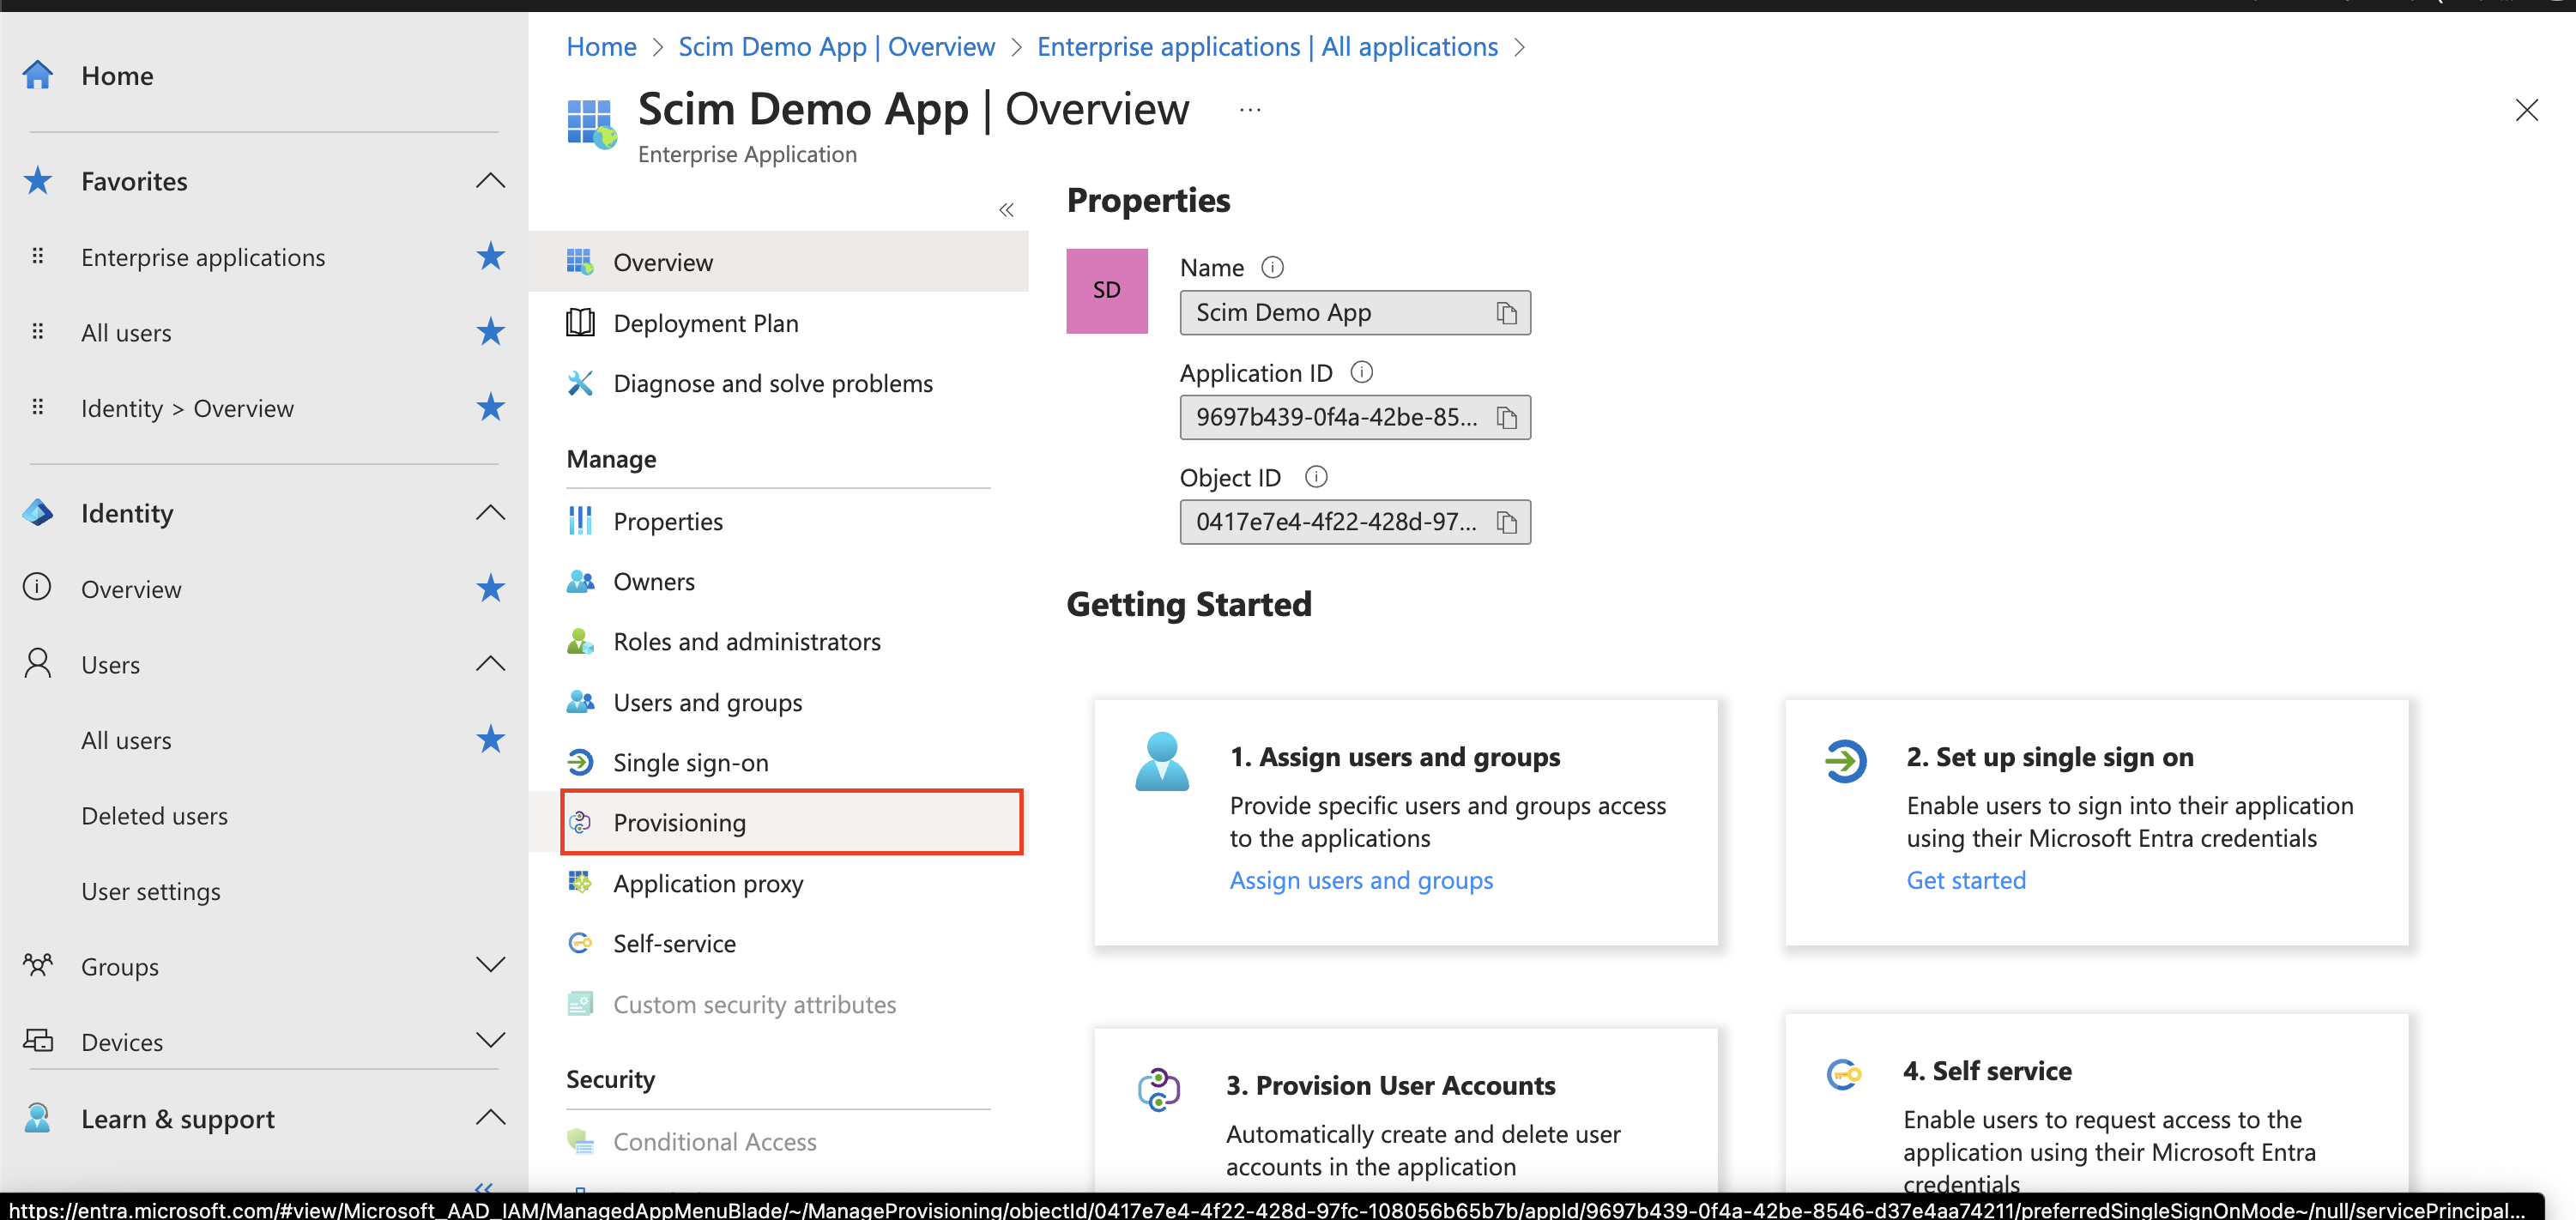
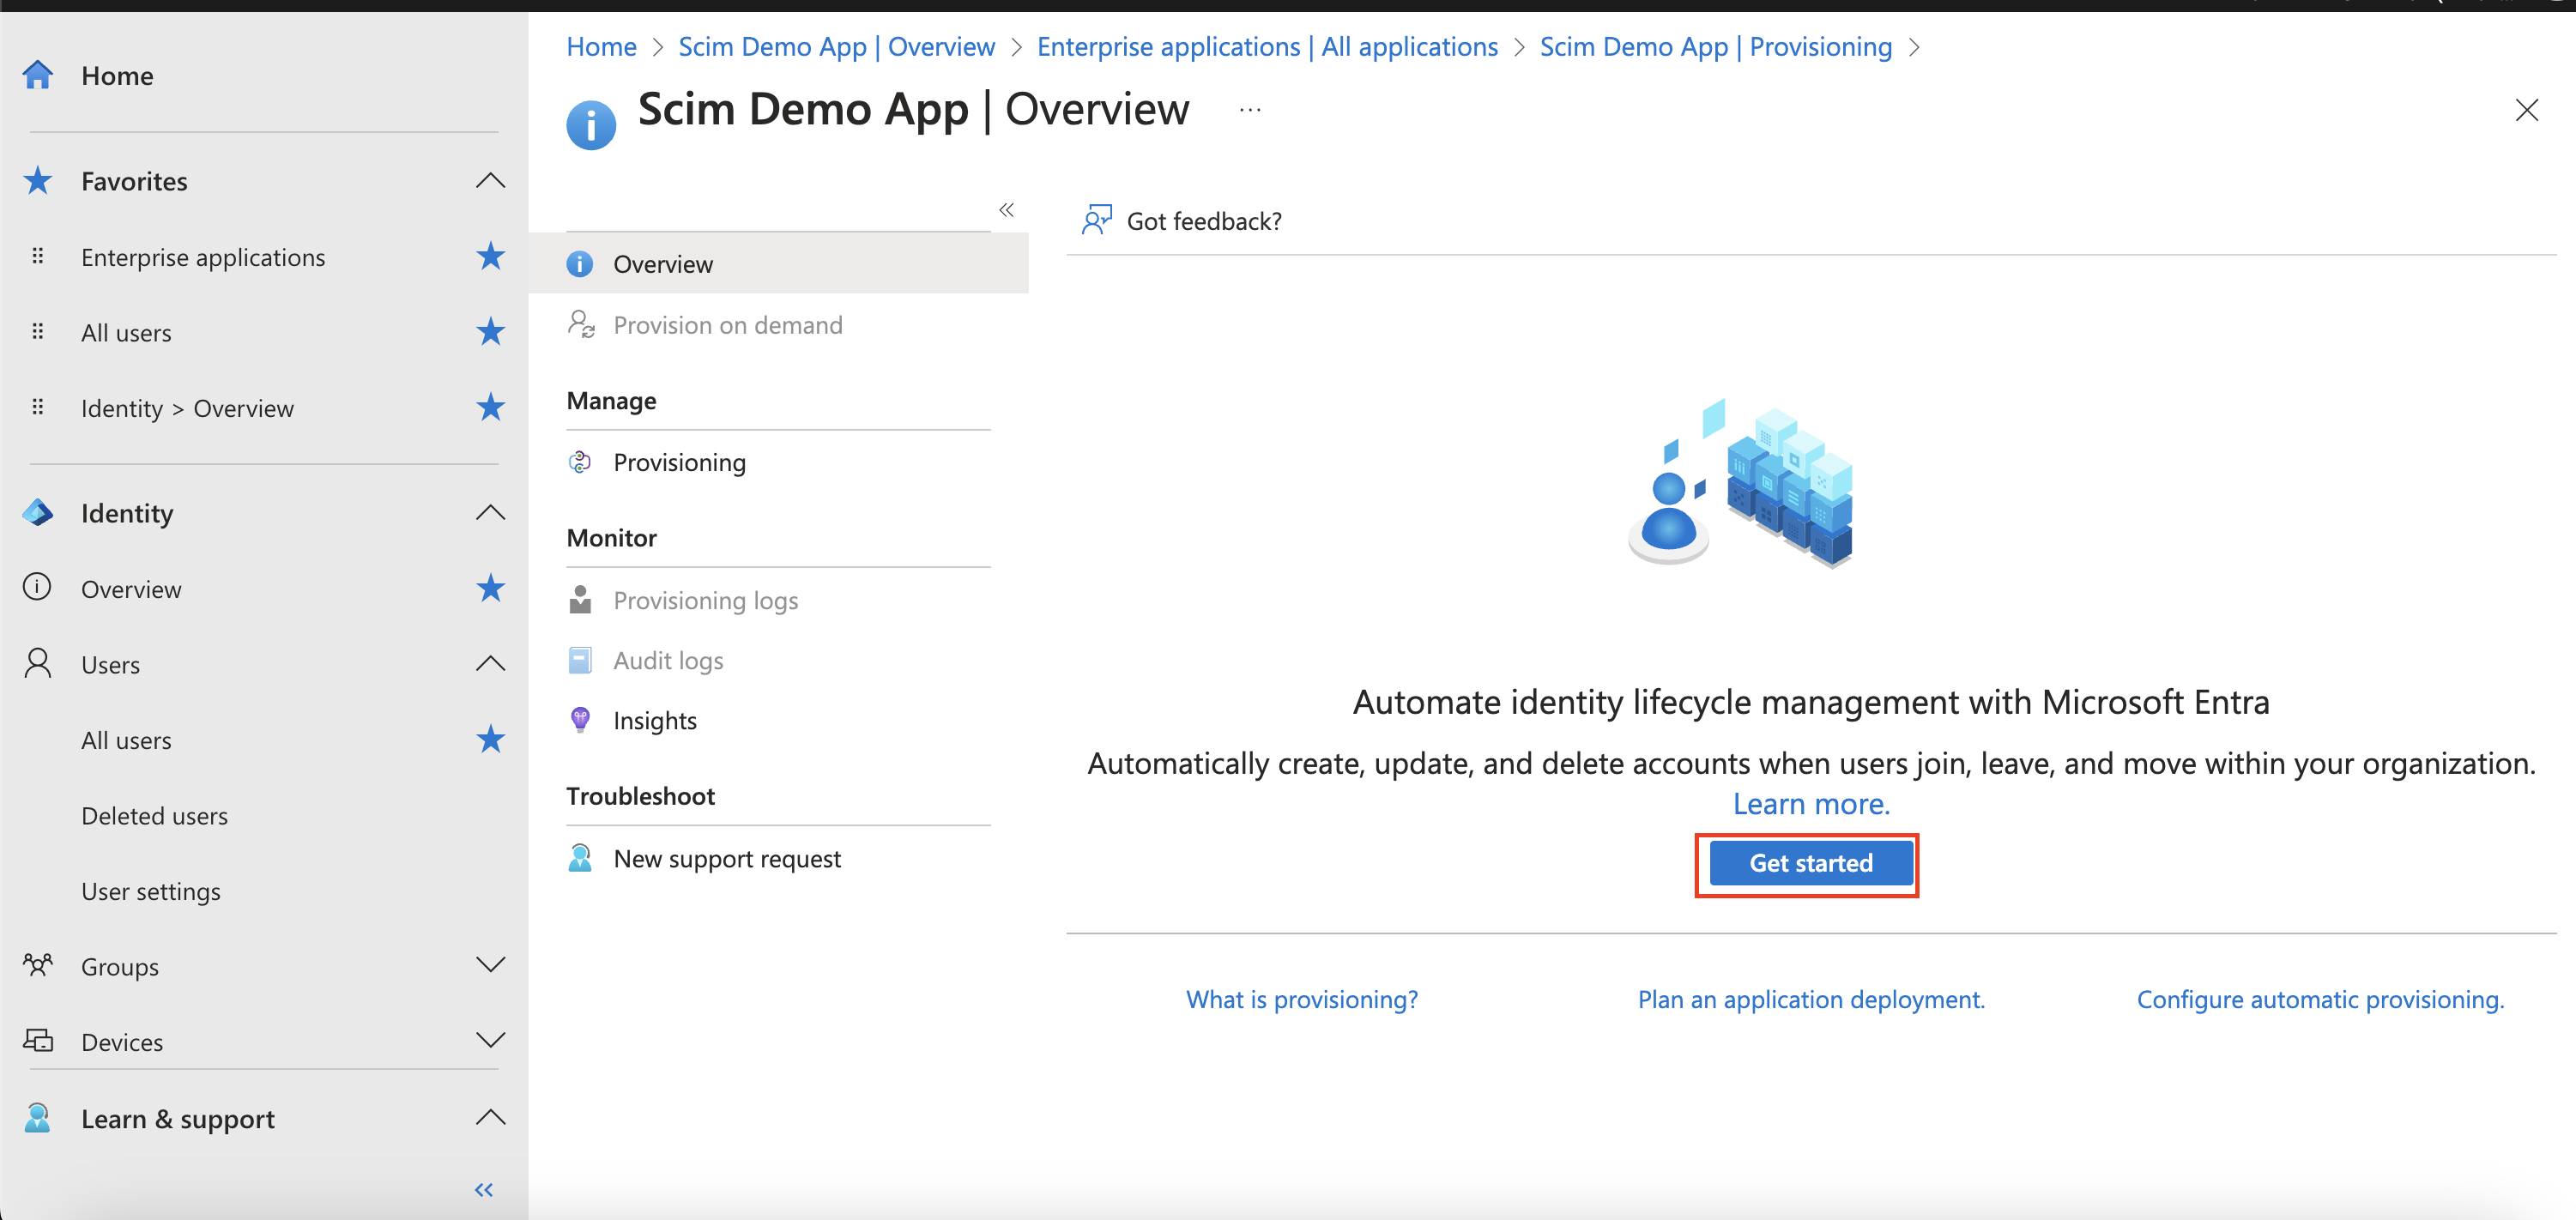
- If this is the first time Provisioning is being configured, an informational screen will be presented. Select “Get started”
-
Go to the Setting up SAML page under
Auth Settingsand copy theSSO URLfrom the wizard. -
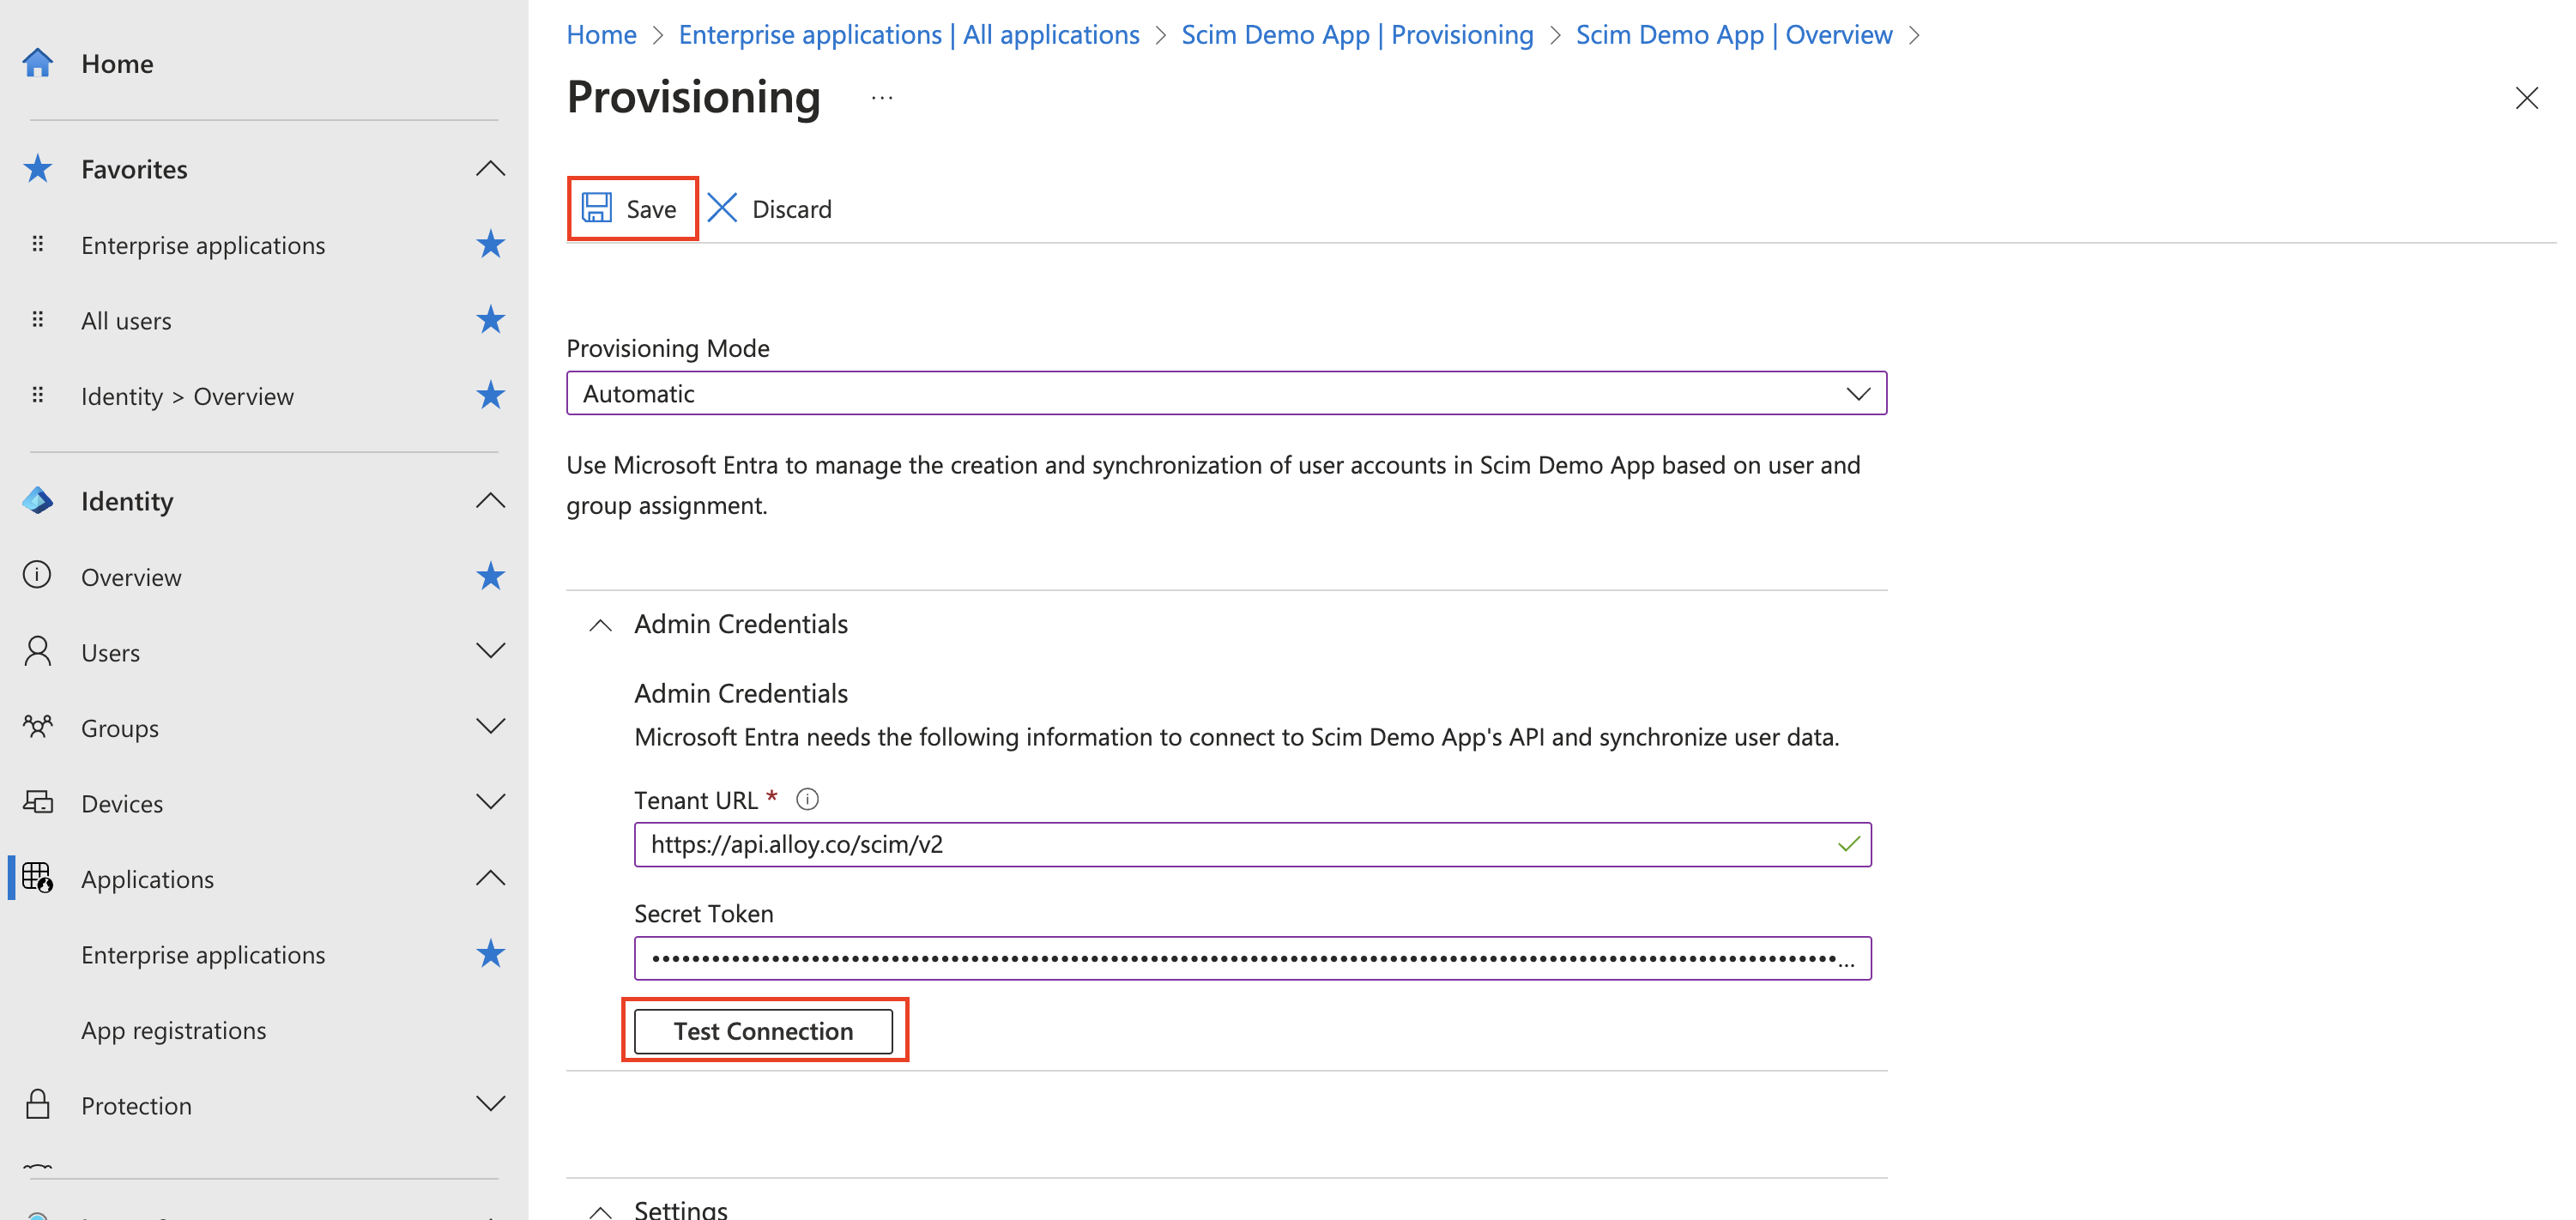
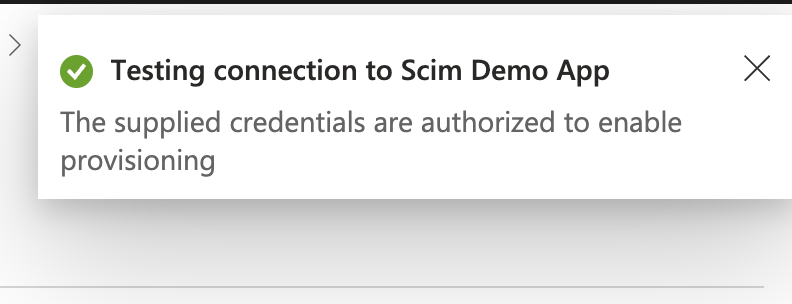
On the Provisioning settings page, input the following values then select Test Connection
- Provisioning Mode -
Automatic - Tenant URL -
https://api.alloy.co/scim/v2- Please note:💡 ”Tenant URL” might differ for different environments. please get it from settings > Authentication
- Secret Token -
<base64_encode(alloy_api_token:alloy_api_secret)>(More detail in LINK, we only support Basic auth for SCIM currently.Basicprefix is NOT required.)-
The alloy_api_token and alloy_api_secret can be found in the Alloy dashboard > "Settings" > "API Keys" section.
-
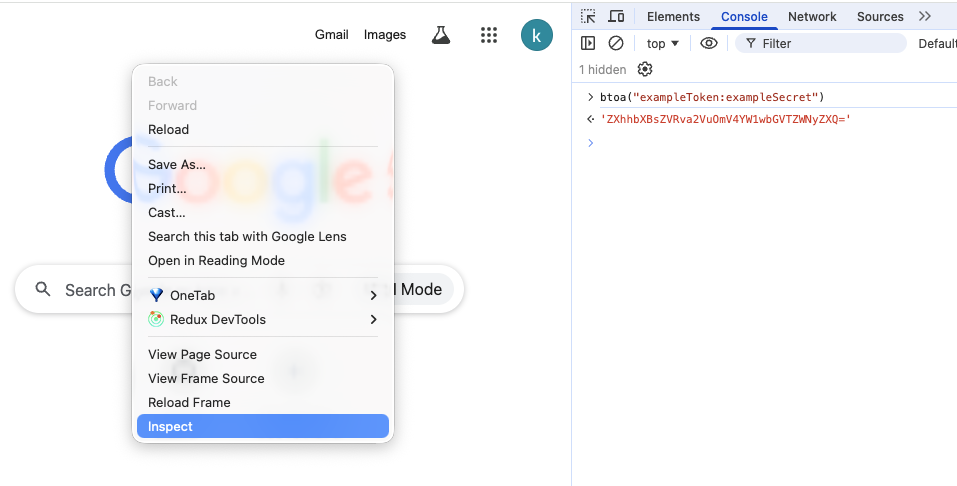
One easy way to do base64 encode by using a browser is using btoa function.
-
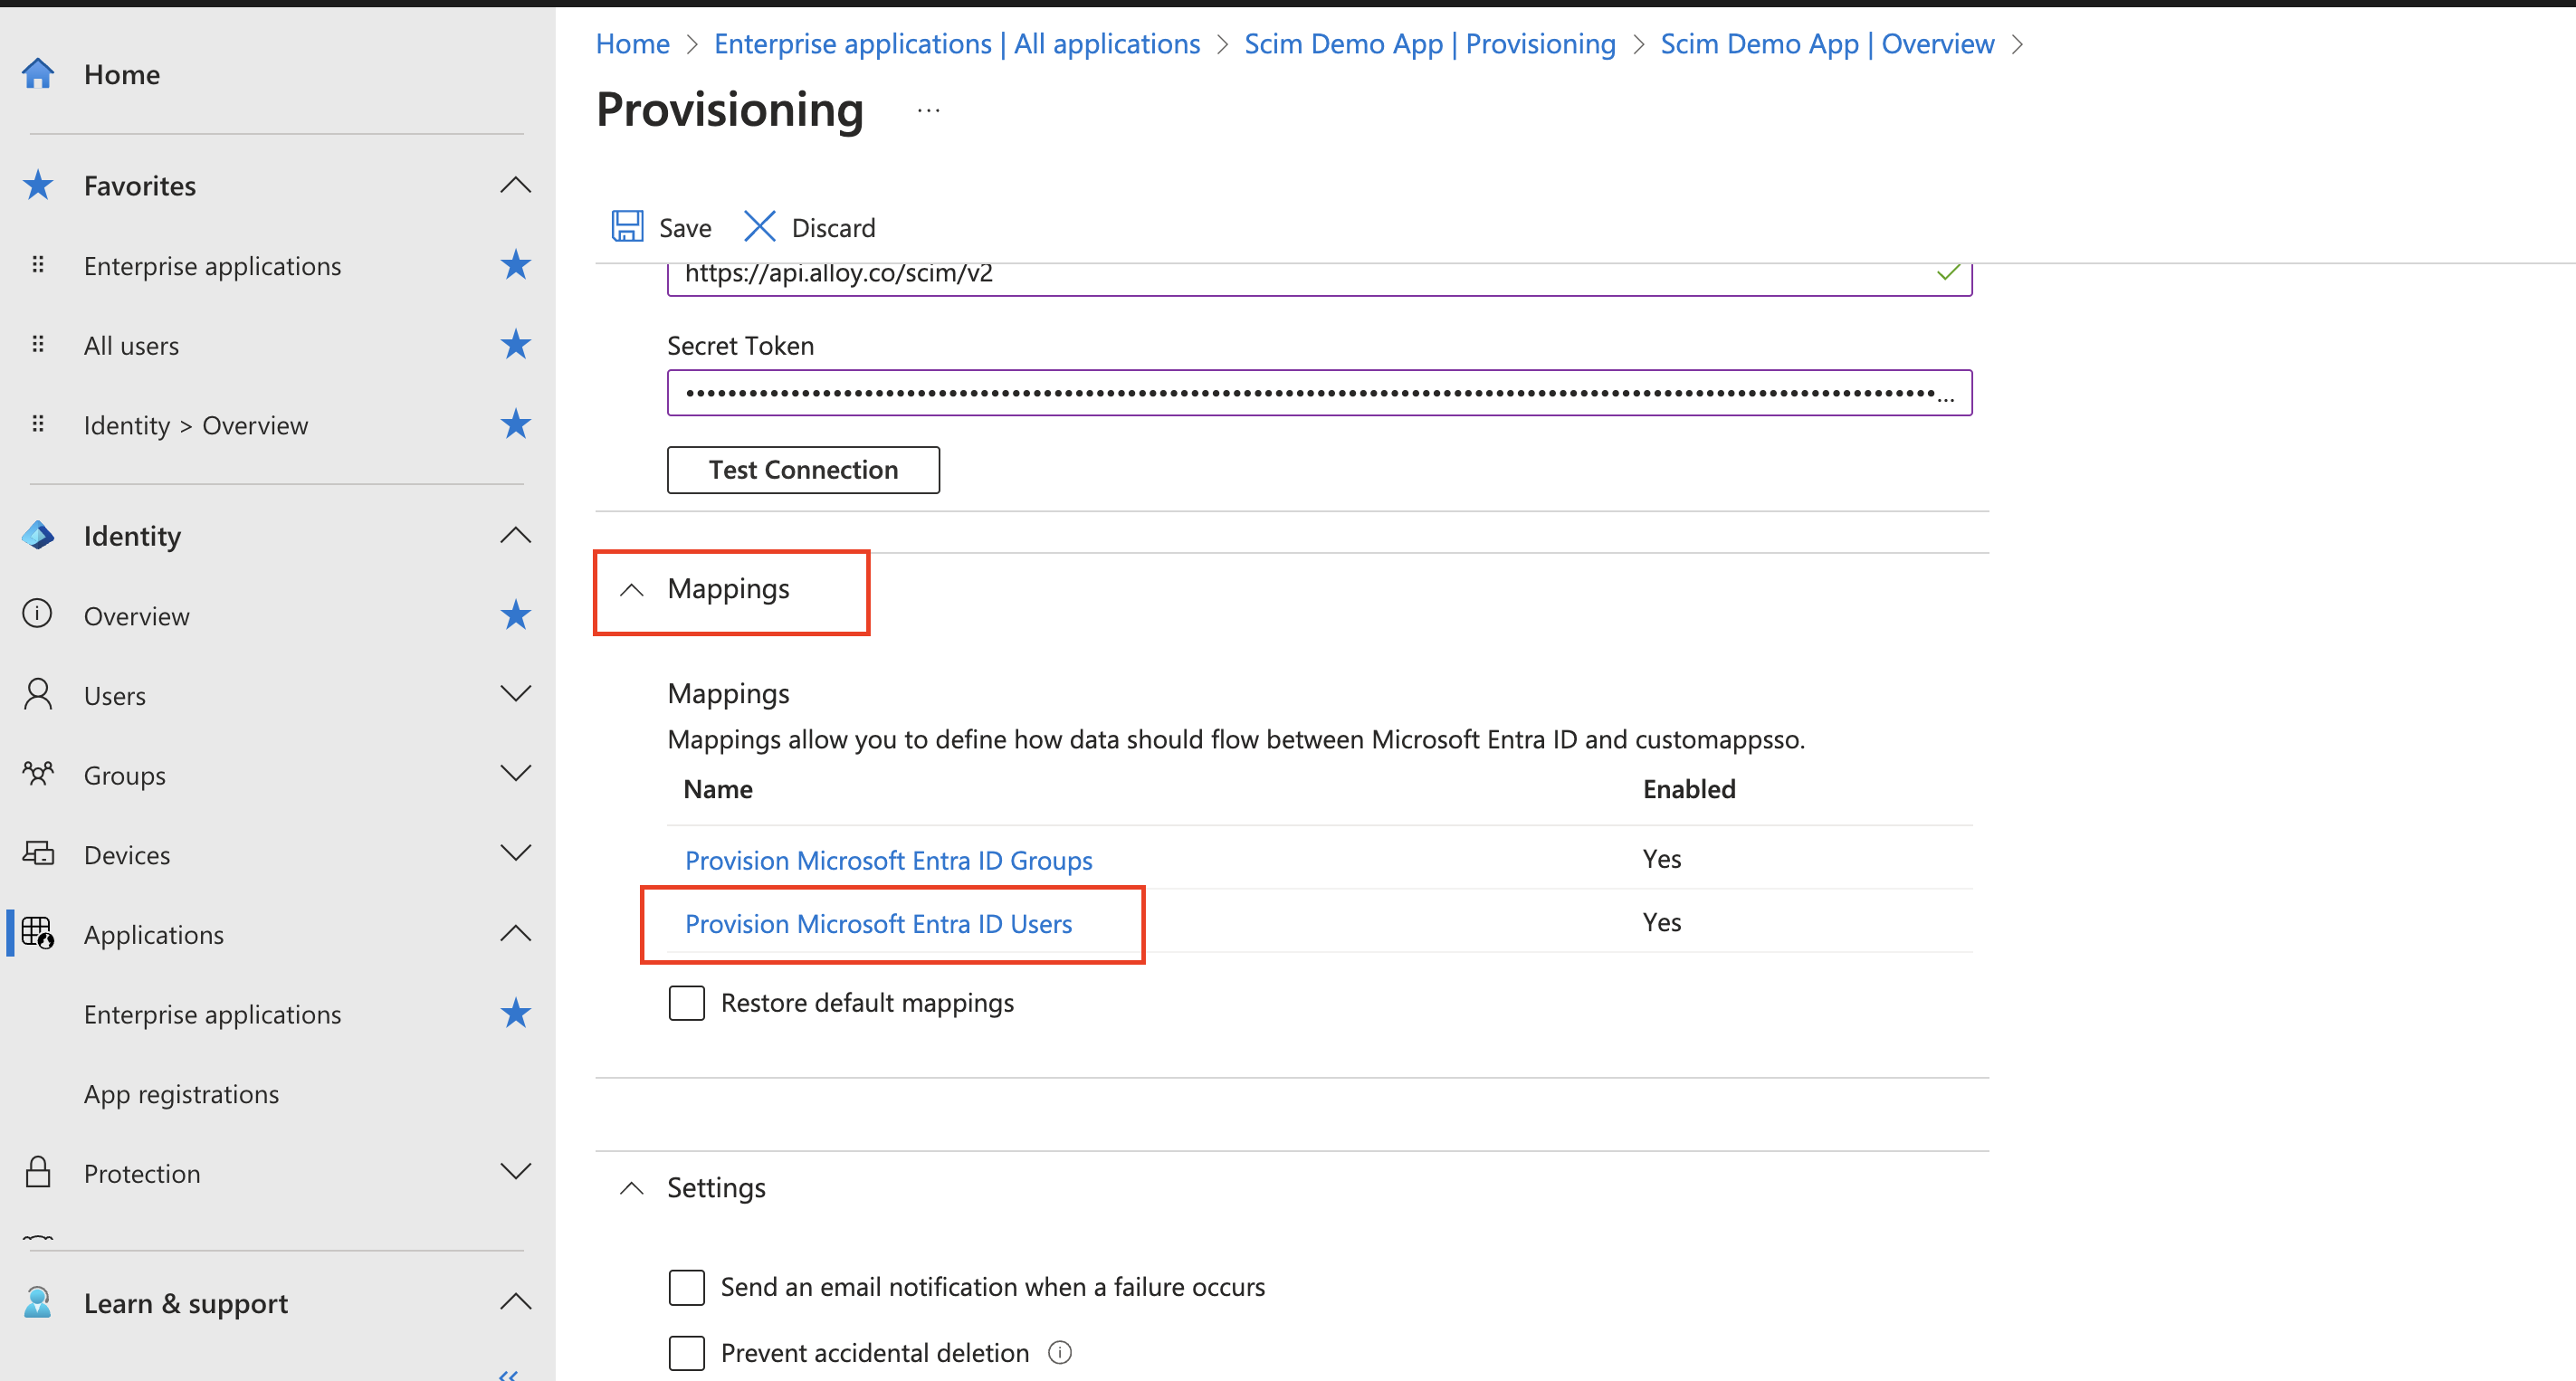
After a successful connection is established between Entra Id and Alloy, select save.
Please note:💡: Entra ID has new UI for the provisioning configuration page. Use
"Click here to switch to the legacy experience"to see the above page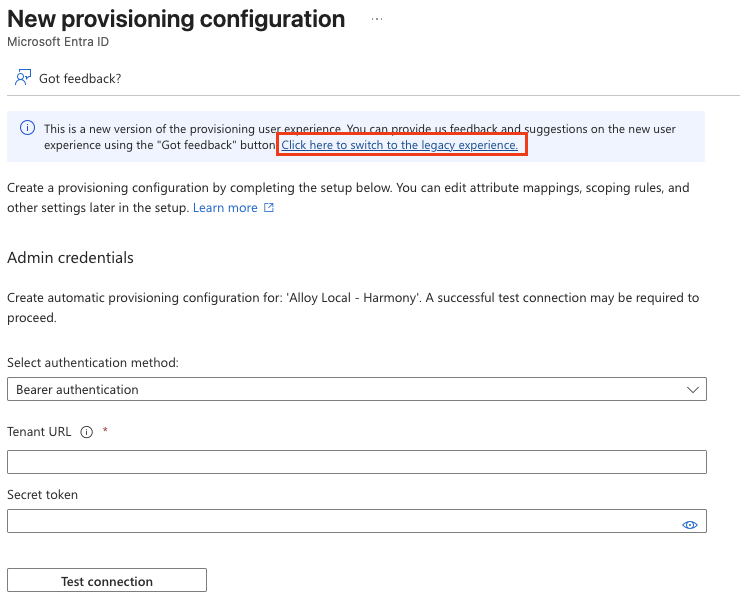
- Provisioning Mode -
-
Once the saving process is complete, scroll down as the toggle header Mappings should now be visible. Select Provisioning Microsoft Entra ID Users.
-
Modify the Users Attribute Mapping to mirror the below image then select Save. That’s it! SCIM Provisioning is now configured. (
phoneNumbers[type eq "mobile"].valueis optional)
2. Assign Users to Alloy app.
-
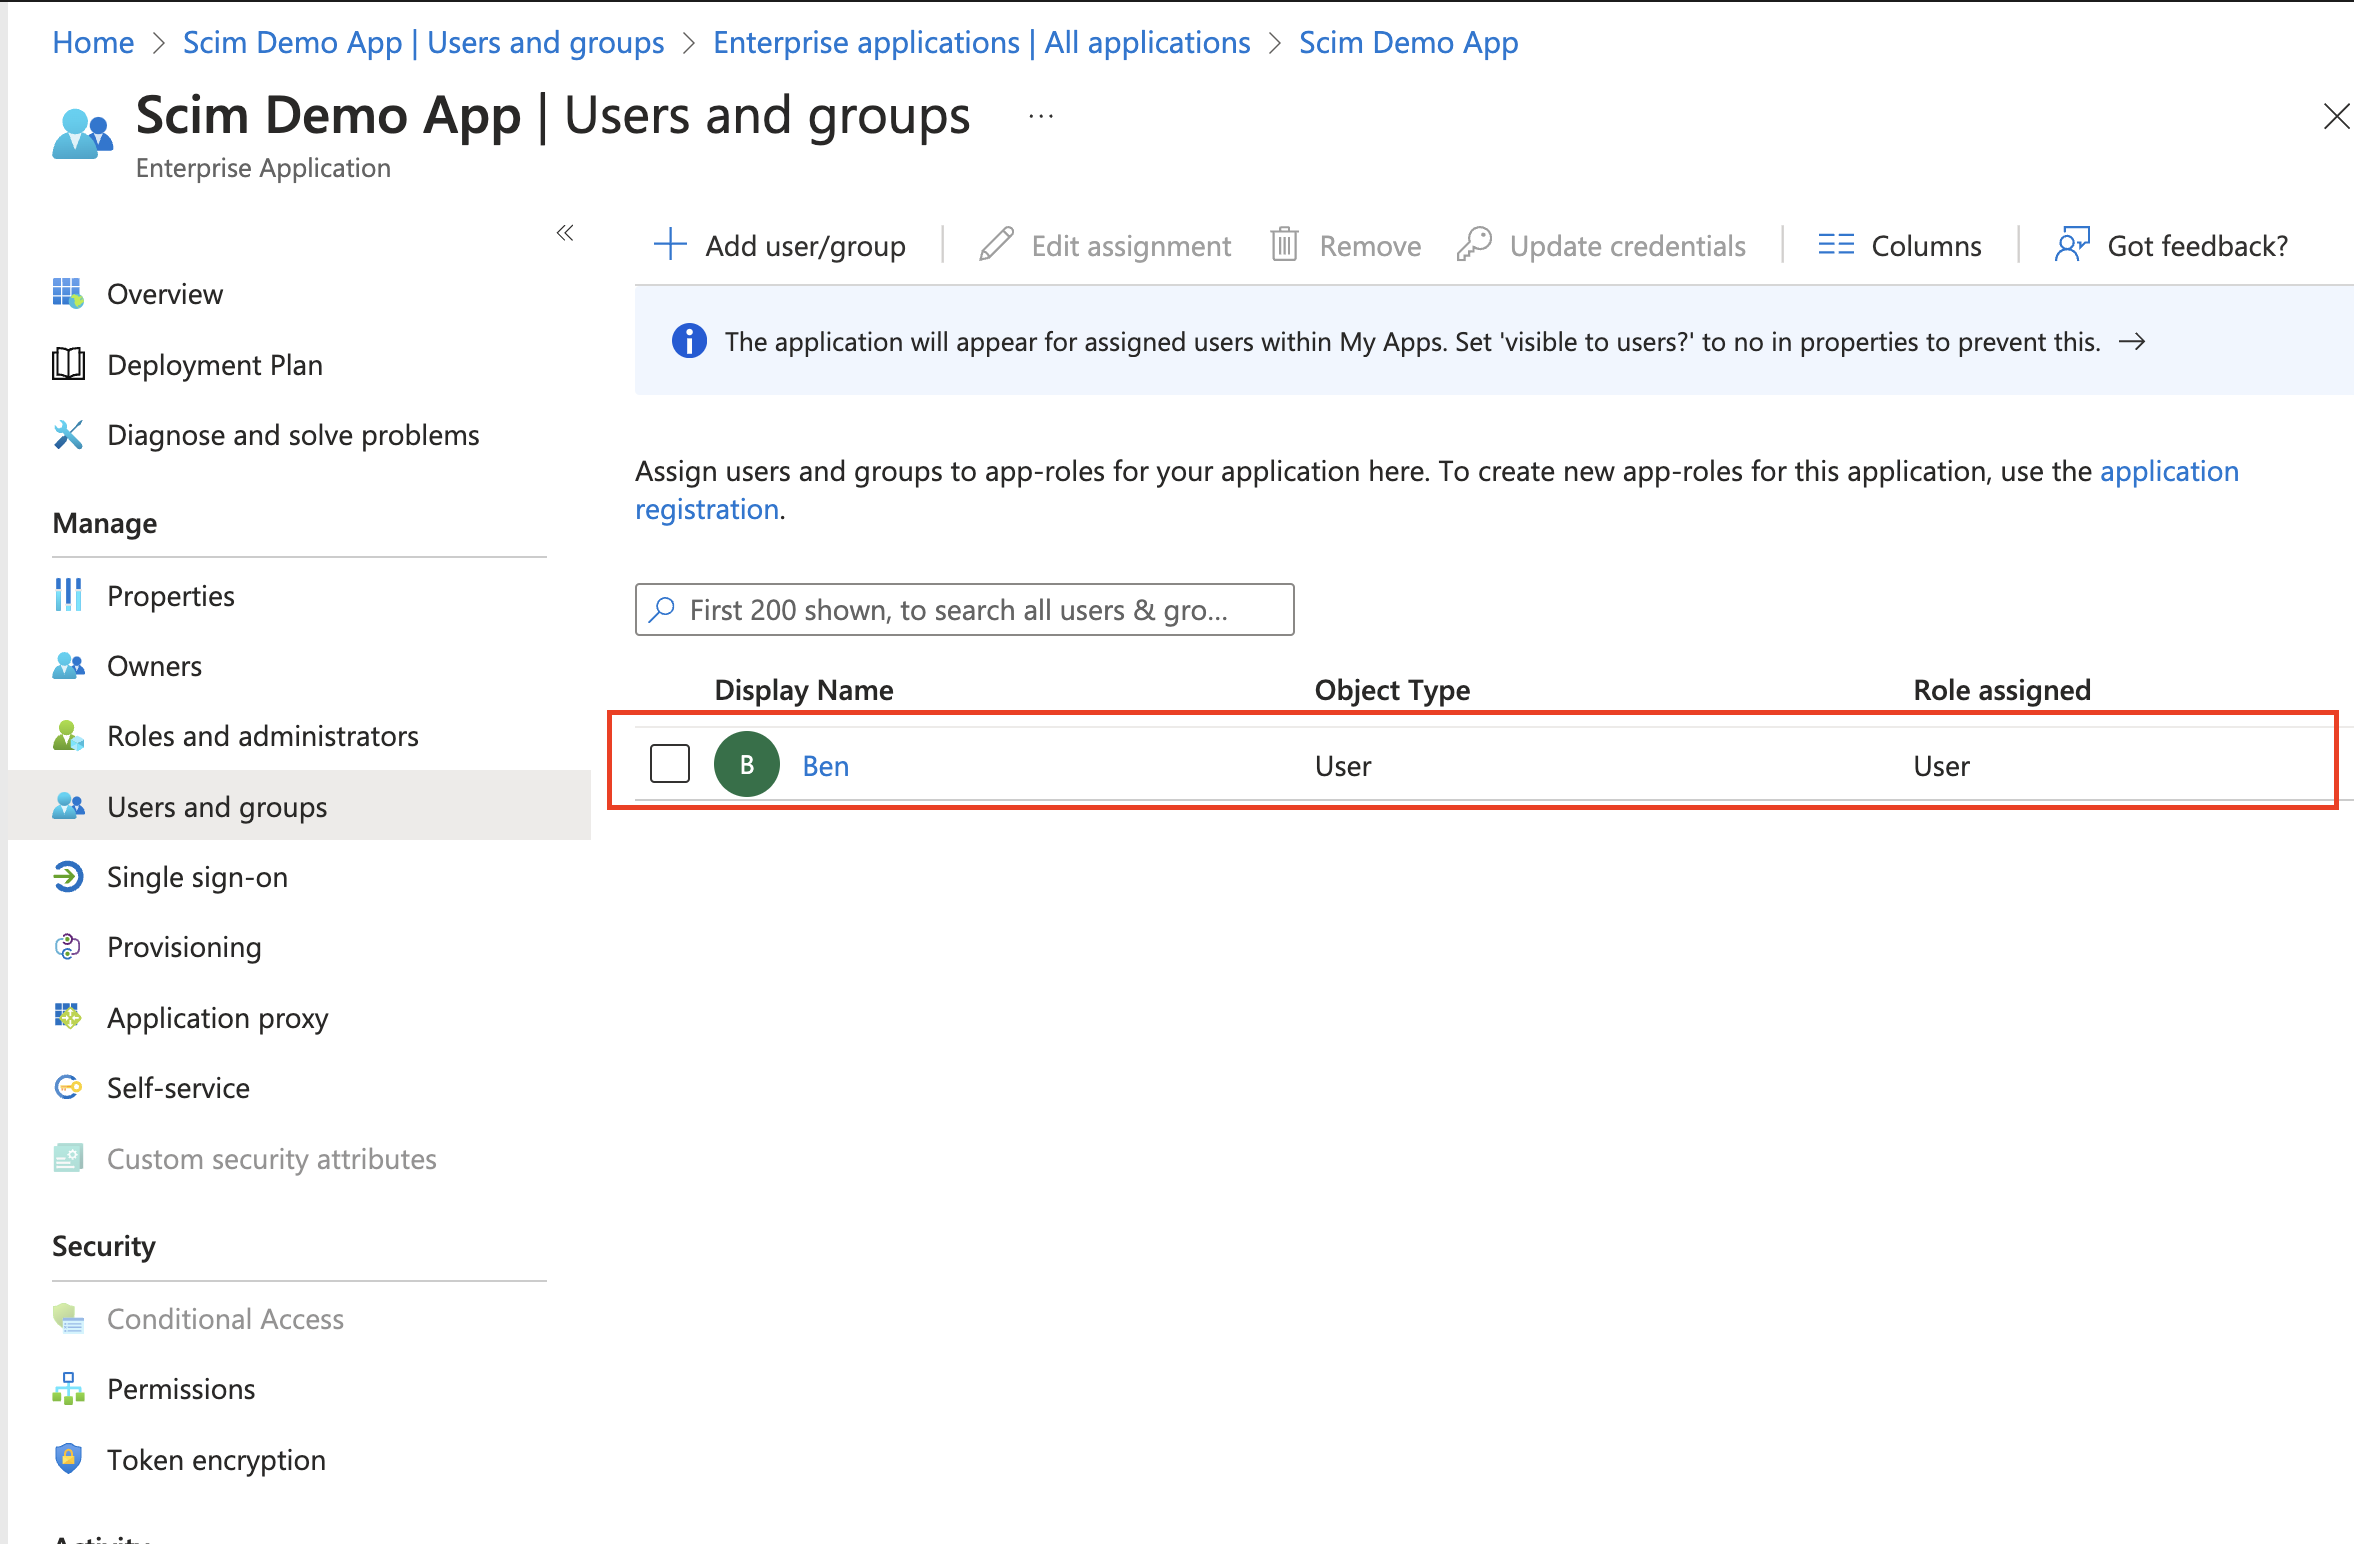
Open the application that is configured for SAML in the Entra Id admin dashboard and select Assign users and groups or select Users and Groups on the left sub nav.

-
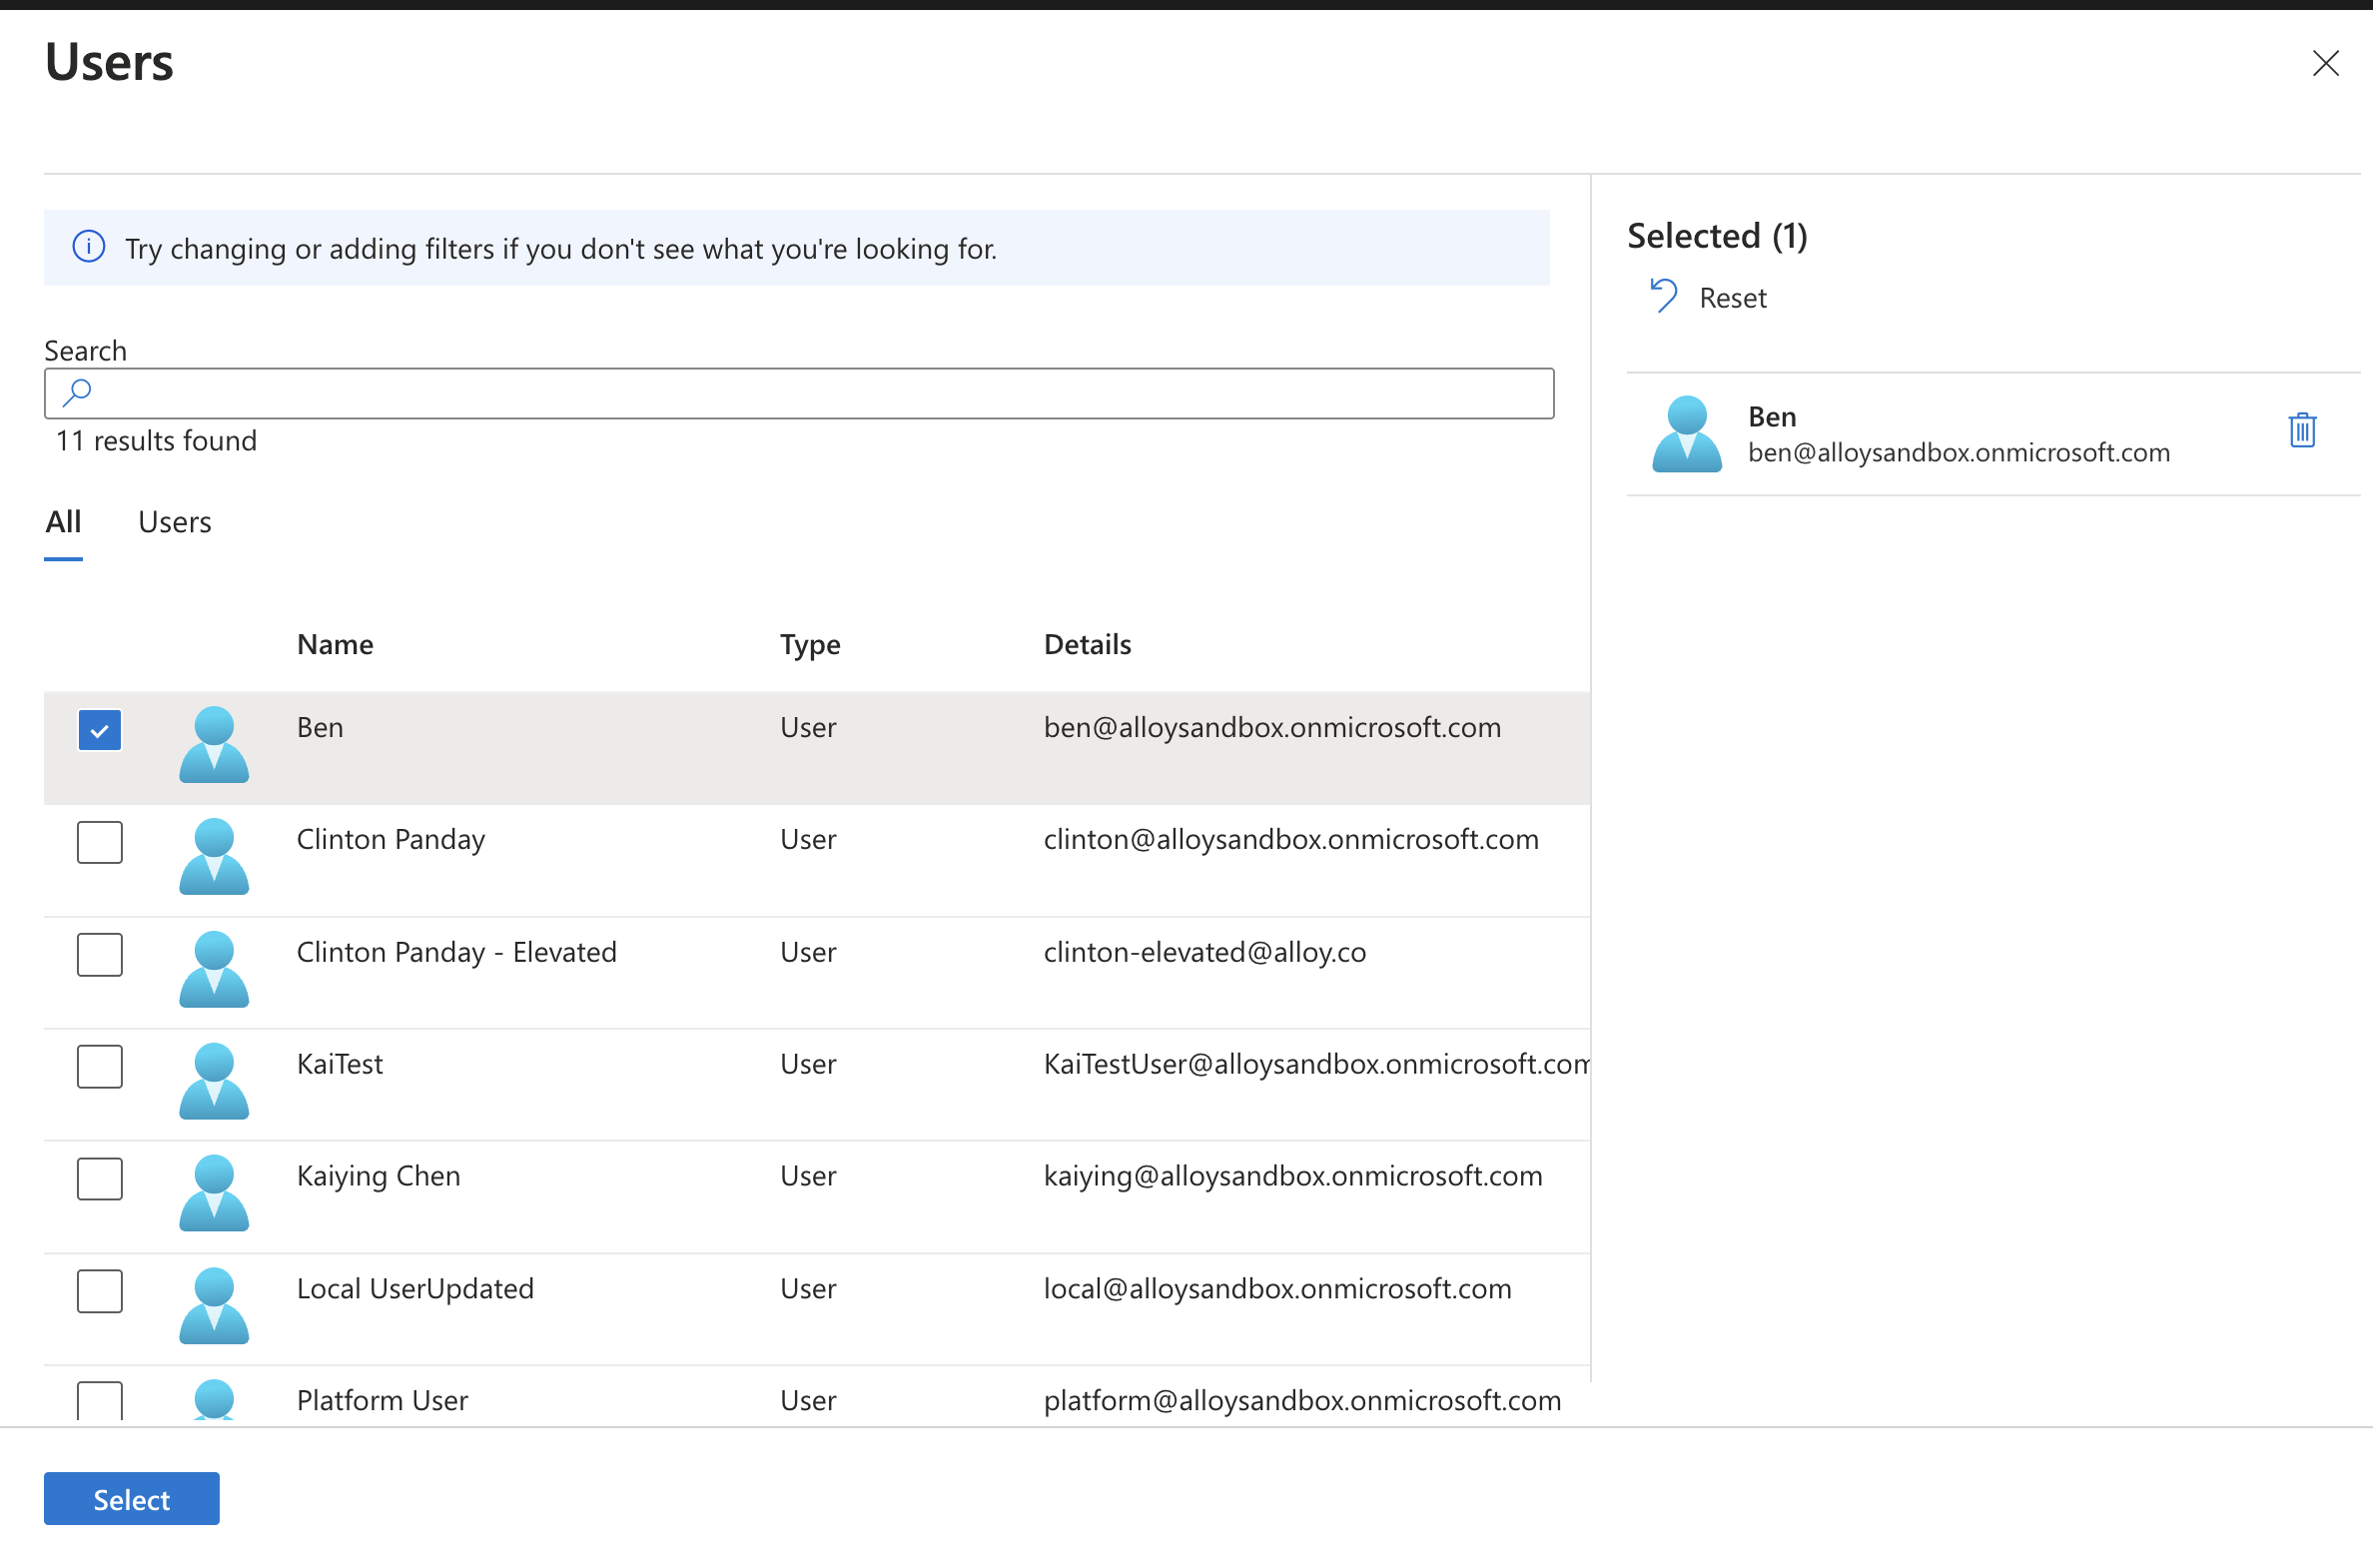
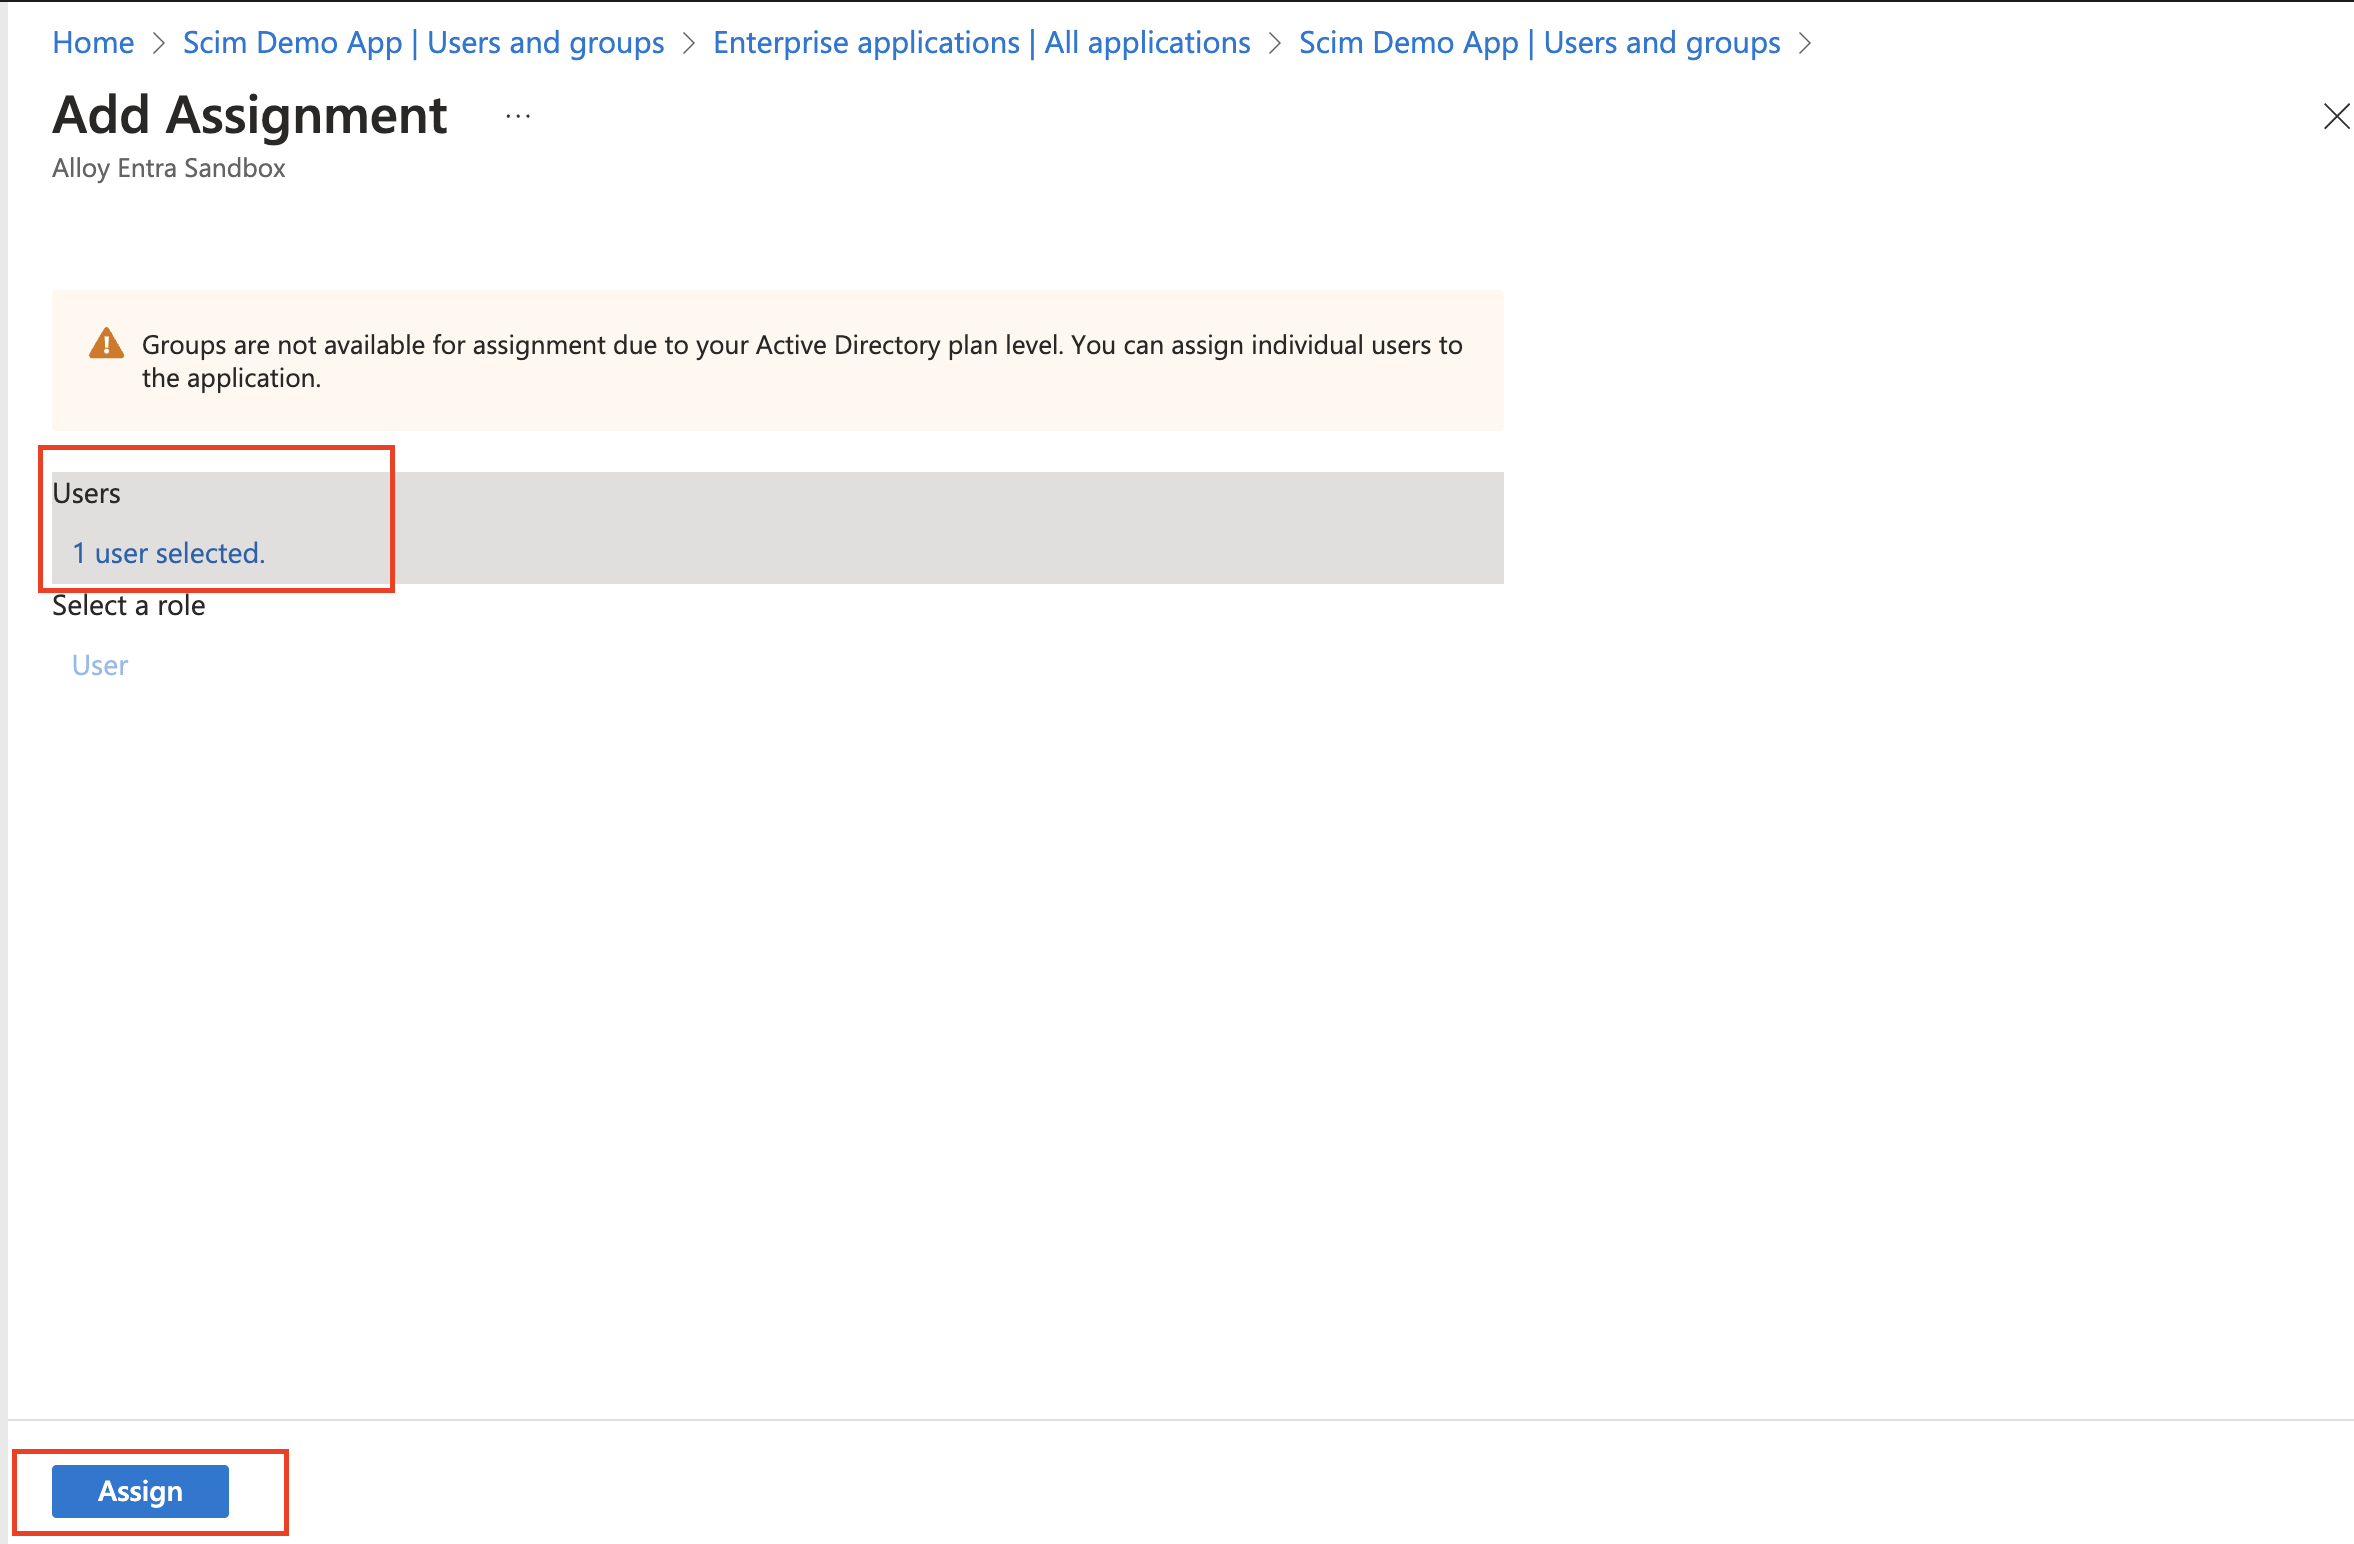
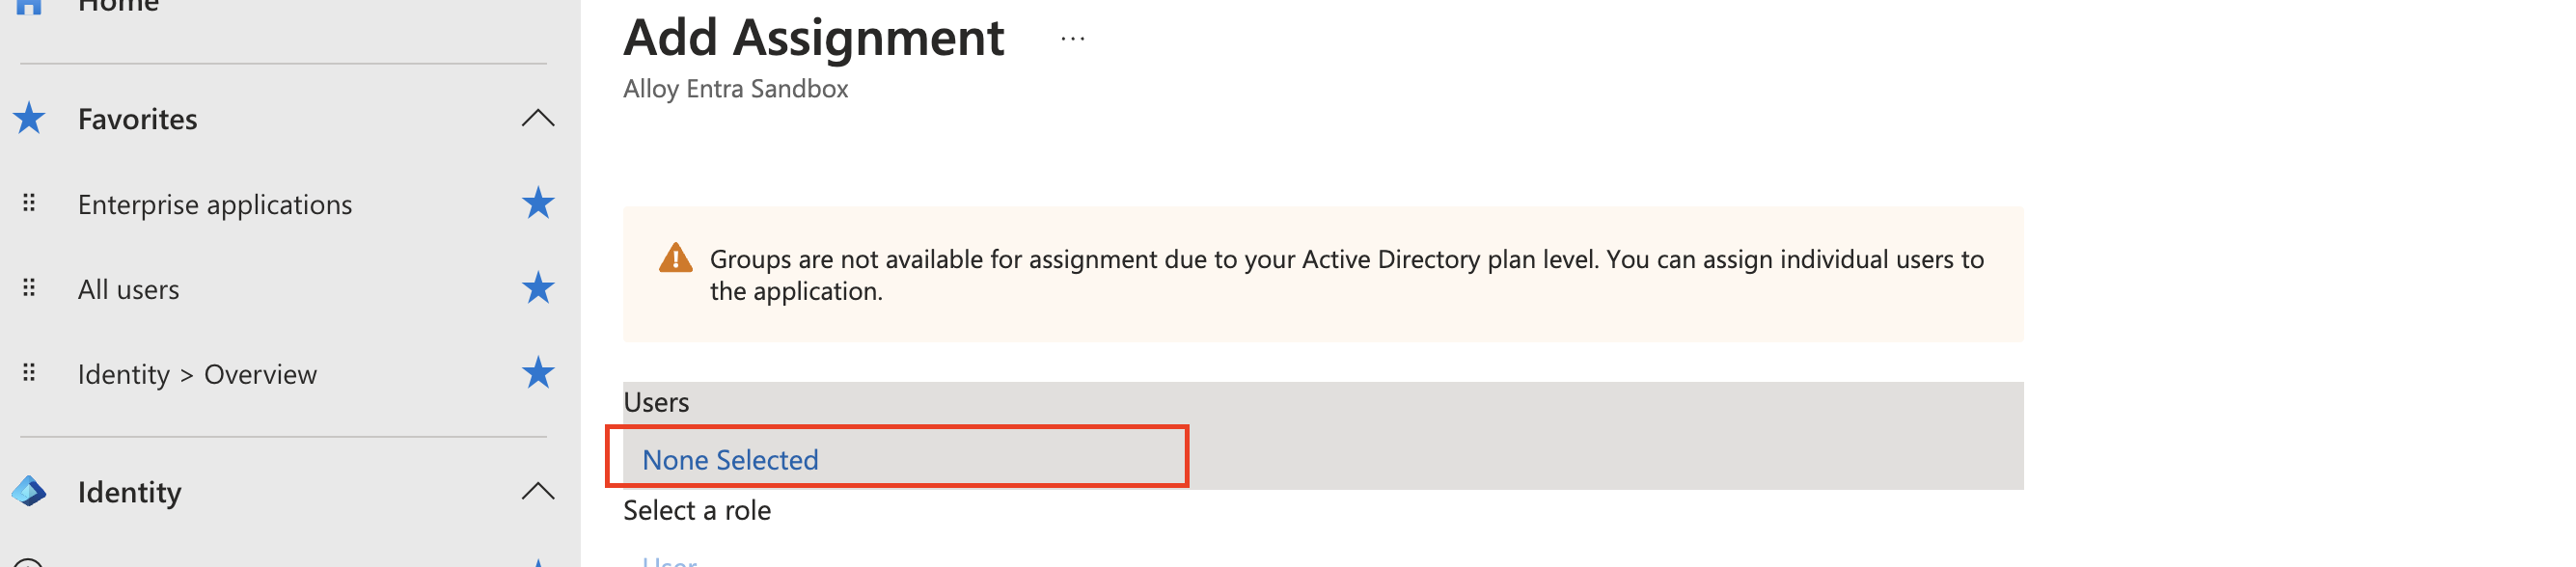
The application may already contain assigned users. To assign a user, select “Add user/group”. A modal should display. Select “None Selected” to begin selecting users to assign.

-
Click “Select” then “Assign” to complete the process.
-
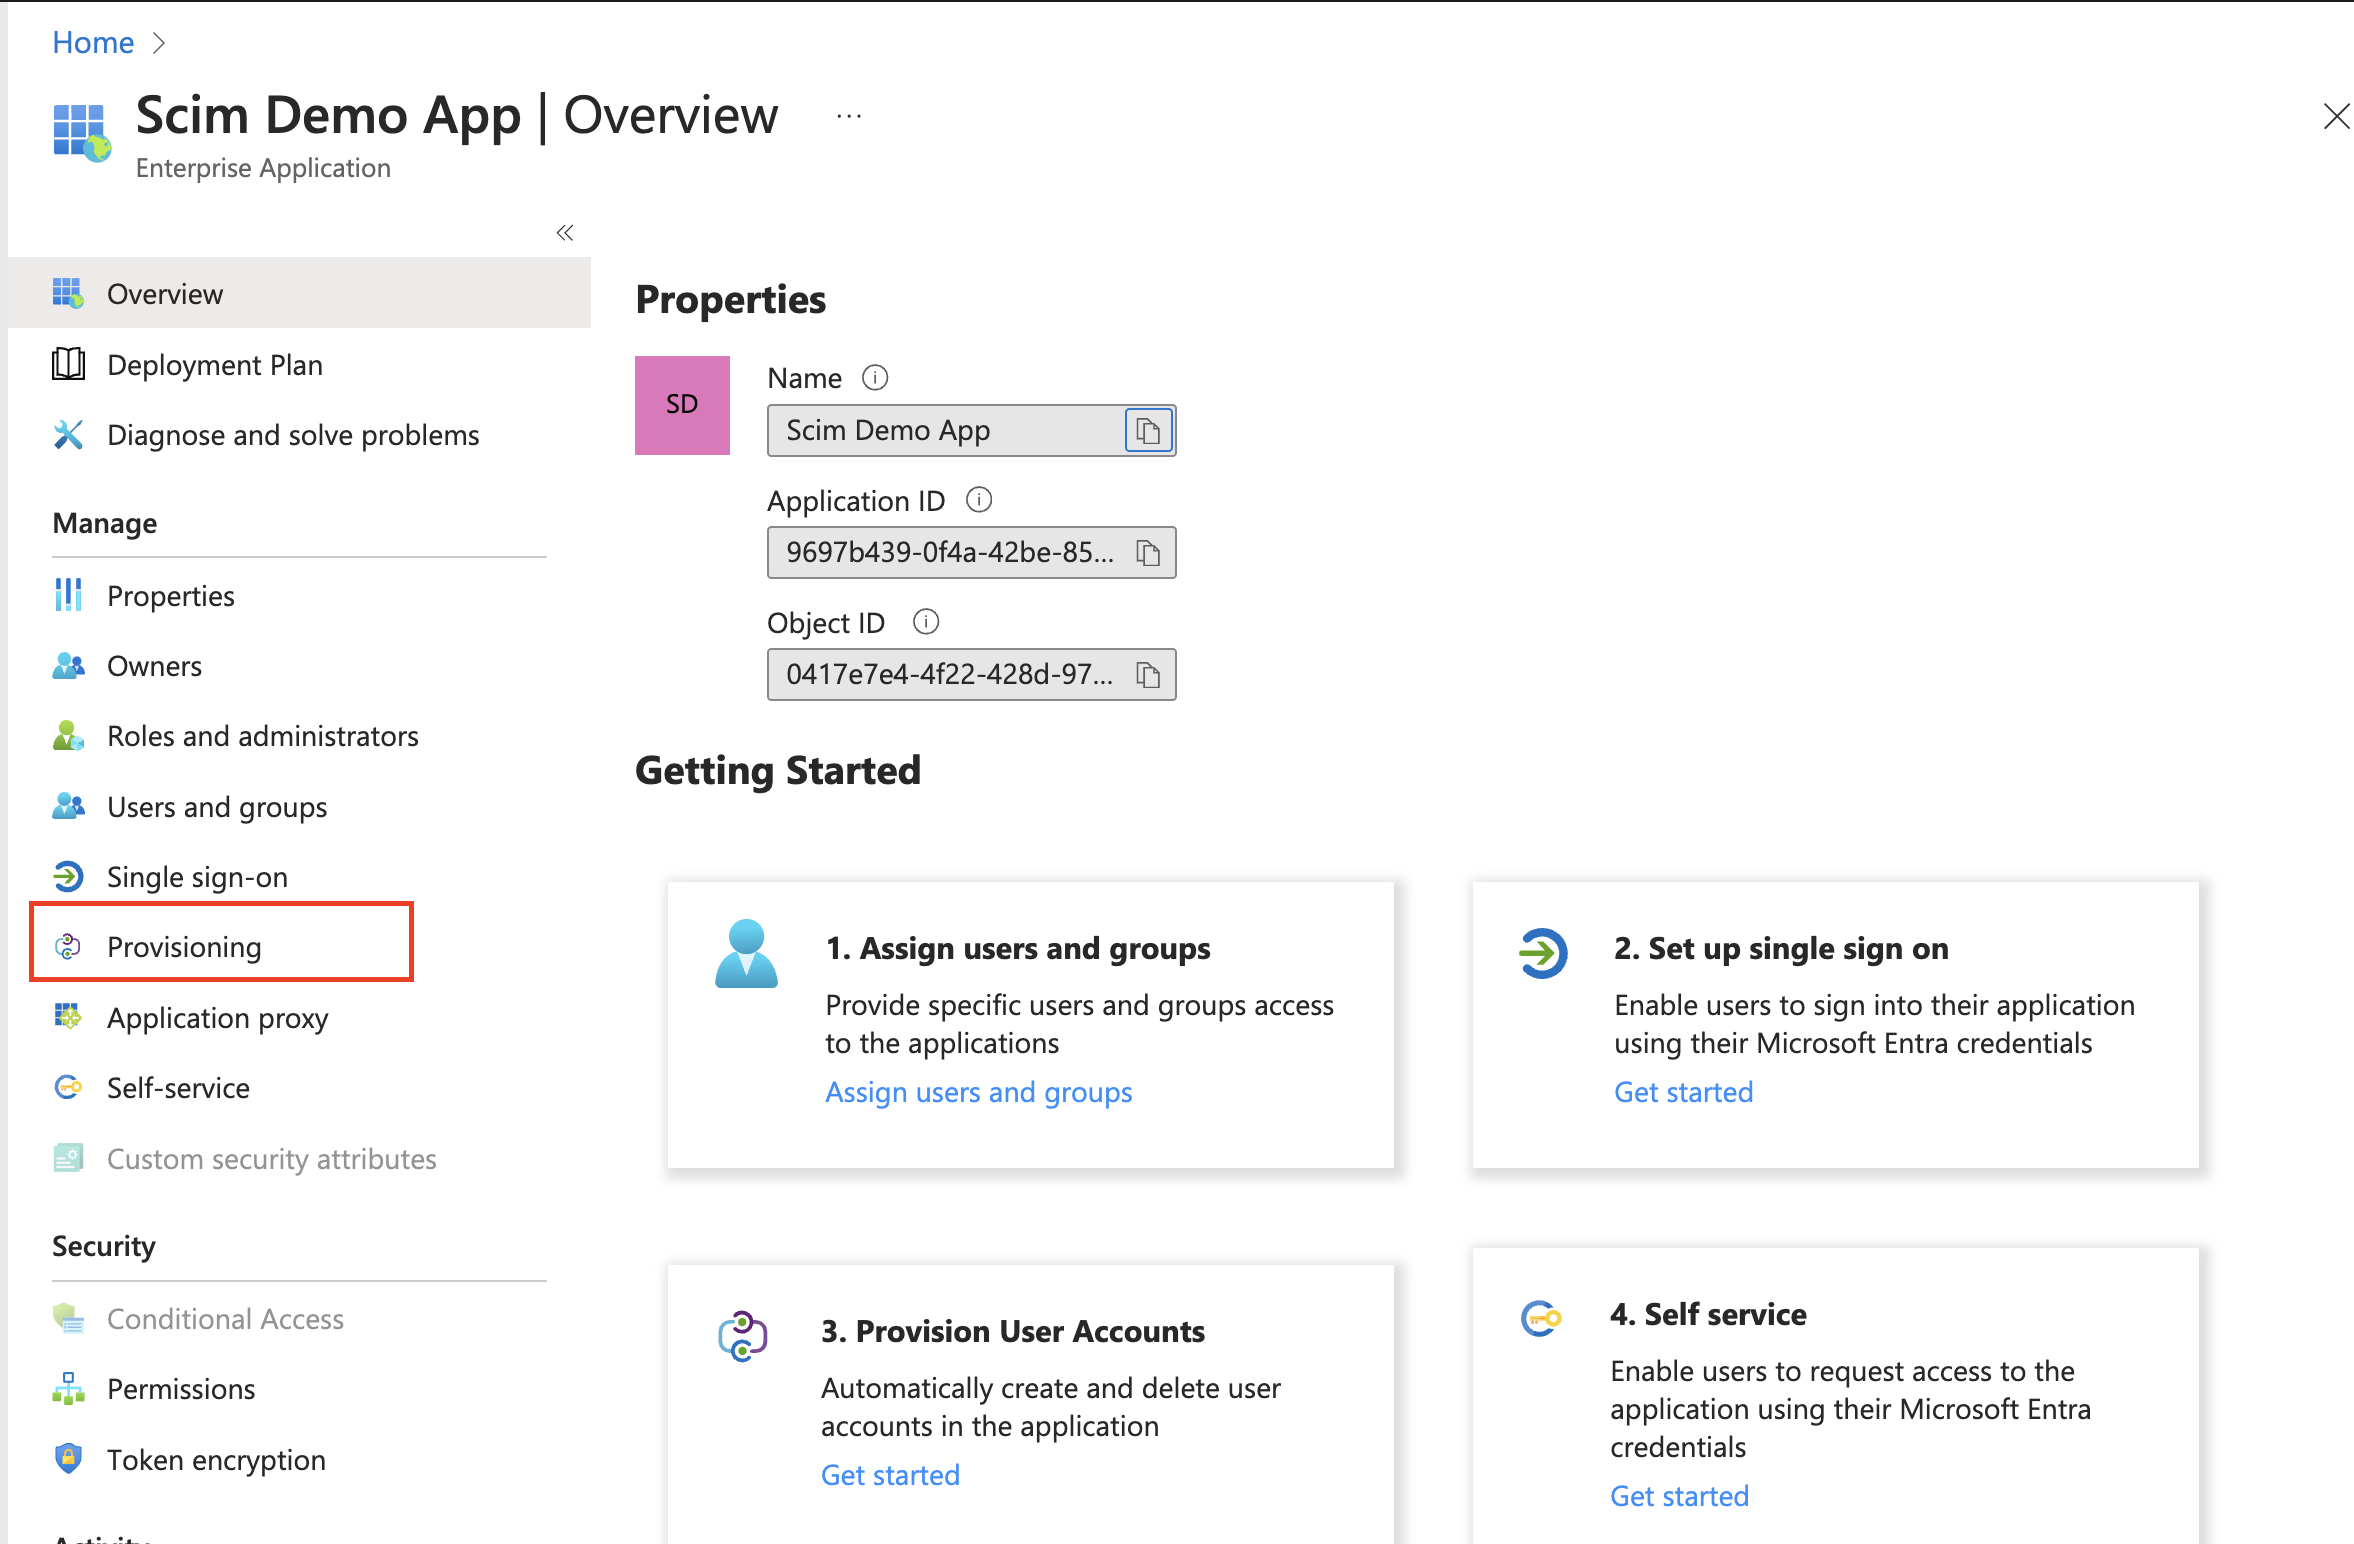
Navigate to “Provisioning” on the left sub-nav.
-
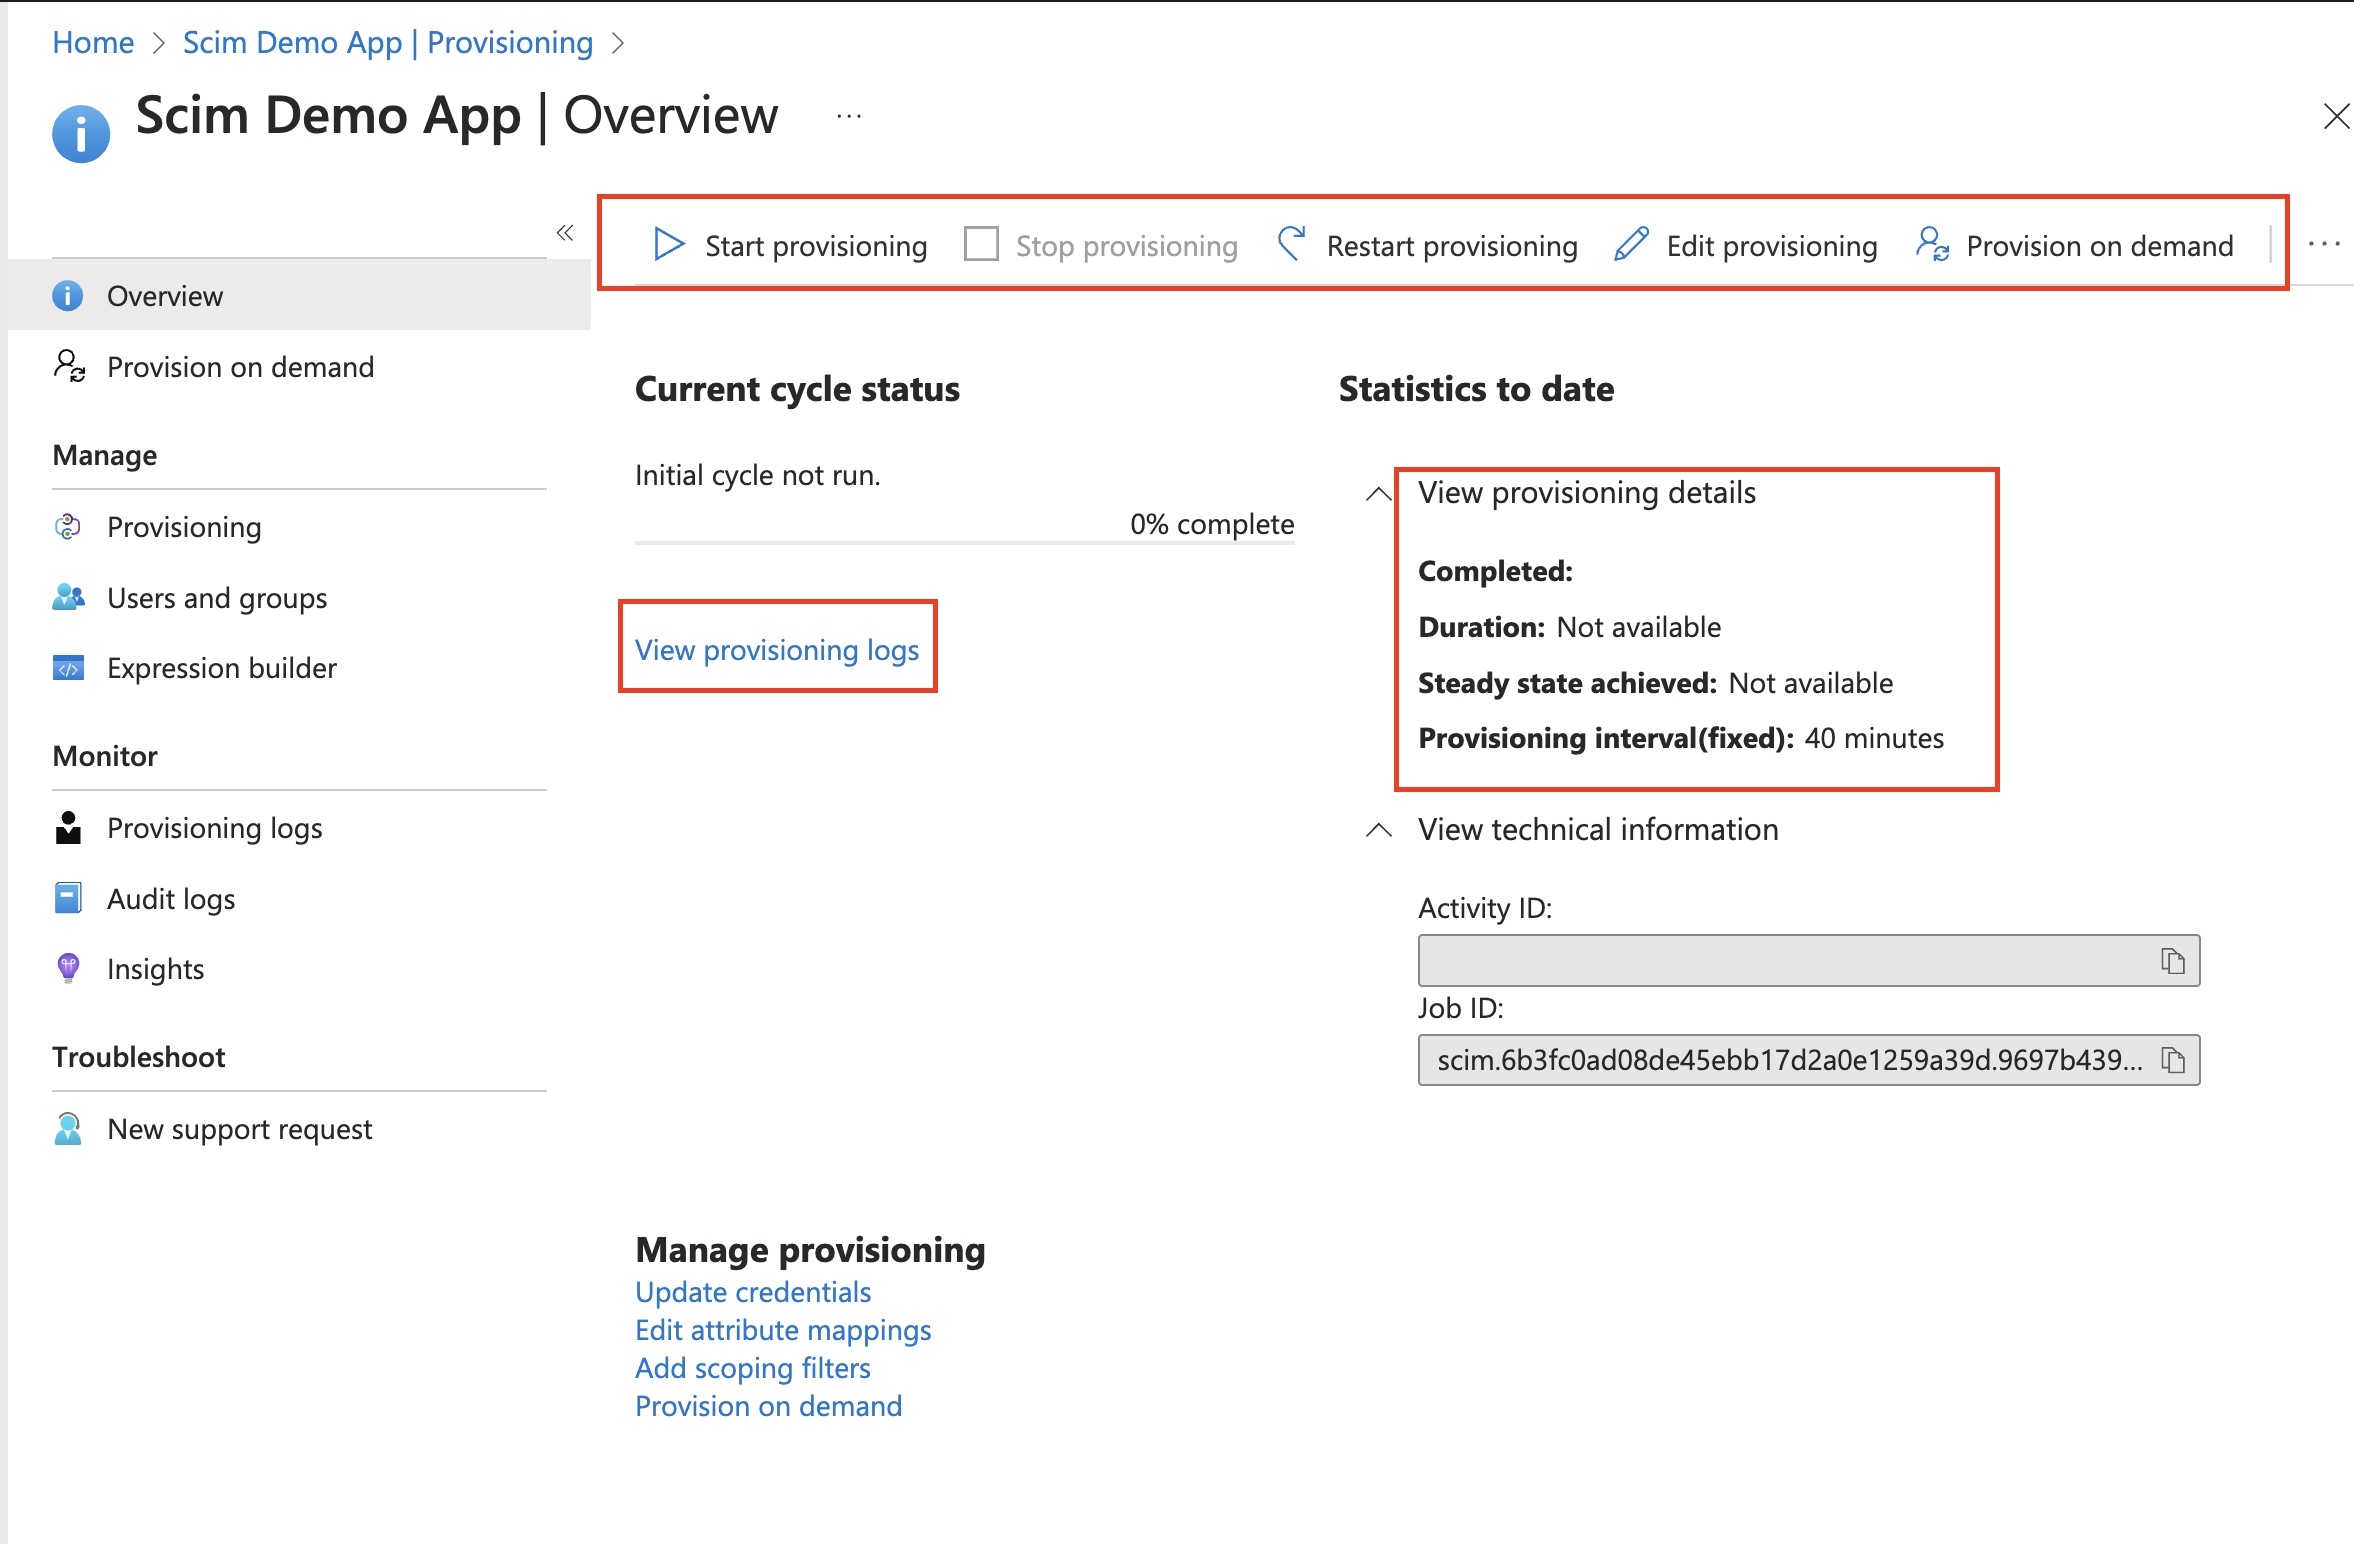
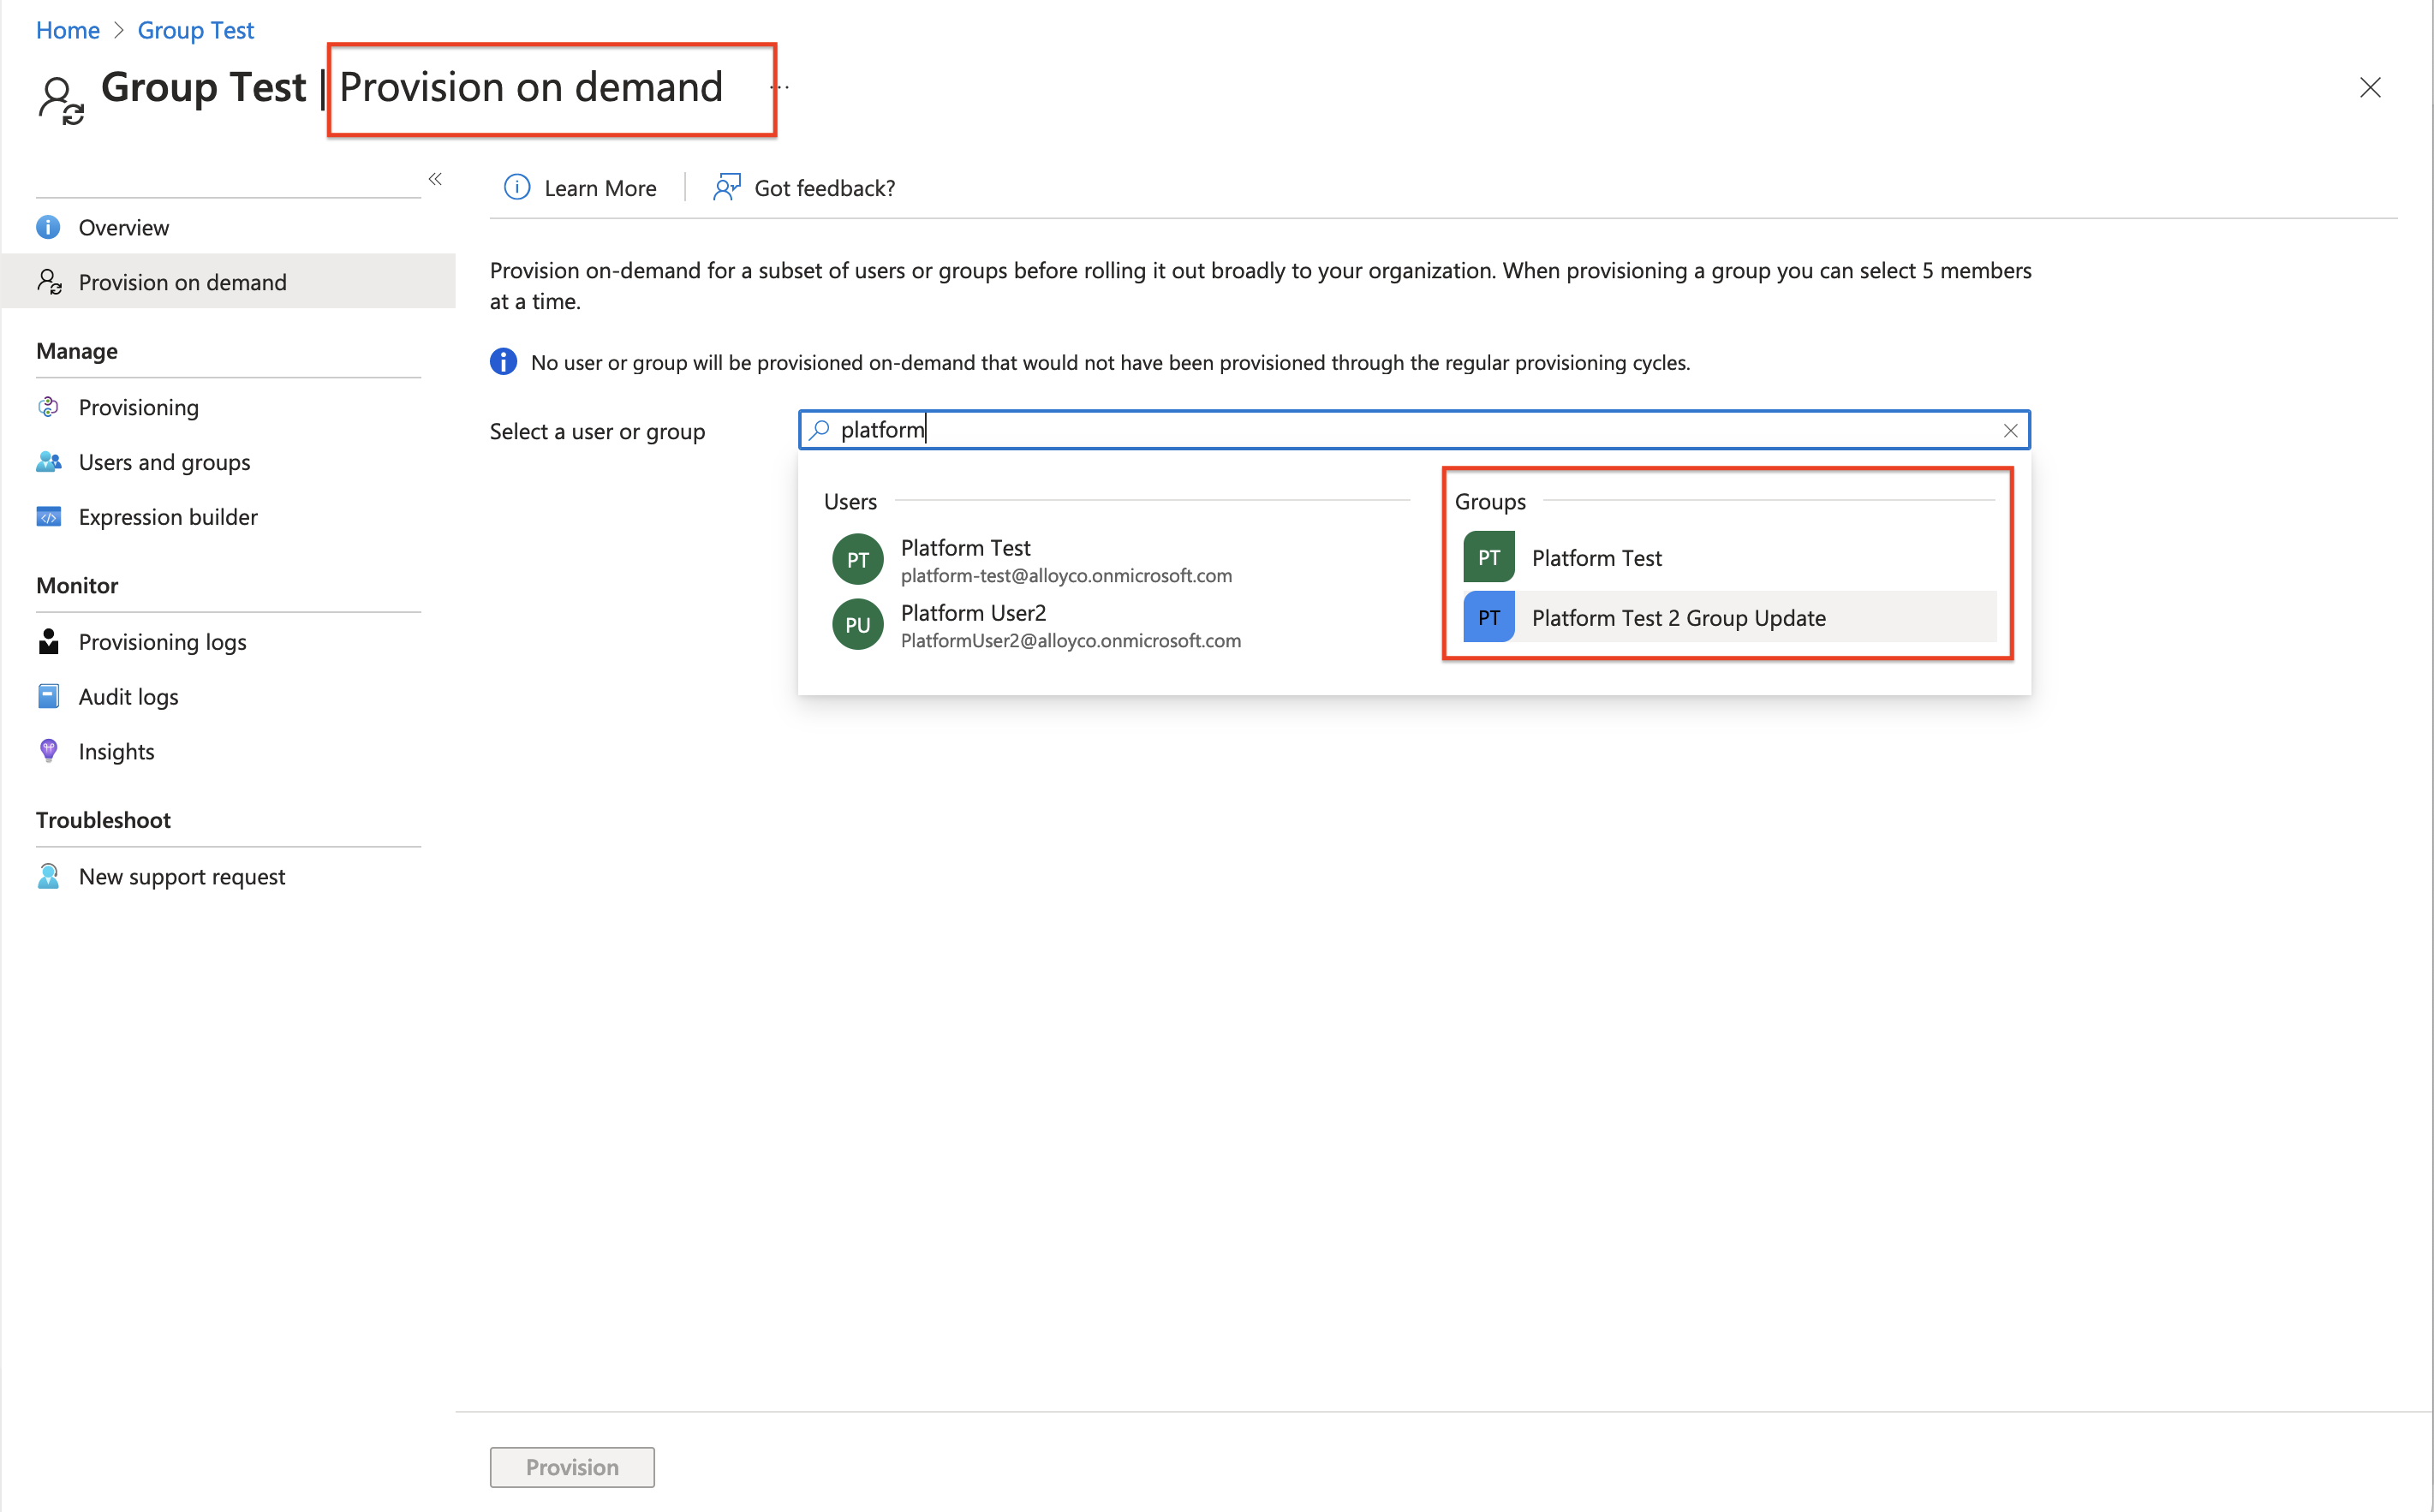
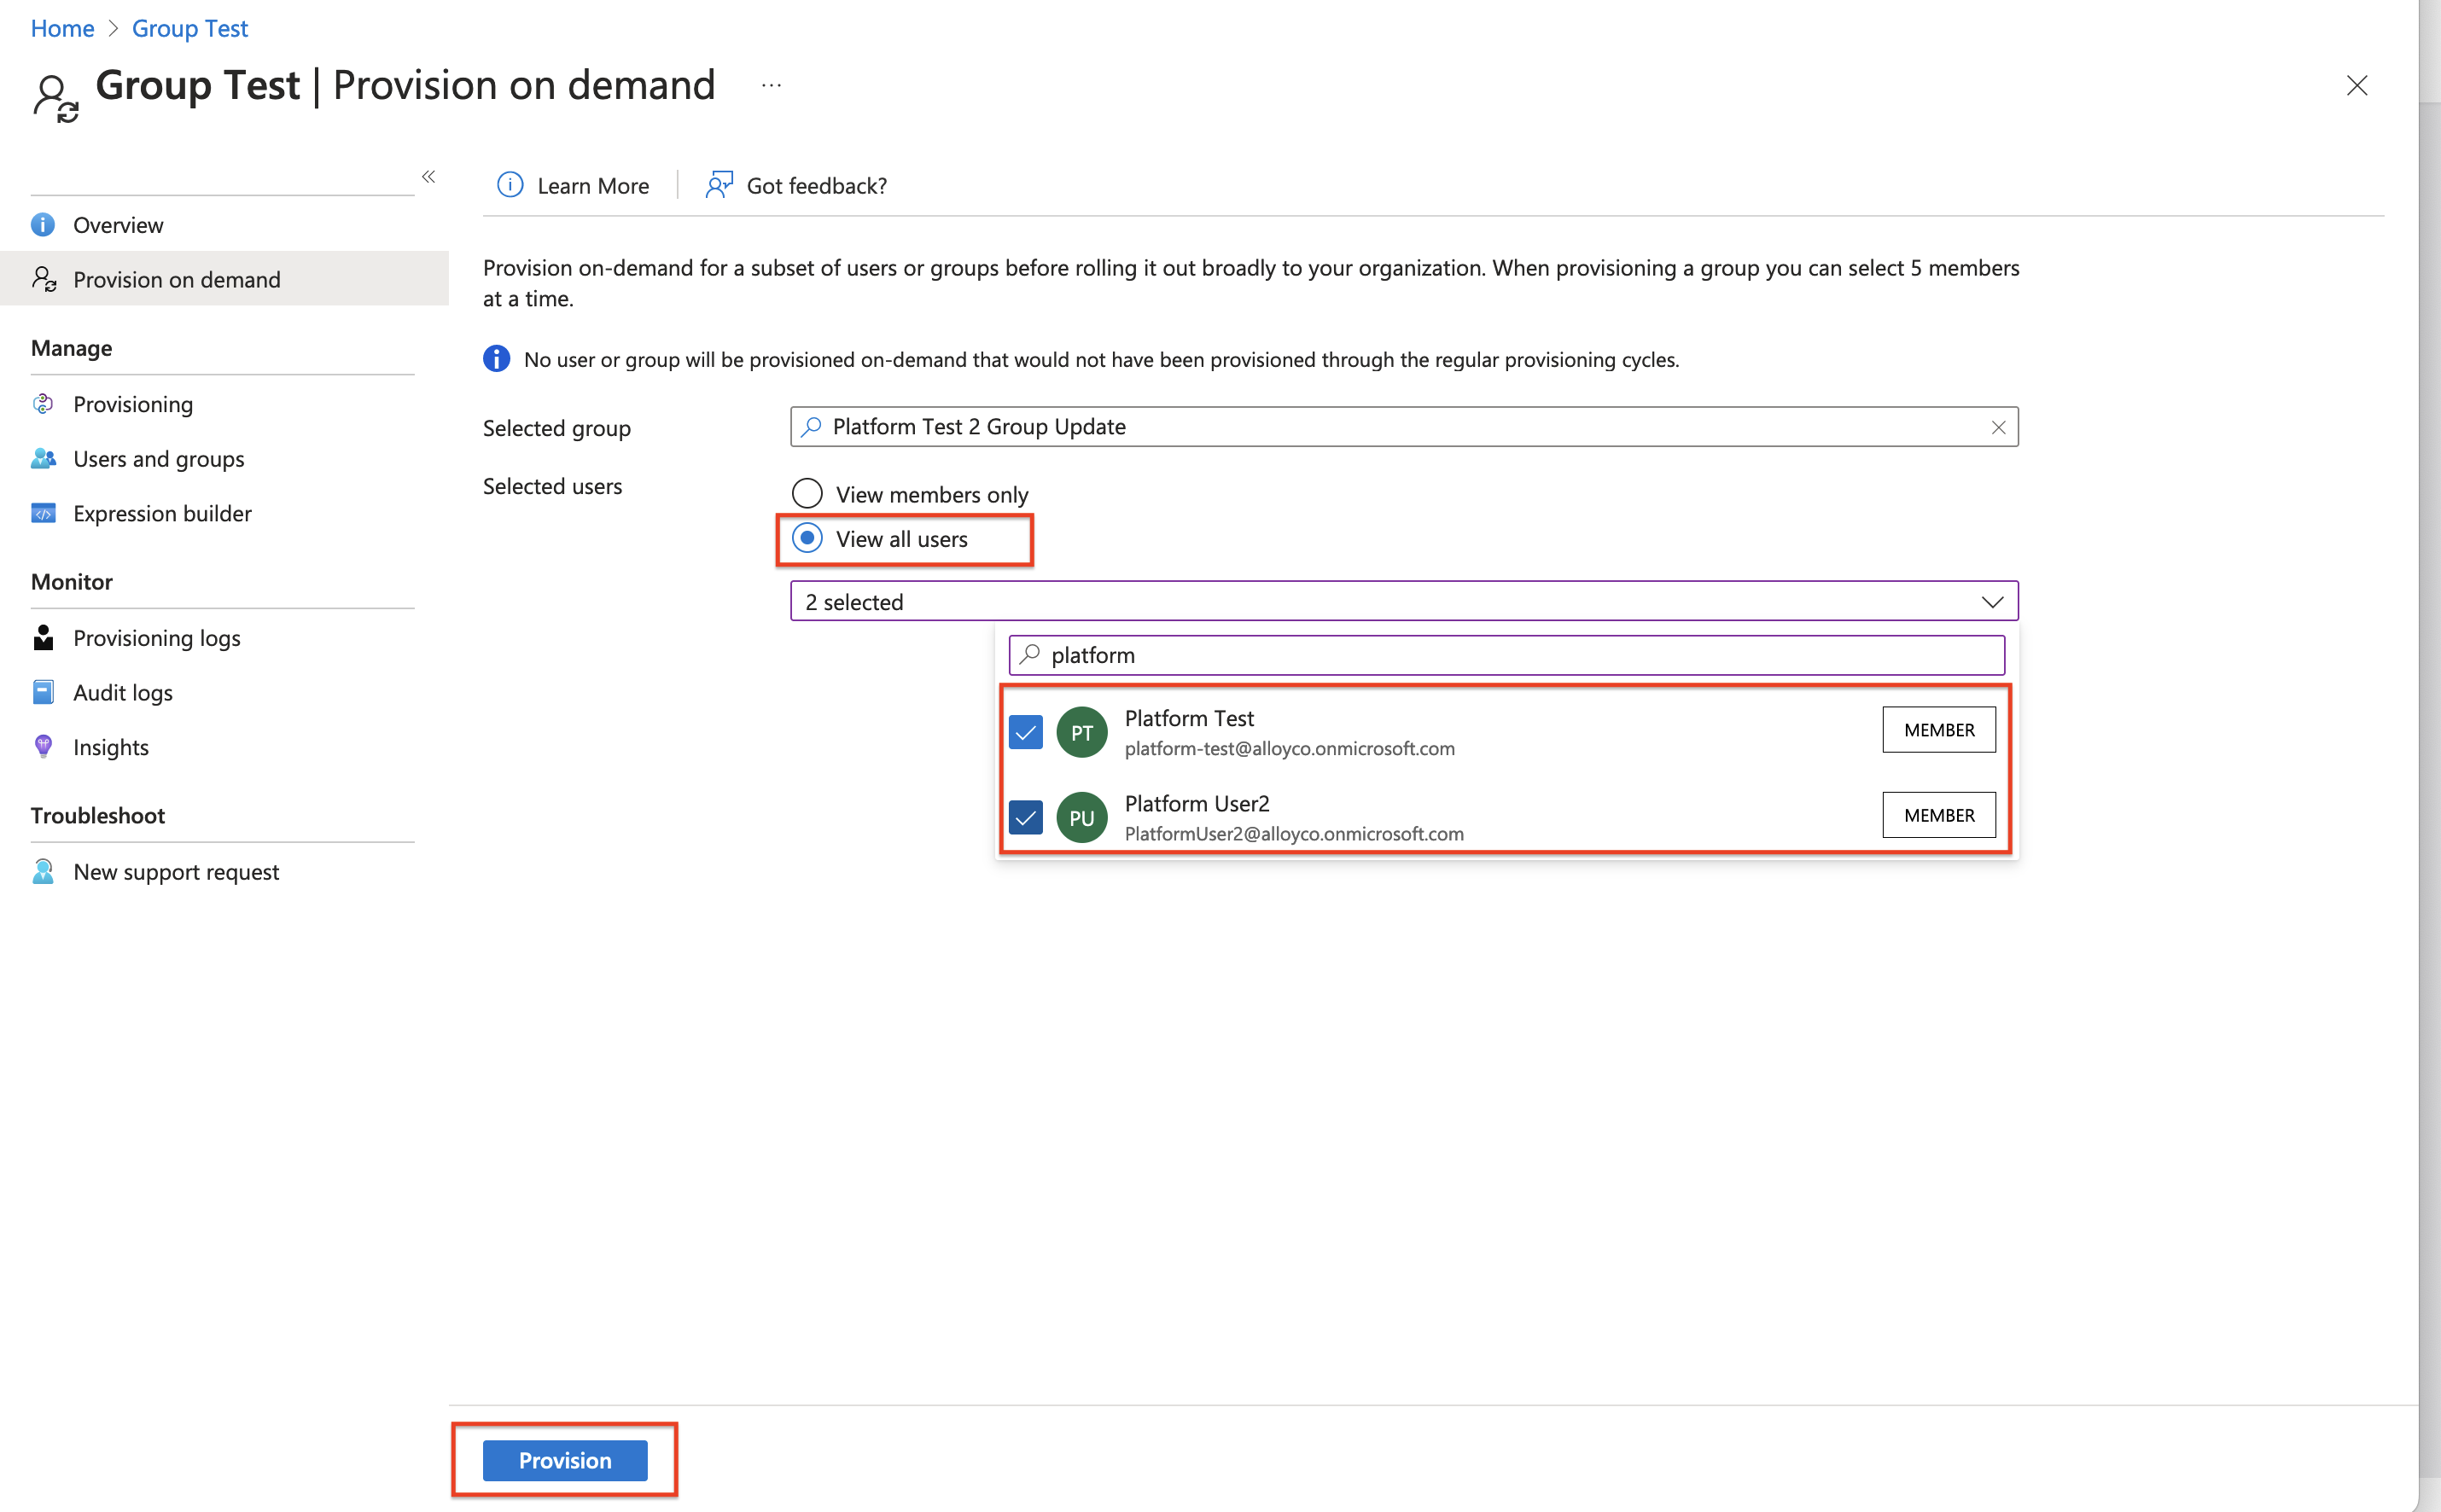
The user has been assigned to the application on Entra Id. Entra Id updates Alloy with these changes on a 40 mins fixed interval basis. Due to the secret token’s short lifespan (1hr), its recommended to use the “**Provision on demand “**option when attempting to synchronize a small number users or groups.
-
Provisioning on Demand. After clicking Provision, any changes made to the users active status, first name, last name, or phone number will propagate to Alloy.
3. Assign Groups to Alloy app
-
Open the application that is configured for SAML in the Entra Id admin dashboard and select Assign users and groups or select Users and Groups on the left sub nav.

-
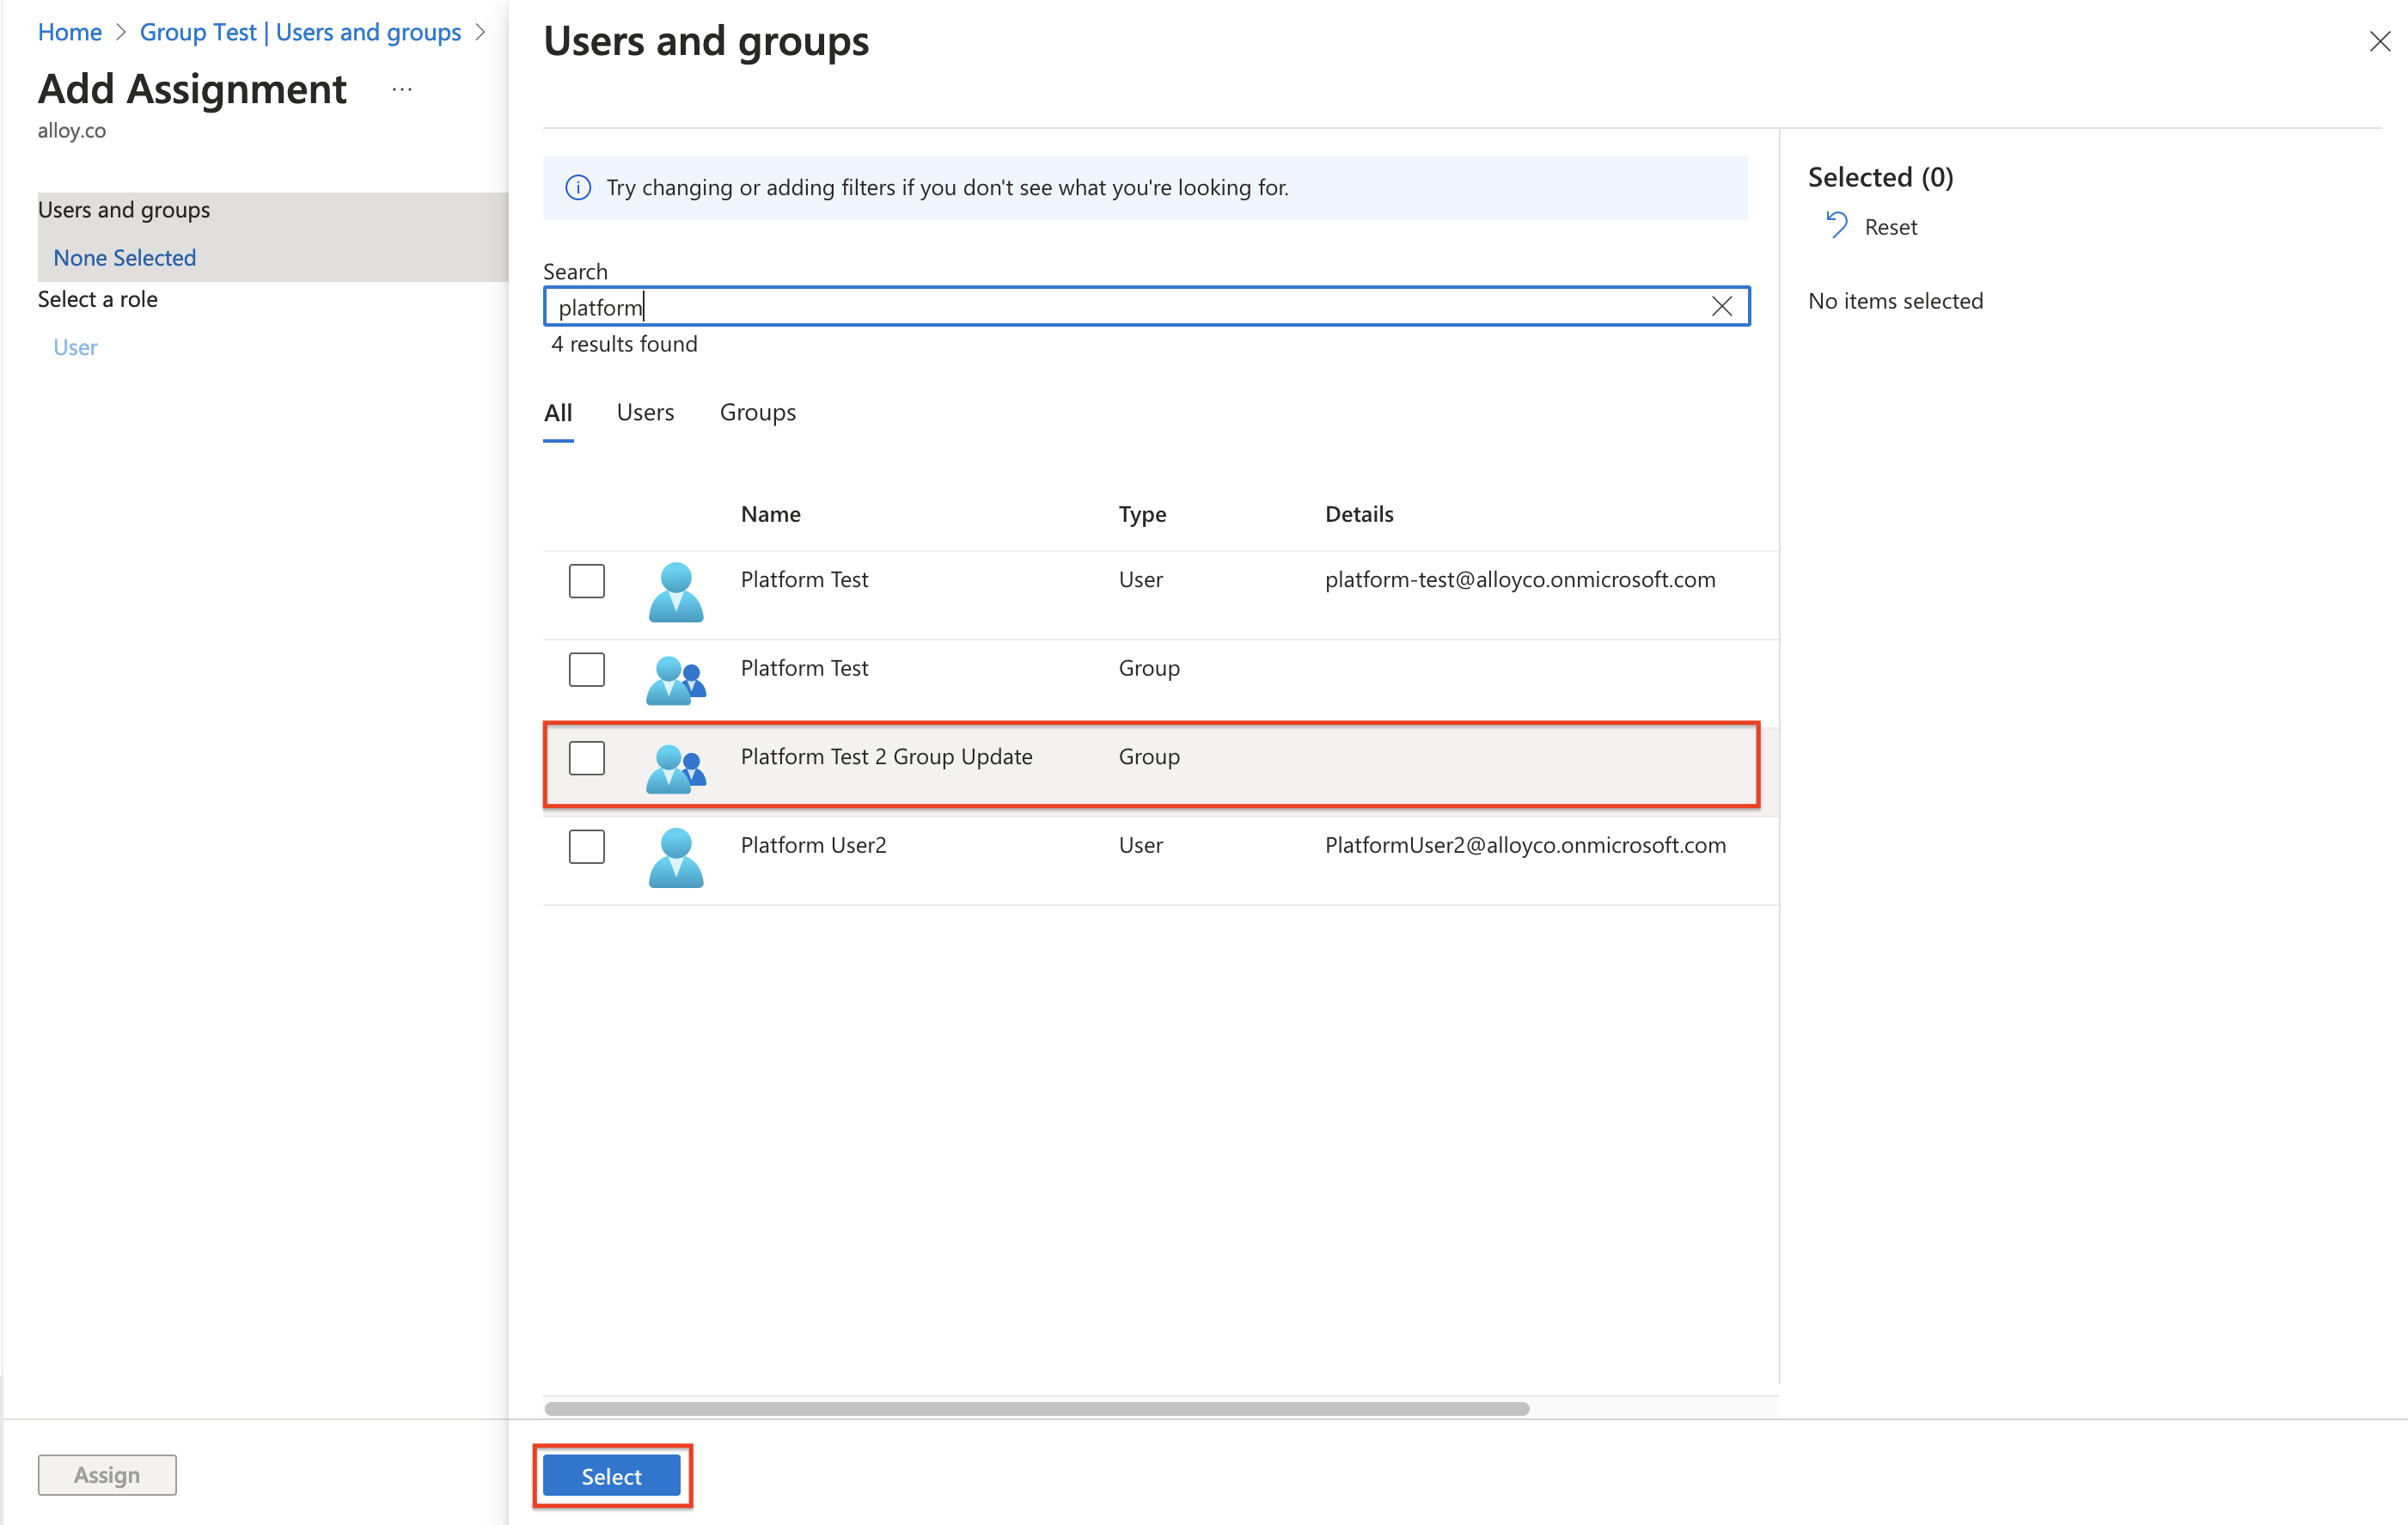
To assign a Group, select “Add user/group”. A modal should display. Select “None Selected” to begin selecting groups to assign.
Please note:💡: To assign a group to an existing role, make sure the group name exactly matches the role within Alloy. Any users assigned to that group will be provisioned into the corresponding Alloy role.
-
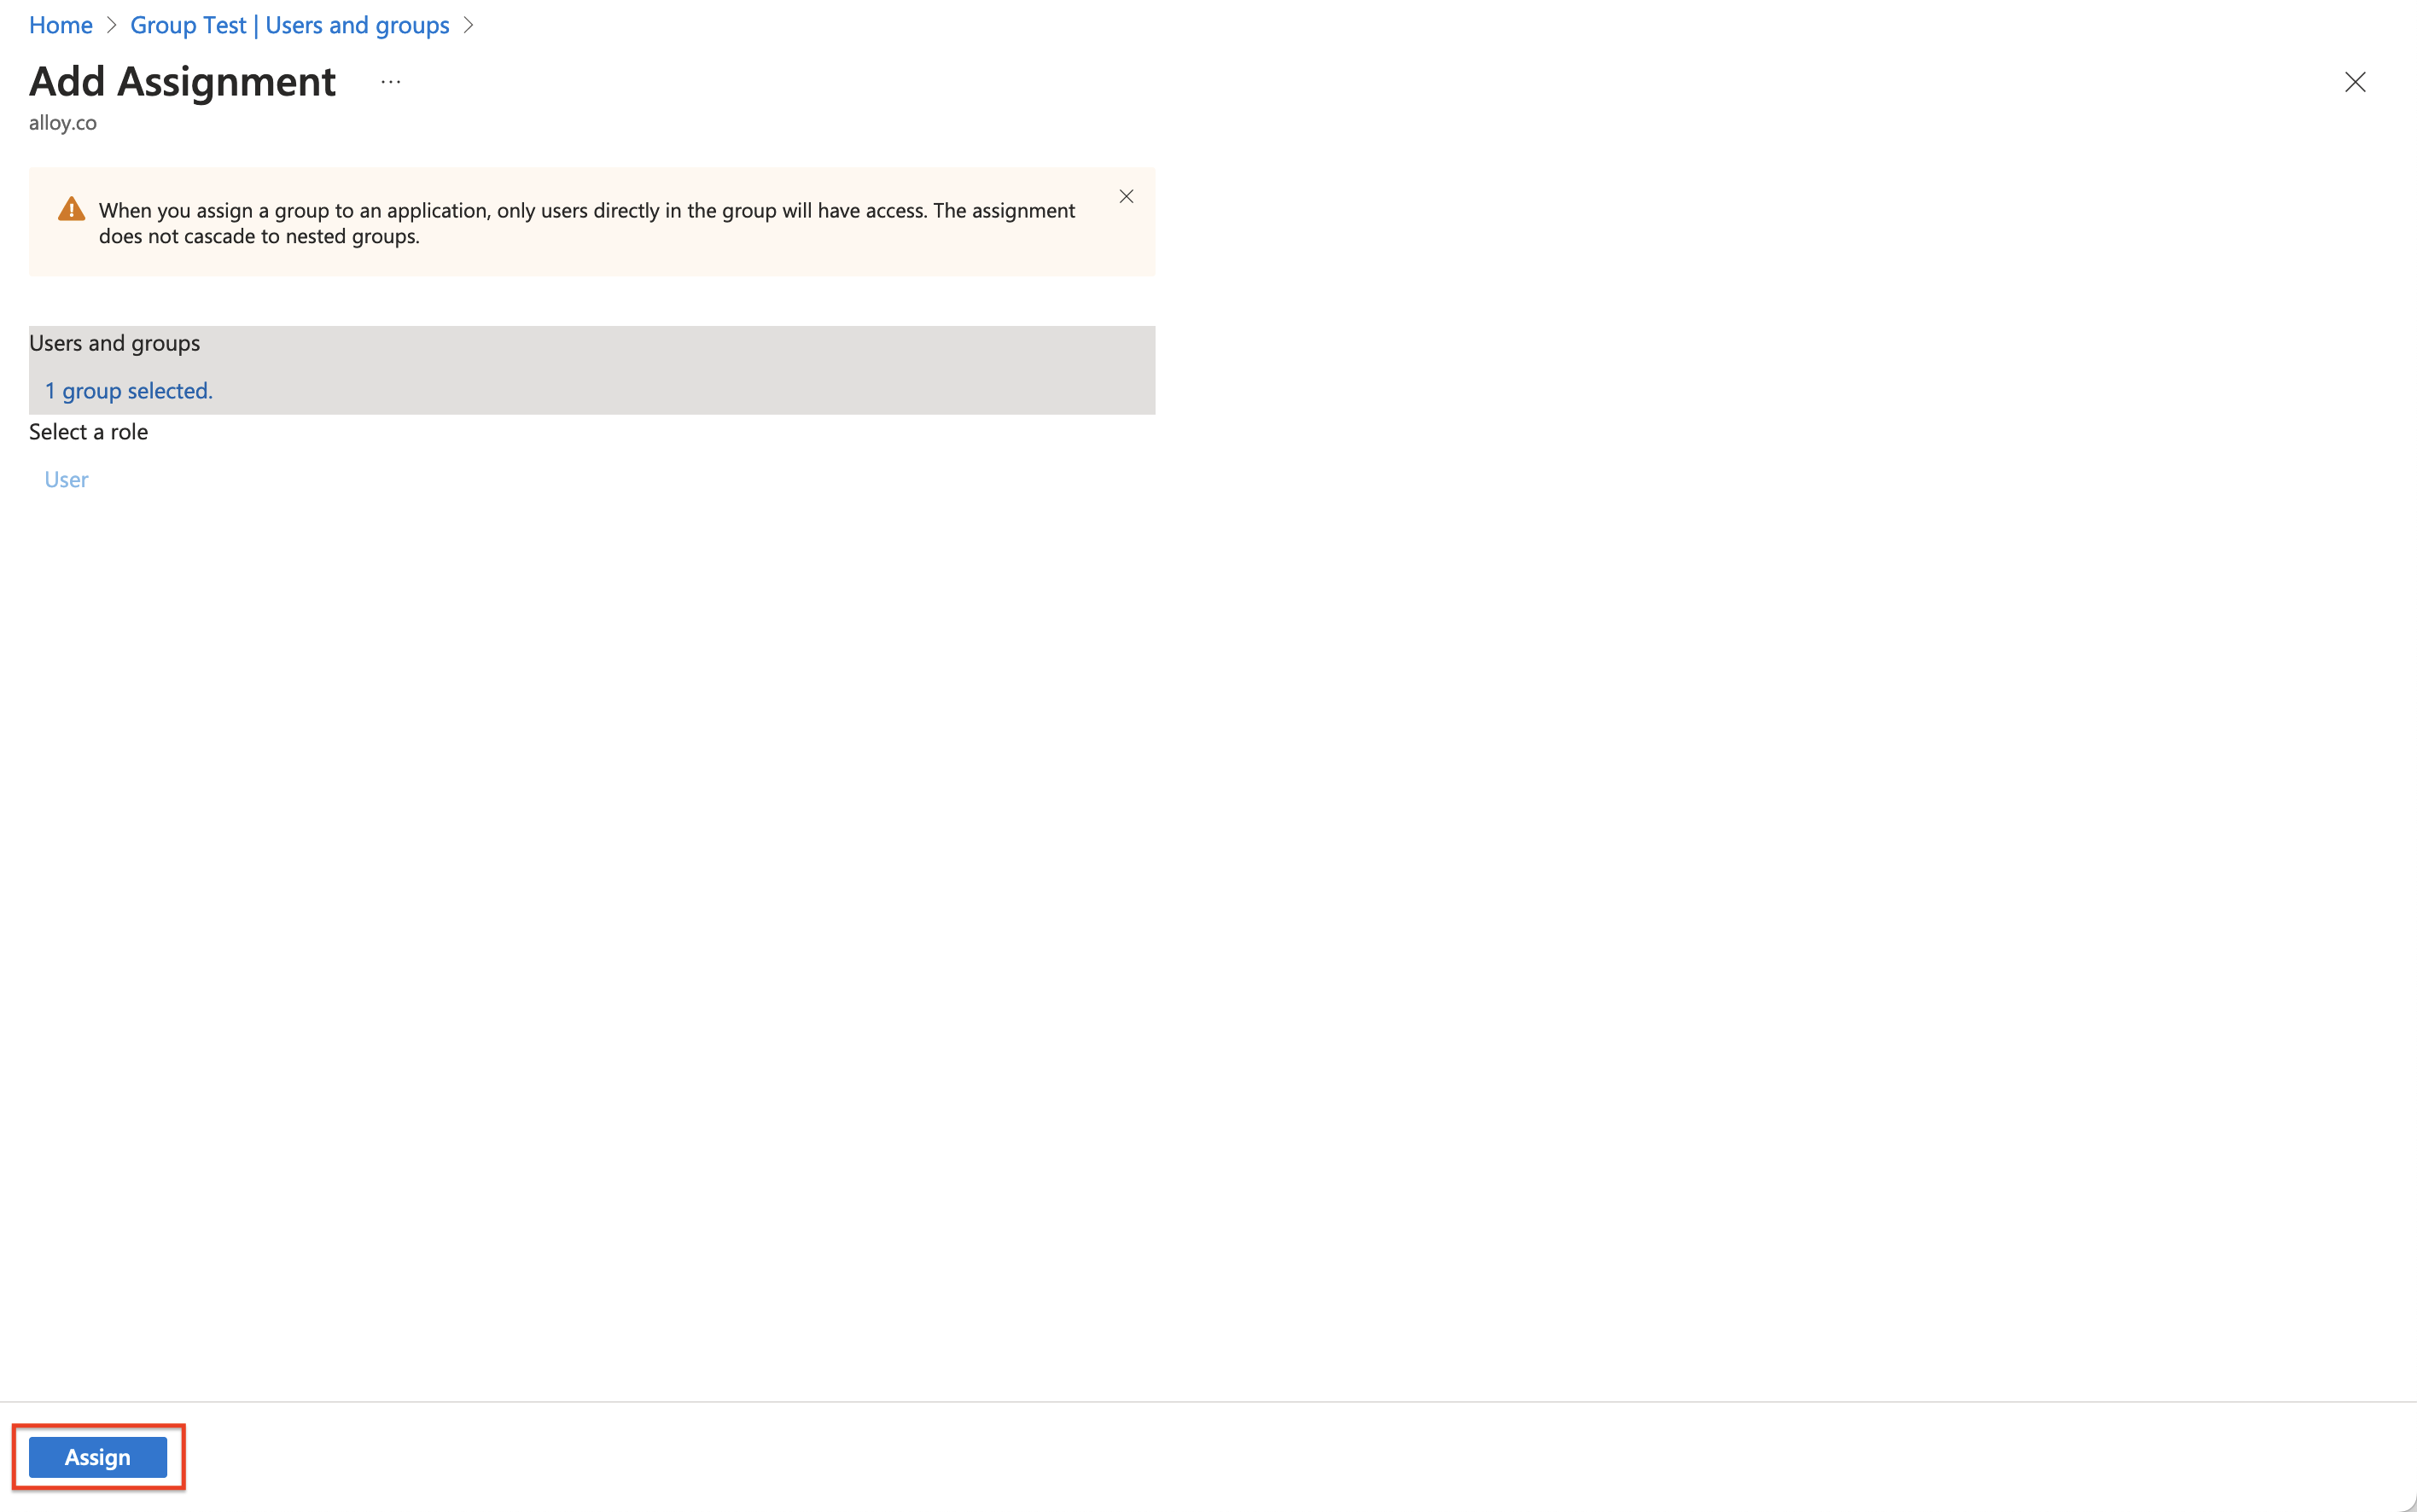
Click “Select” then “Assign” to complete the process.
-
Navigate to “Provisioning” on the left sub-nav.

-
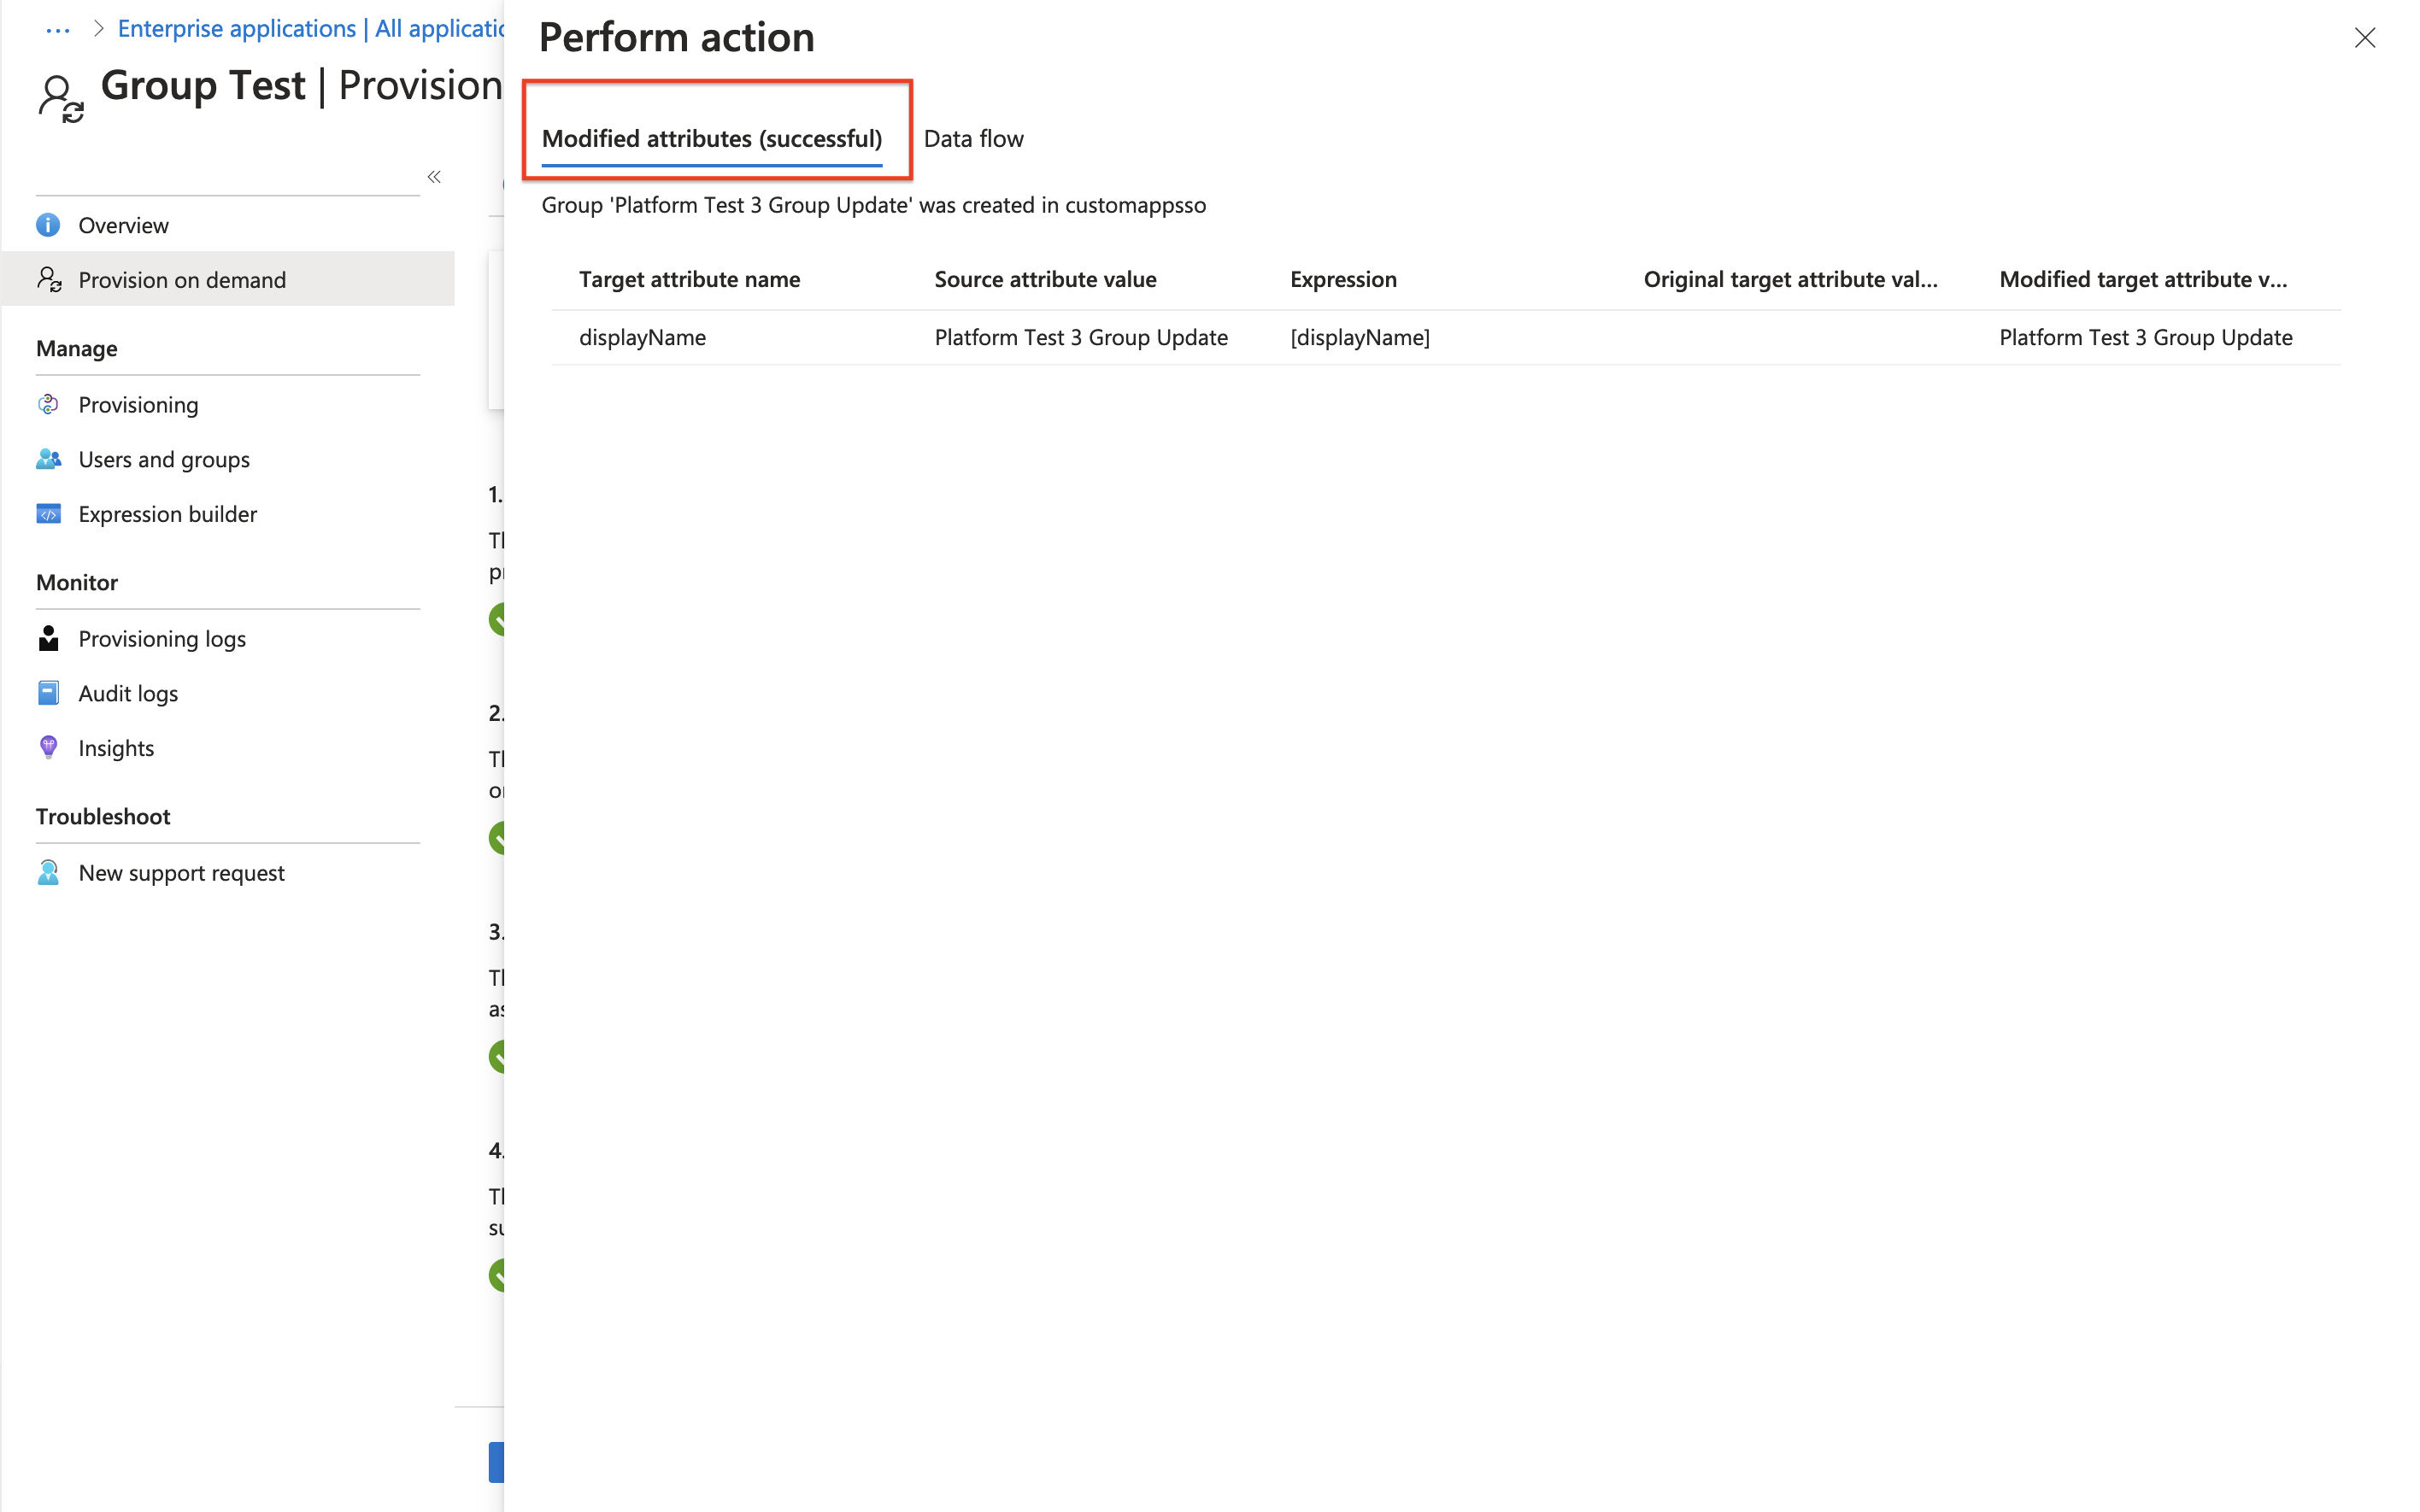
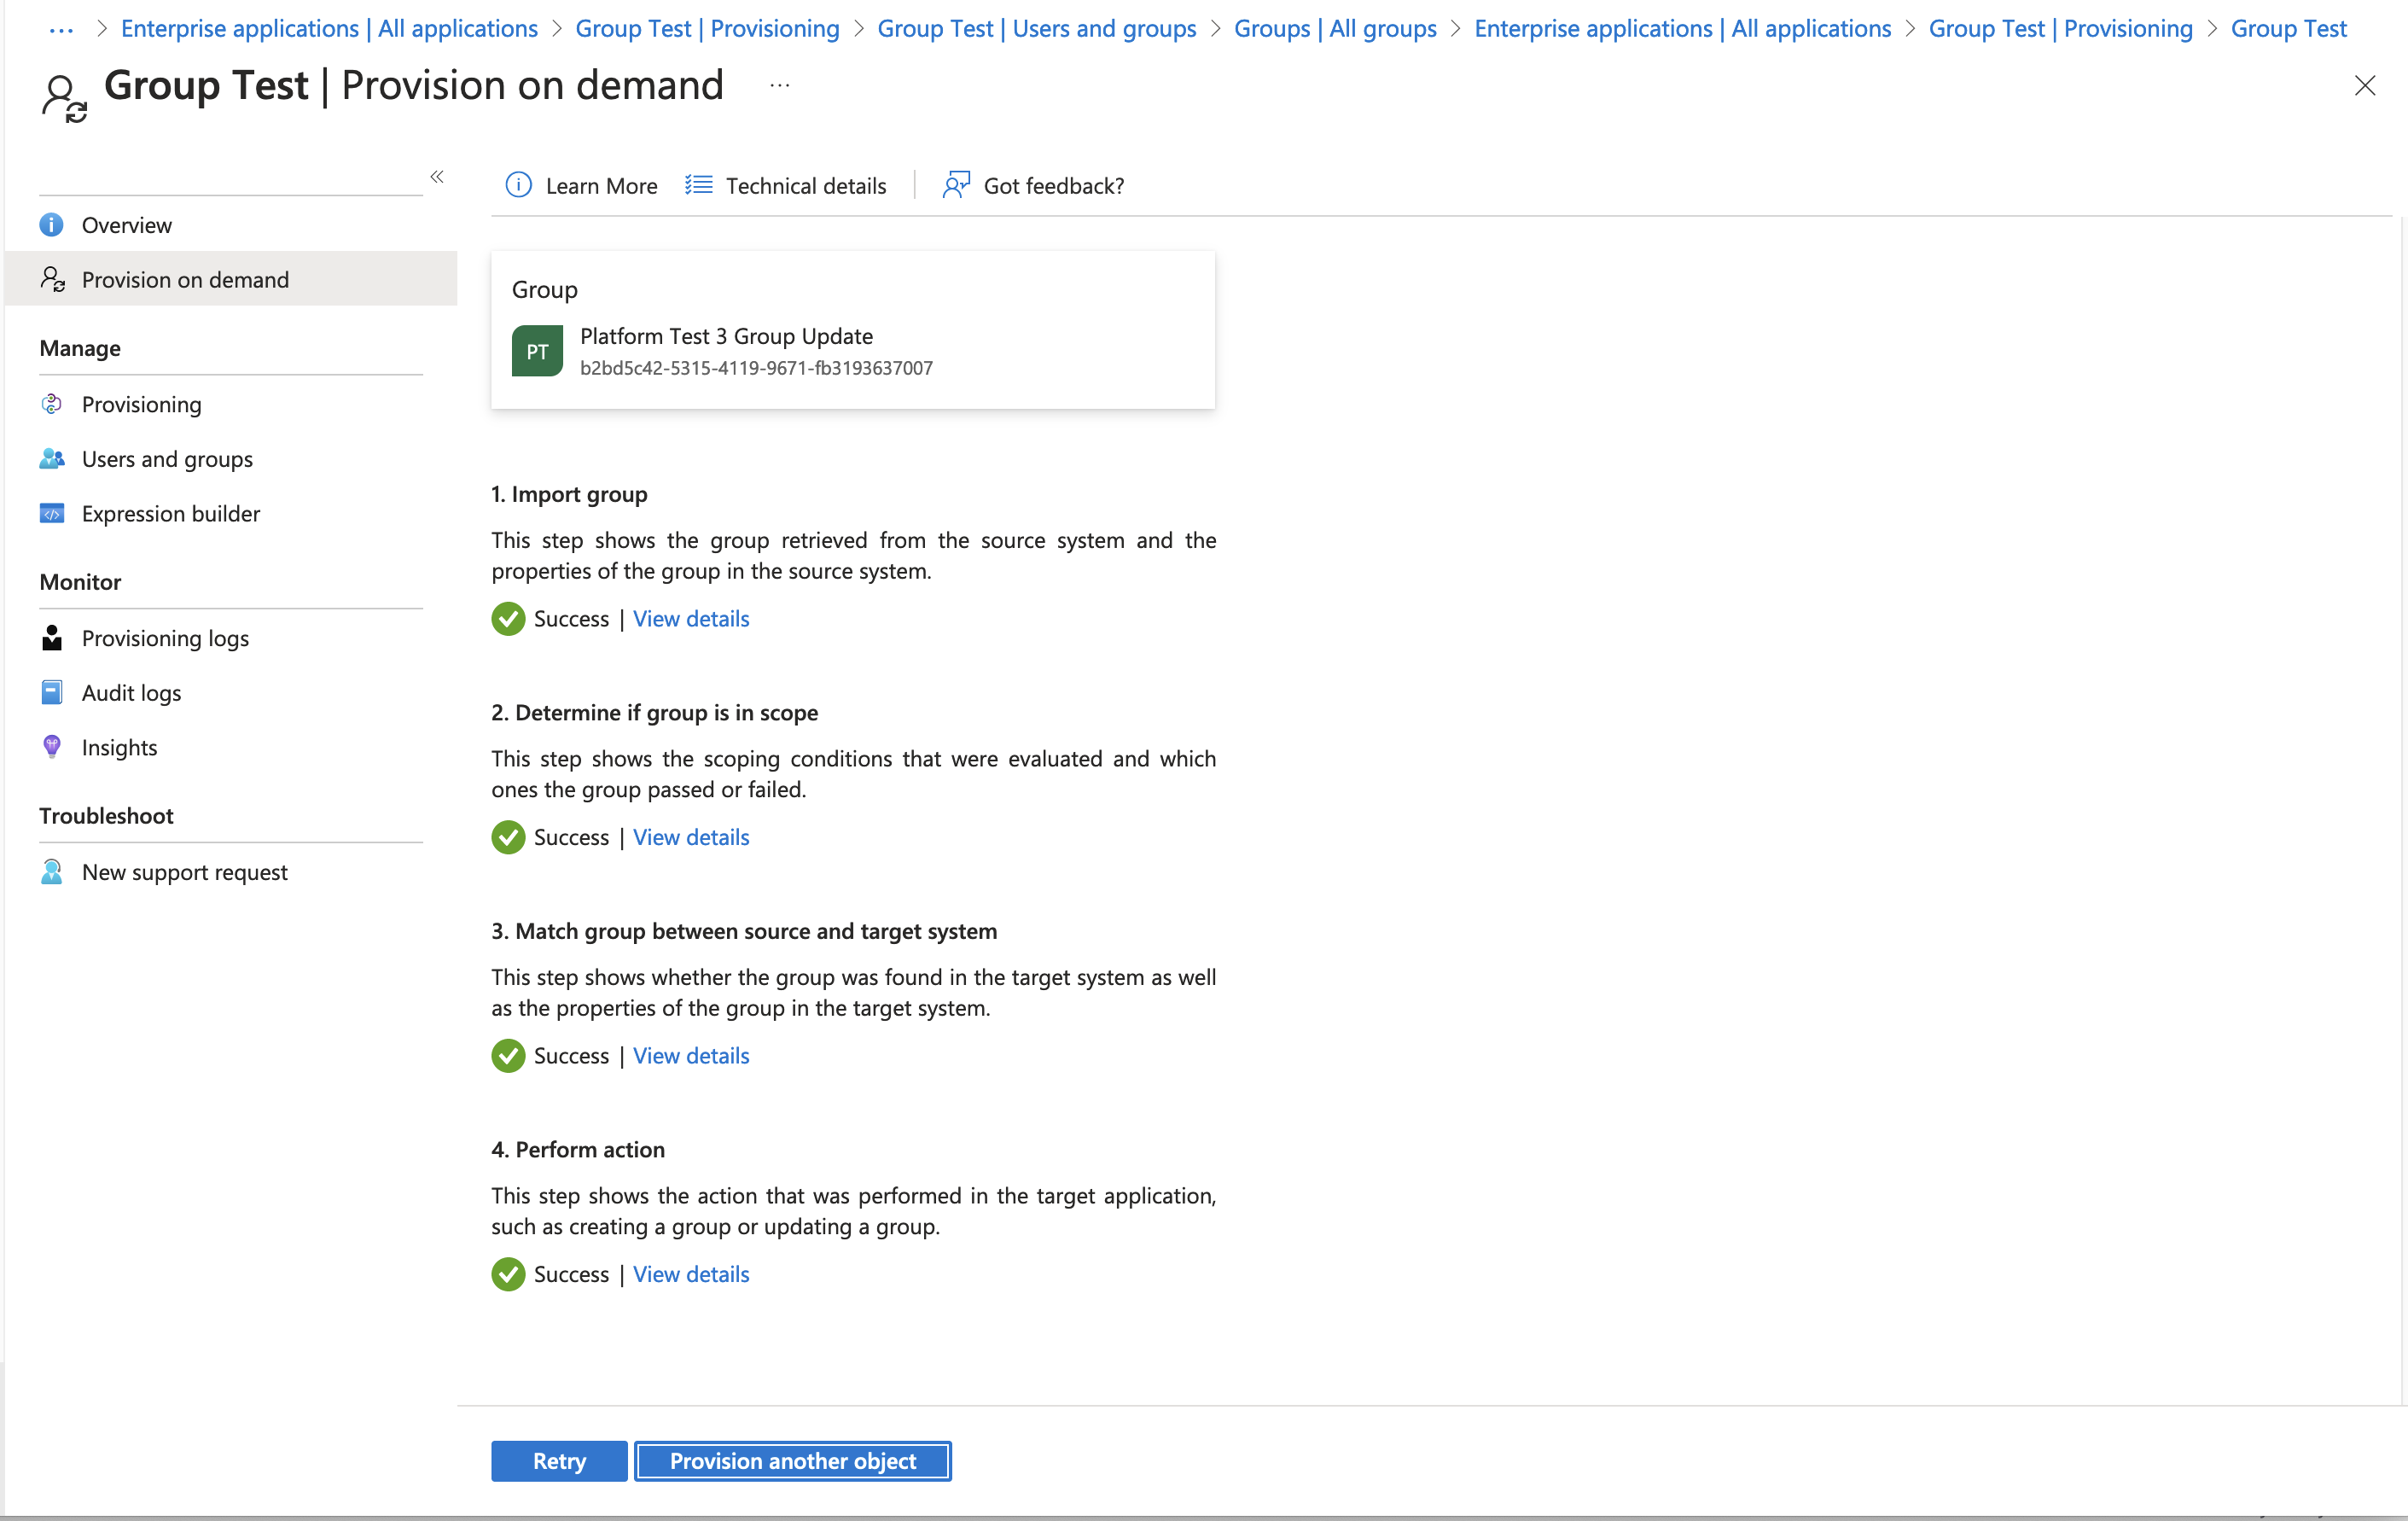
The group has been assigned to the application on Entra Id. Entra Id updates Alloy with these changes on a 40-minute fixed interval basis. Due to the secret token’s short lifespan (1hr), it's recommended to use the “**Provision on demand “**option when attempting to synchronize a small number of users or groups.

-
Provisioning on Demand. After clicking Provision, any changes made to the group's name will propagate to Alloy.
4. Verify the User and Groups created on the Alloy app
-
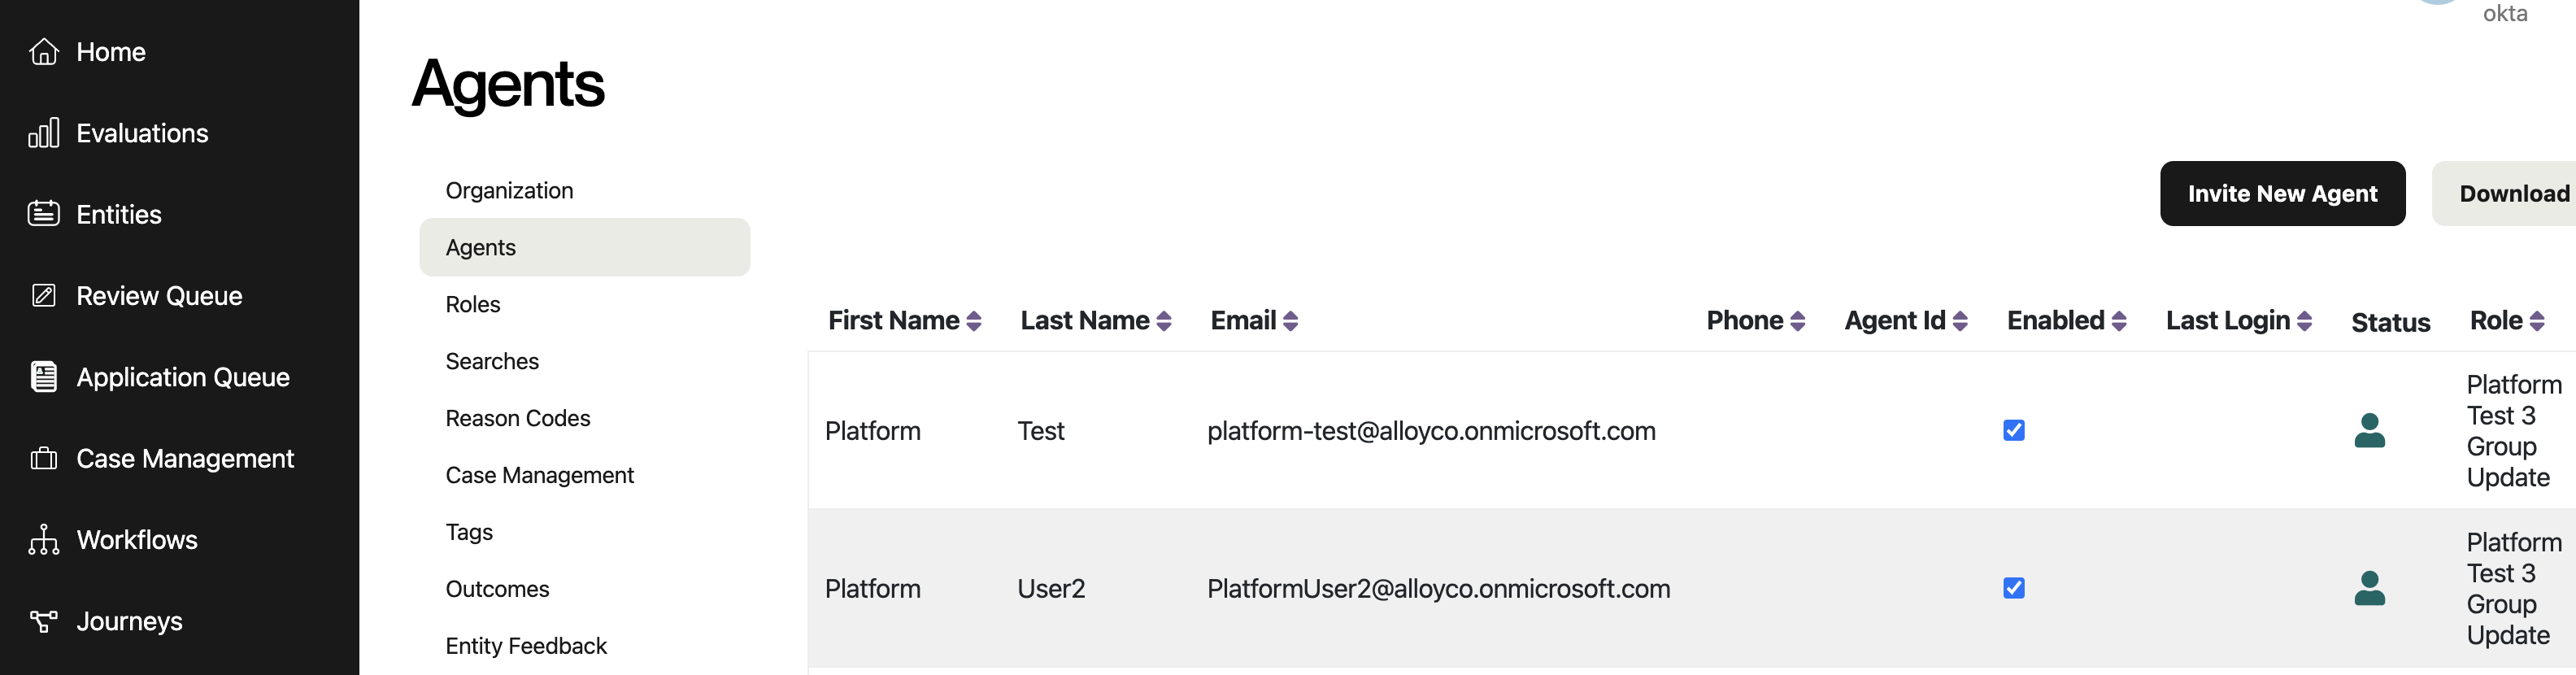
Login to the Alloy app. go to the settings, nav to Agents and Groups page. verify the user and group are added to the Alloy app
Updated 4 months ago