

Okta
This is a comprehensive step-step guide to set up SCIM with Okta
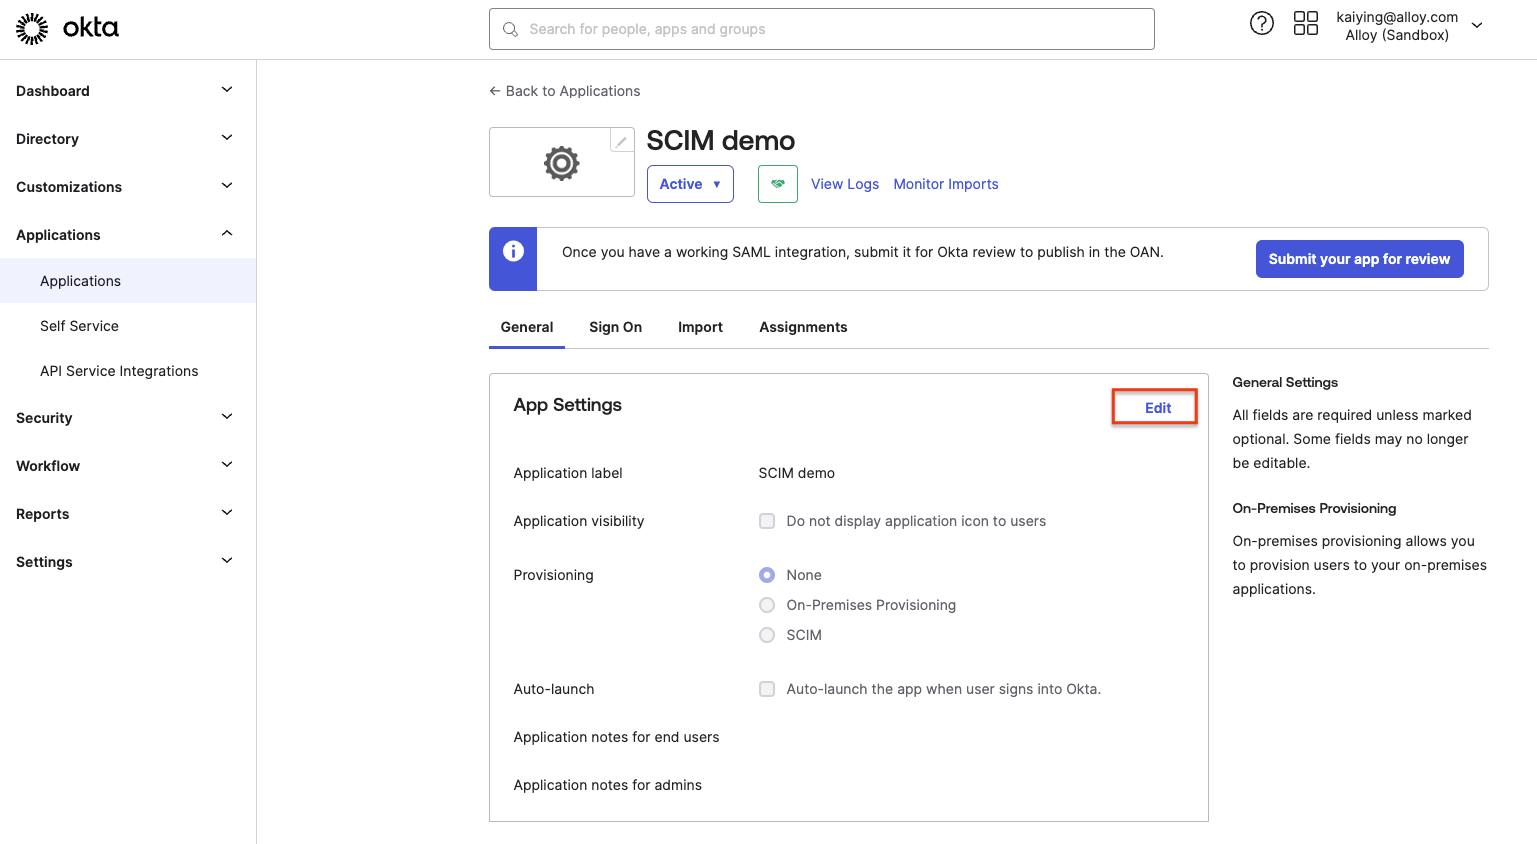
1. Enable SCIM
-
Open the application that is configured for the SAML in the Okta admin dashboard. click the edit.
-
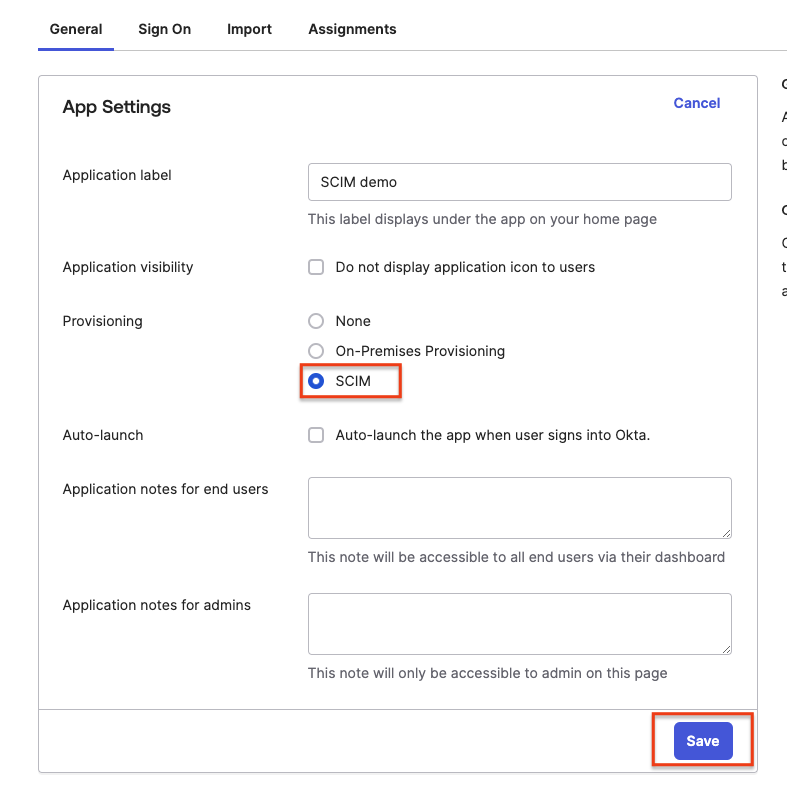
Toggle on the SCIM, and Save.
2. Add the SCIM Connector to Okta Settings
-
In the Provisioning tab, add
https://api.alloy.co/scim/v2in the SCIM connector base URL. and,emailto the Unique identifier field for users. Enable the actions you want in the “Supported provisioning actions”.
(Please note:💡 ”SCIM connector base URL” might differ for different environments.)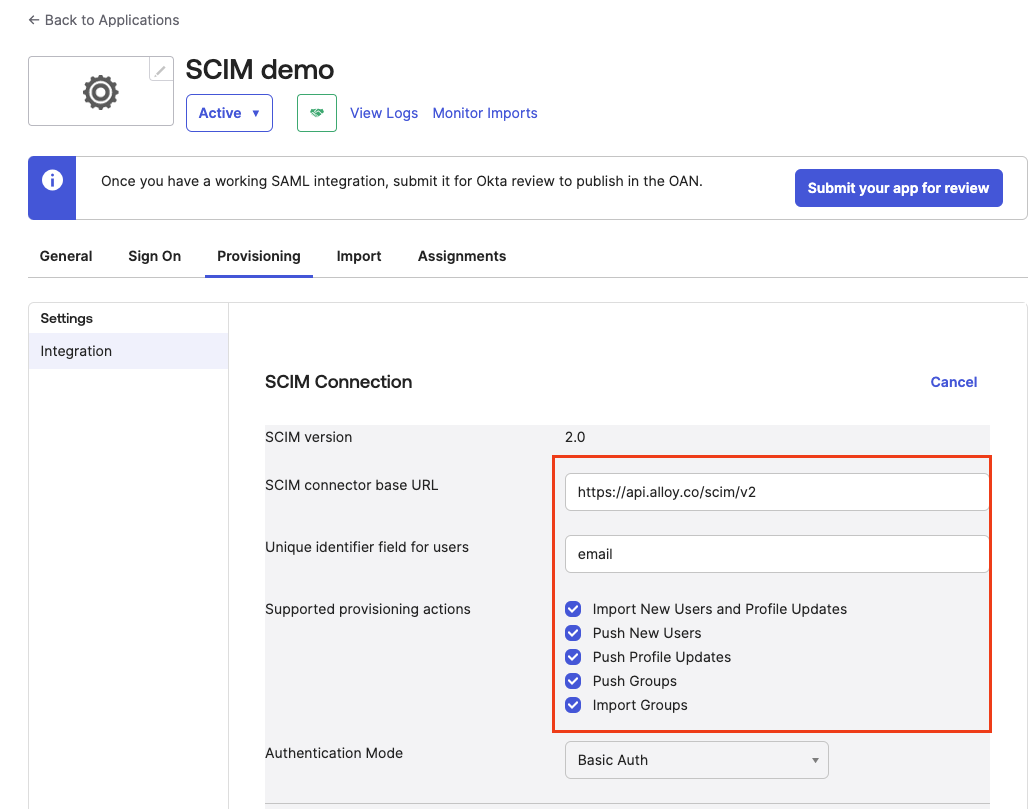
-
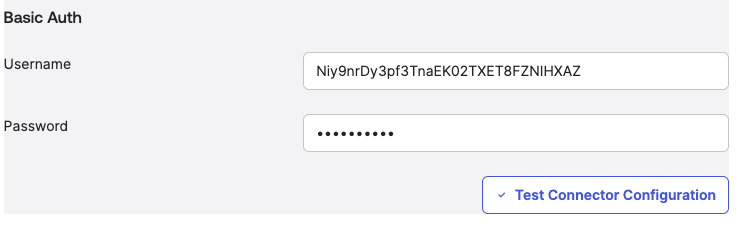
Add the Authentication. We only support “Basic auth“ currently. please reference to https://developer.alloy.com/public/docs/authentication-guide
-
For Basic Auth. use the workflow_token as Username and workflow_secret as password.
-
-
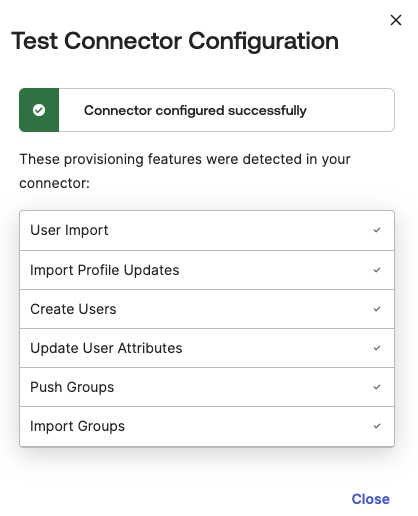
Click “Test Connector Configuration”, you should see the “Connector configured successfully” message
-
Save the integration changes.
-
Enable the “Create Users”, “Update User Attributes” and “Deactivate Users” in the “To App” tab. Based on the use case, customers can choose to enable/disable them.
(Please note:💡 The ”To App” tab will only show after saving the integration setting”)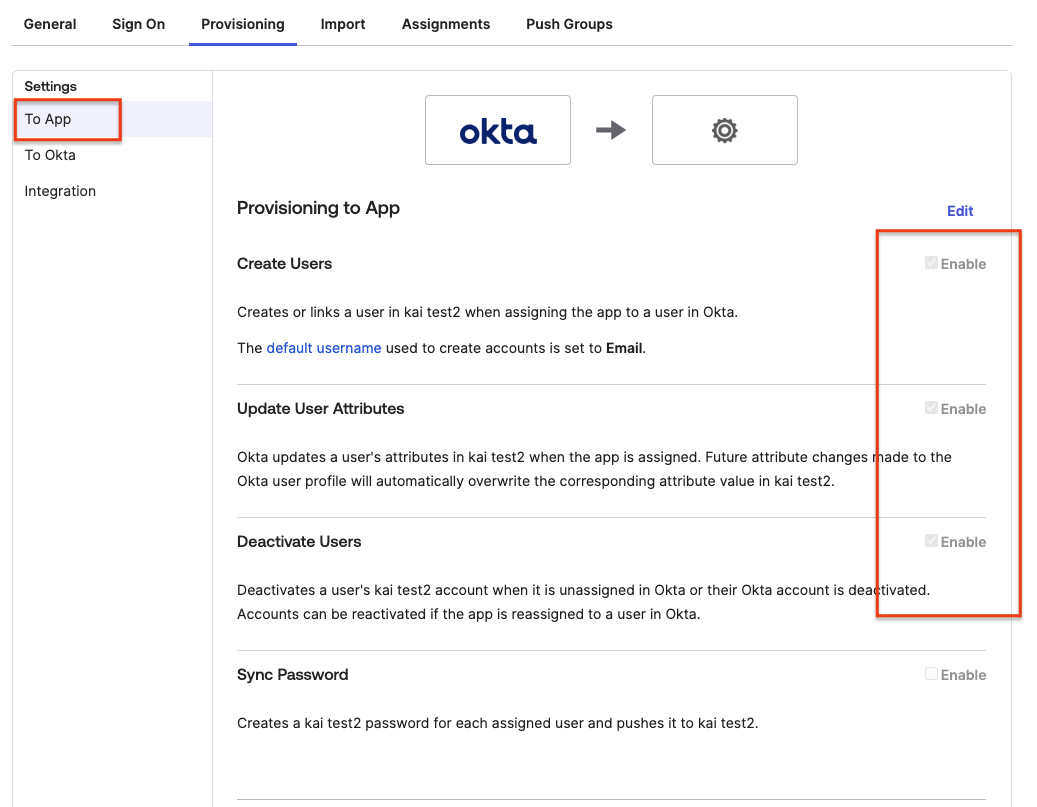
-
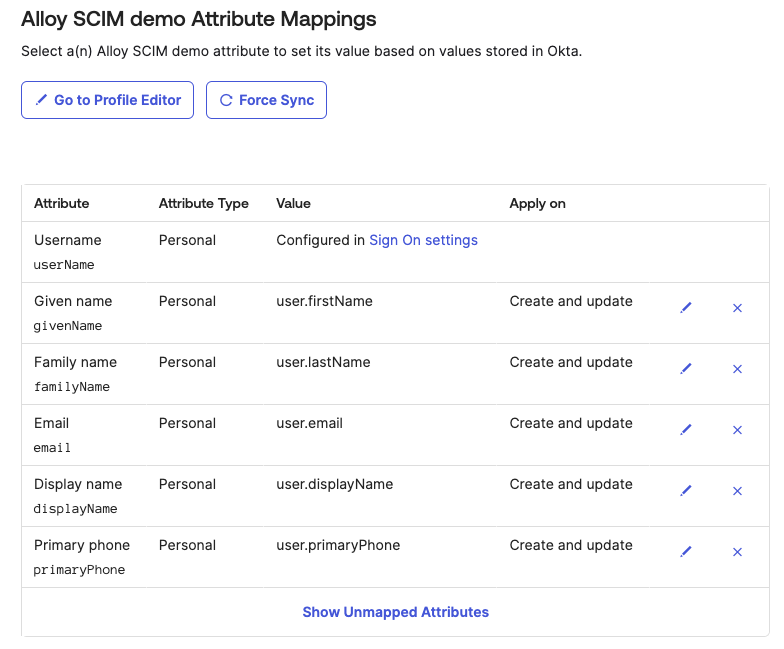
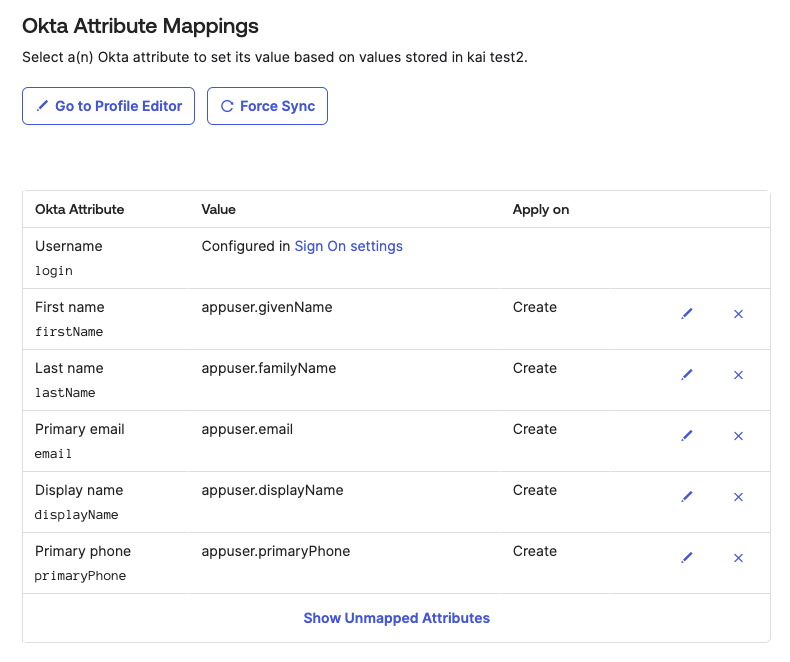
Remove useless Attribute Mappings in “To App”. we only need “username”, “Given name”, “Family name”, “Email”, Display name”, and “Primary phone”. ("Primary phone" is optional.)
- In the To Okta tab, make sure the Email Address is selected for Okta username format.
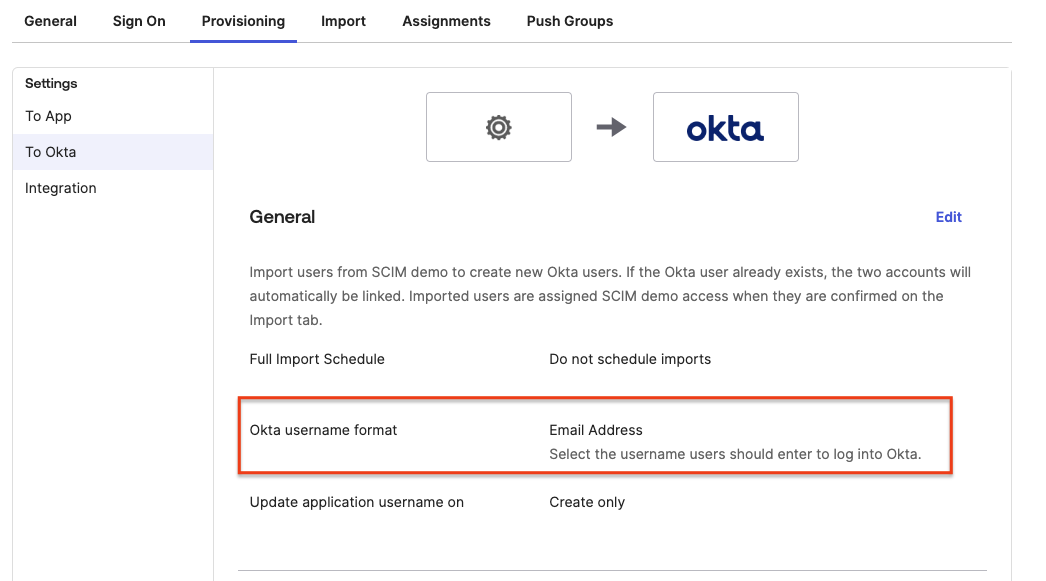
- (Optional) Remove useless Attribute Mapping in the “To Okta” tab.
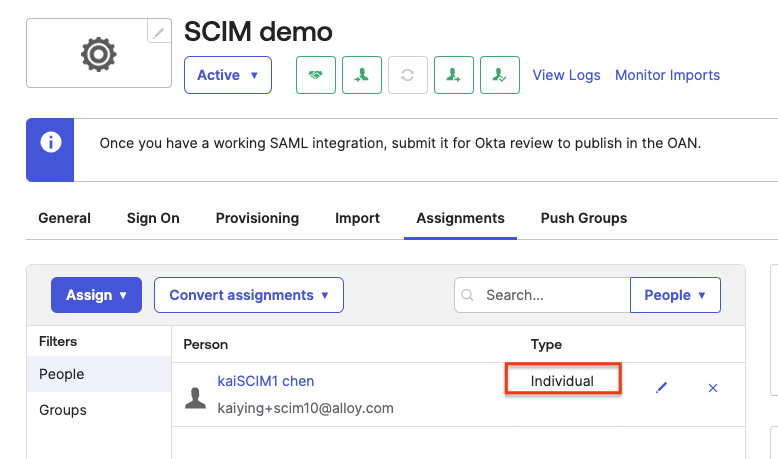
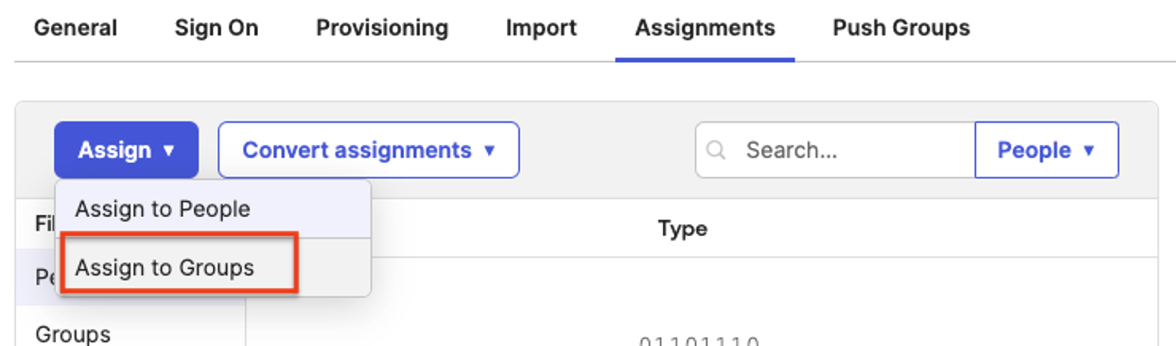
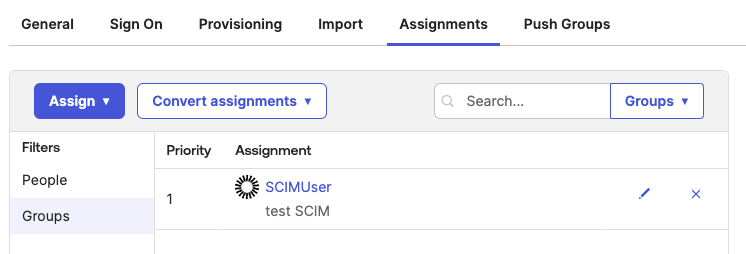
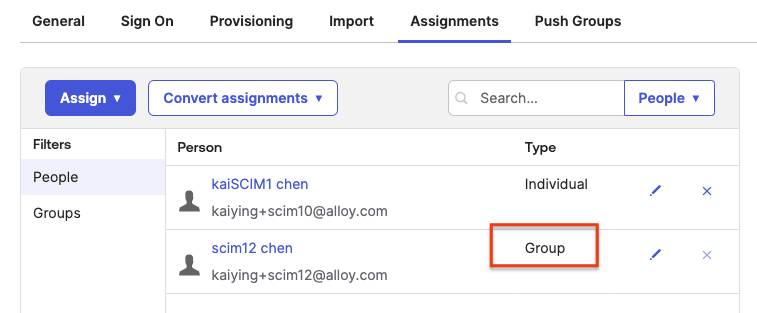
3. Assign the Okta user to the Alloy app.
- Assign by individual. It will push individual users to the alloy.
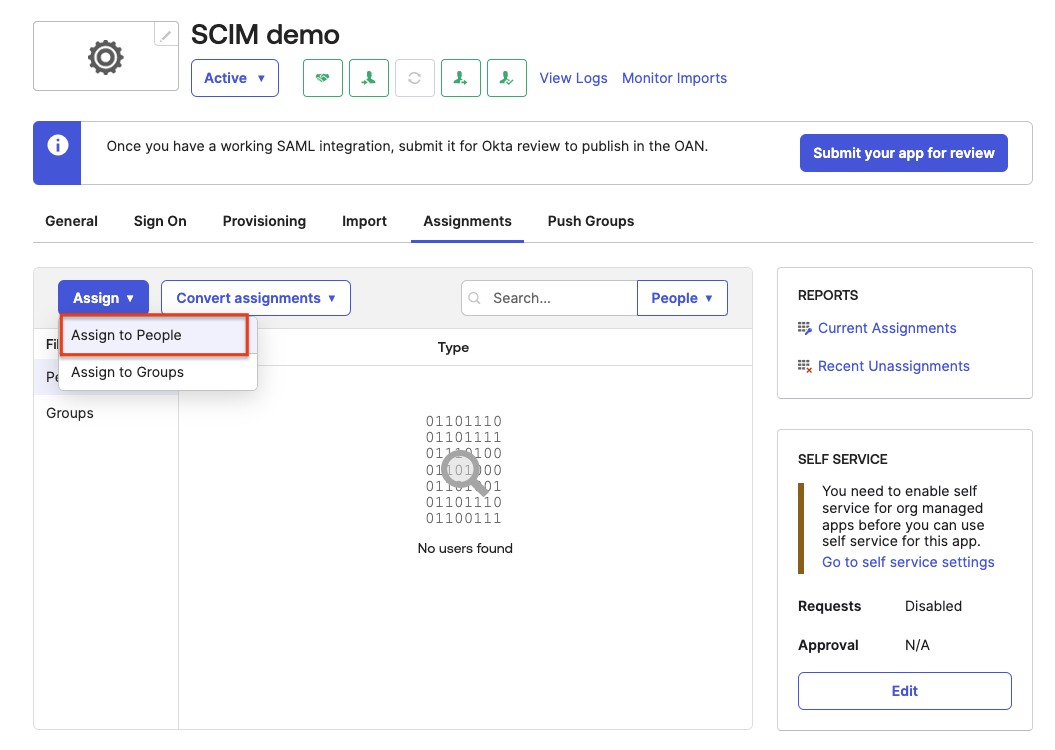
- Assign by Groups. It will push all the people in the group to the alloy.
(Please note:💡To assign a group to an existing role, make sure the group name exactly matches the role within Alloy. Any users assigned to that group will be provisioned into the corresponding Alloy role)
-
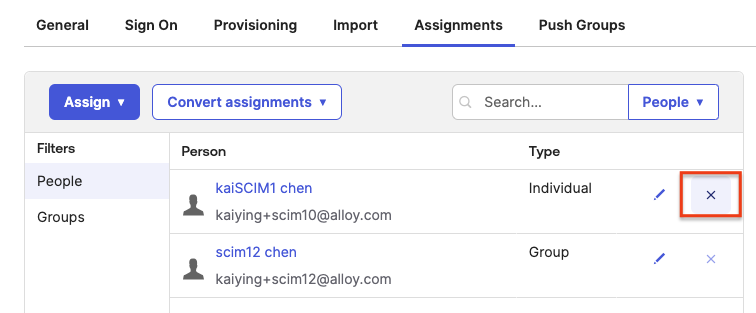
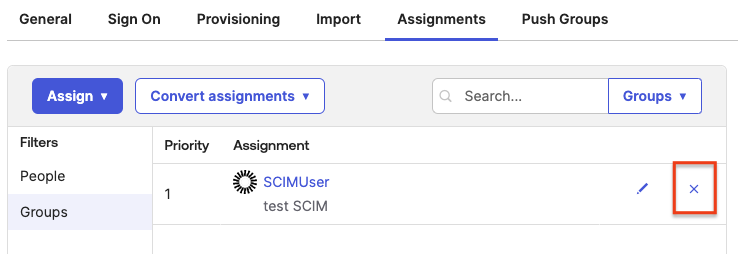
To remove the user
-
For added type individual, click the ‘X’ button on the “People” tab.
-
For added type Grop, click the ‘X’ button on the “Groups” tab. It will remove all the users in the groups from Alloy.
-
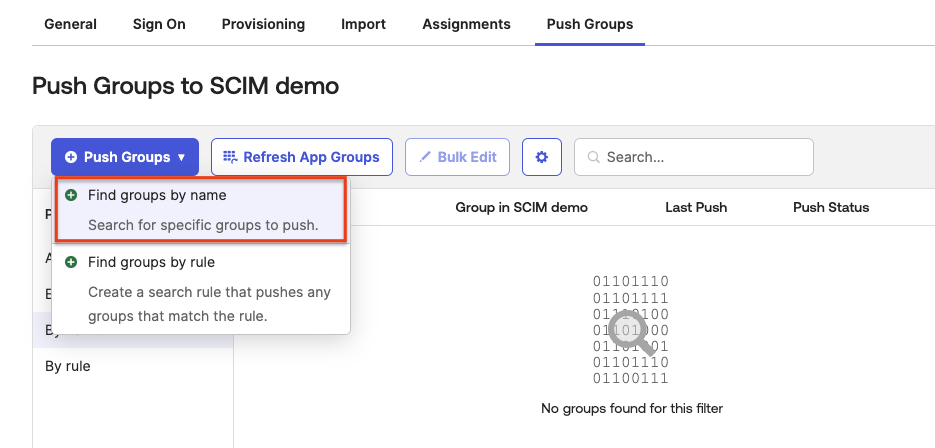
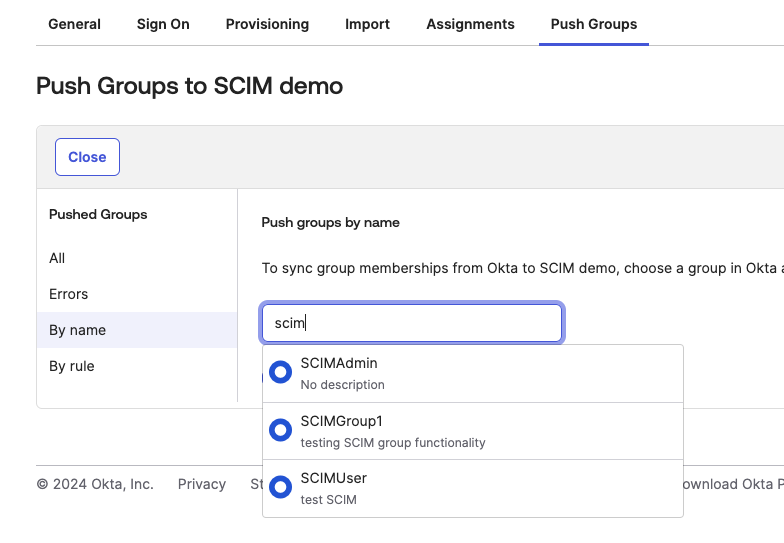
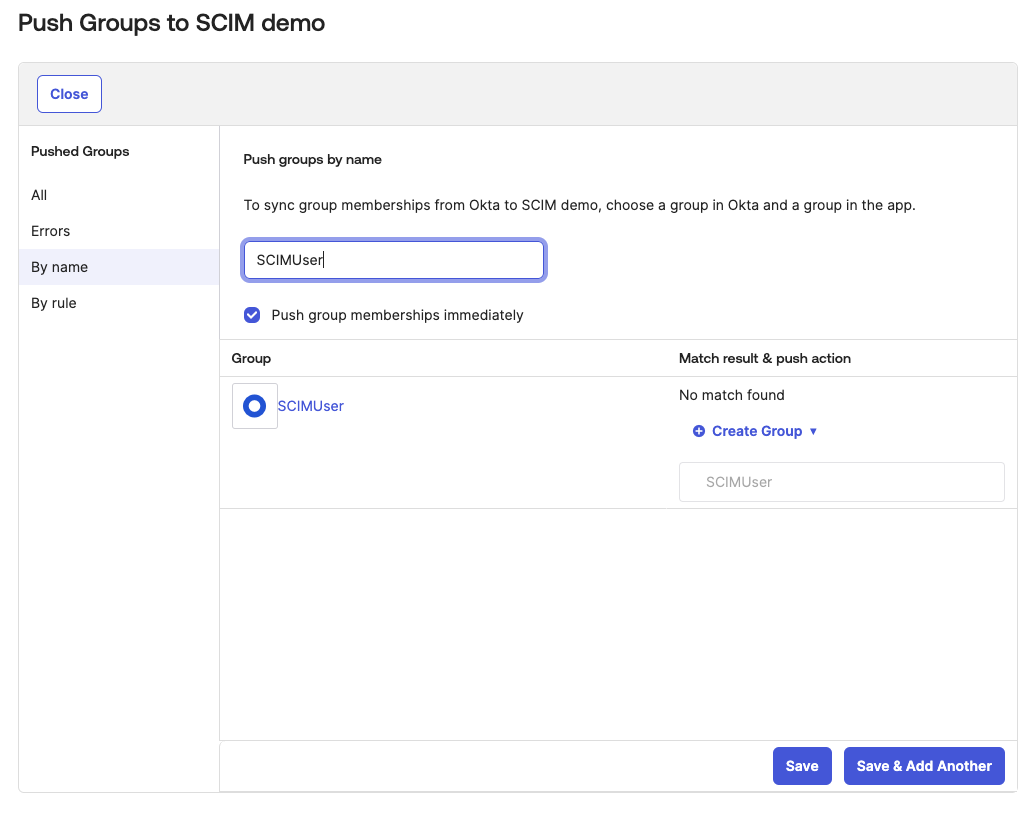
4. Push Okta Groups as Roles in Alloy
-
Push groups to the Alloy. The group is equivalent to the role in the Alloy. Push group will assign the role for the user which was pushed to the Alloy.
-
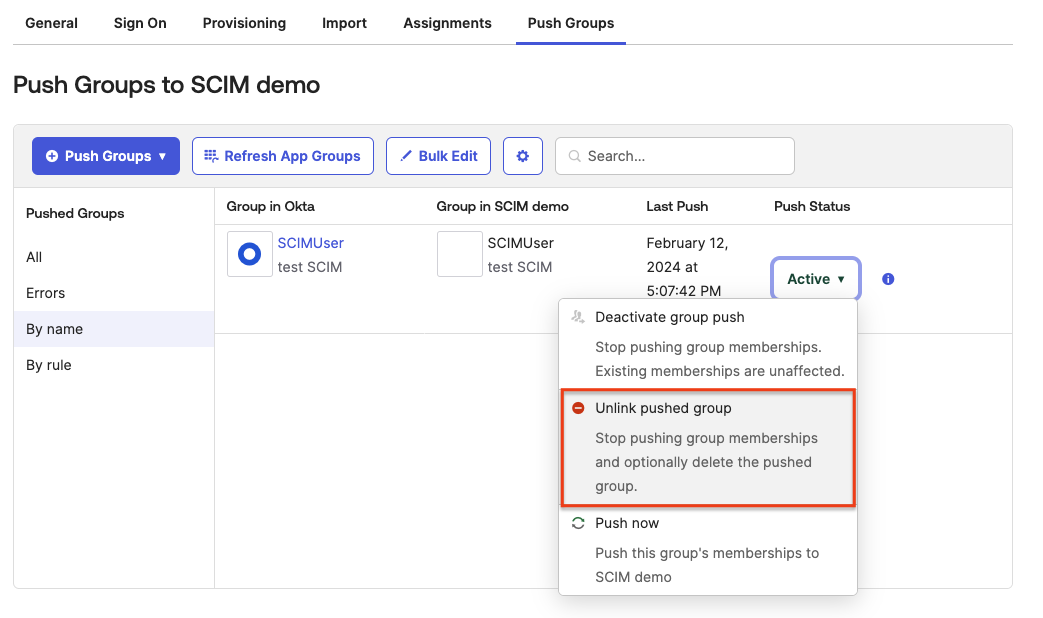
To remove the group(role), click the Unlink pushed group. it will remove the group(role) from the Alloy. and set the Empty role for the users who are in the group(role)
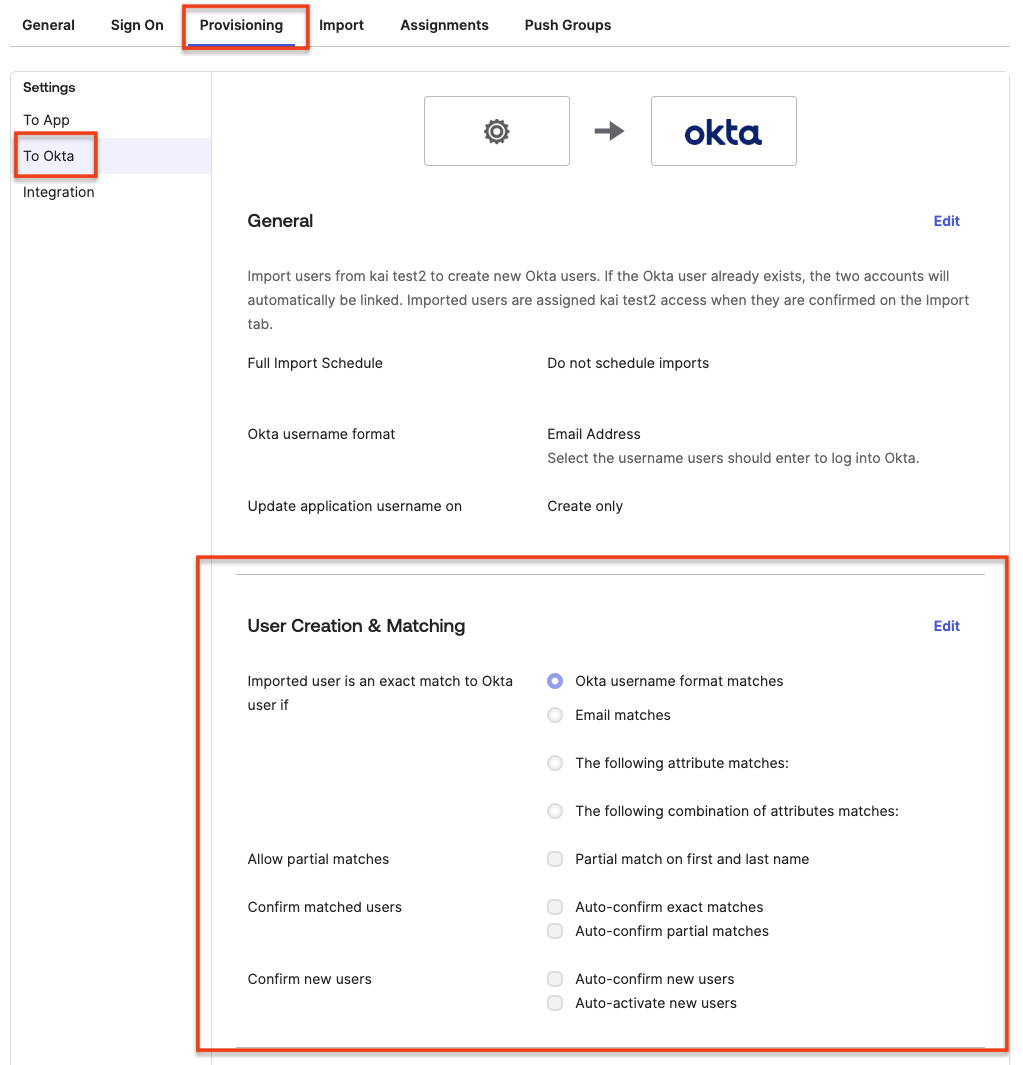
5. Import Alloy User and Groups to Okta (Optional)
-
Make sure to select the User Creation& Matching rule that matches to your use case in the Provisioning → To Okta tab.
-
Click Import Now in the Import tab.
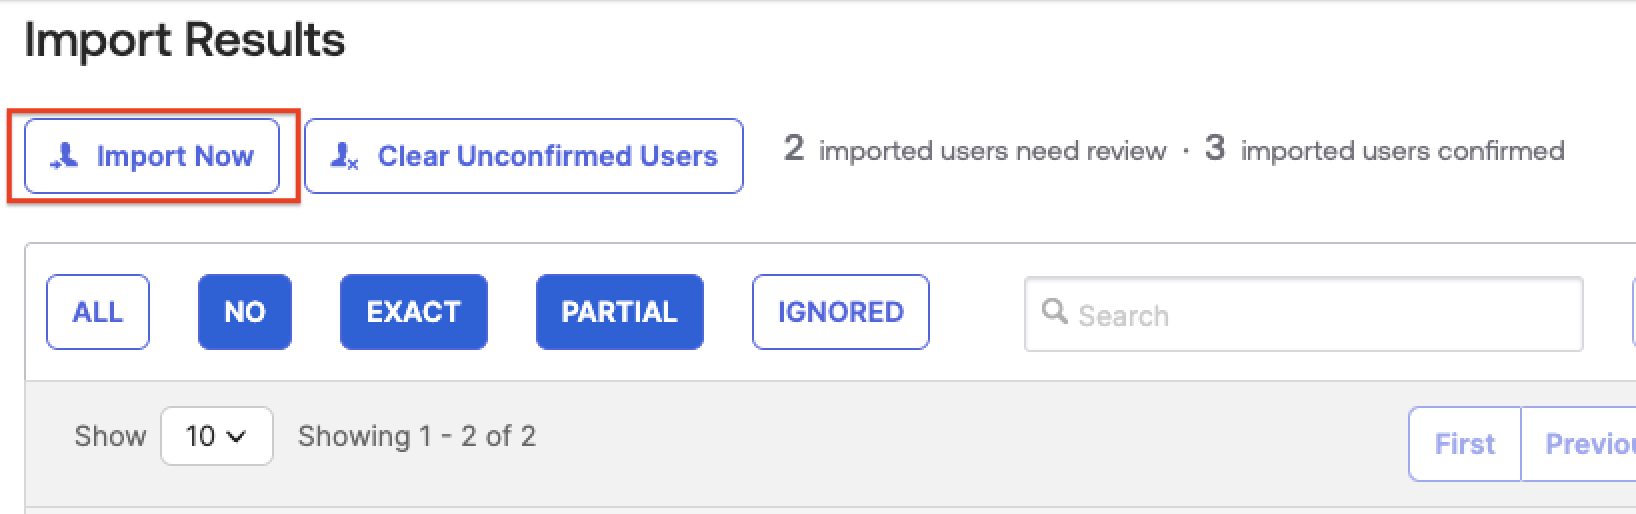
-
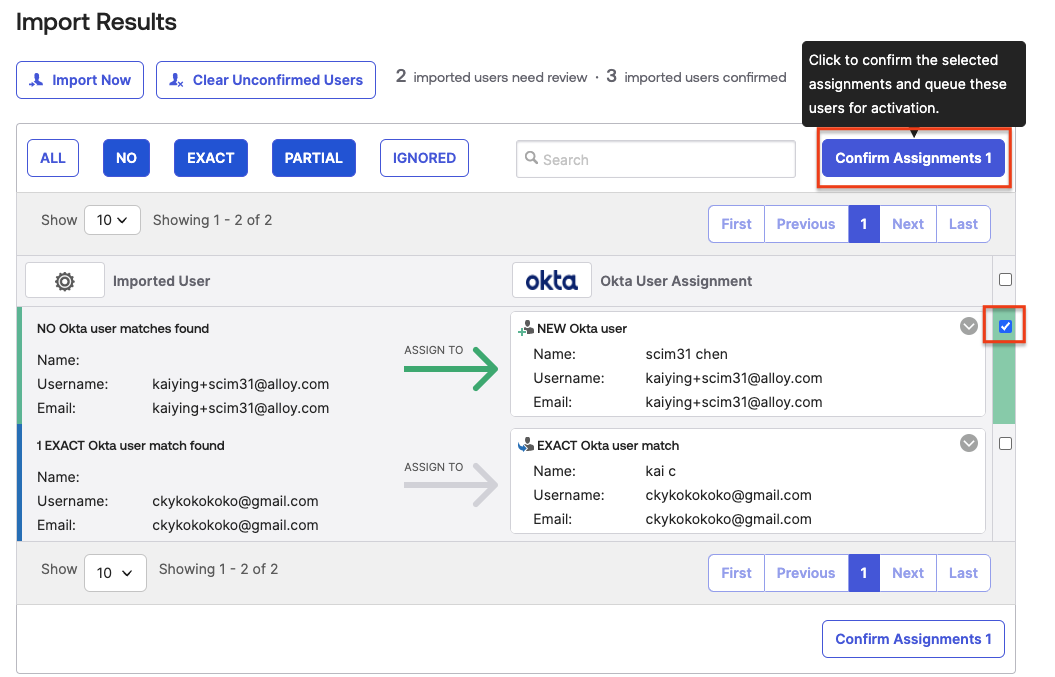
If auto-confirm was not selected, it will show all the match results for manual User assignment. Confirm the user assignment.
Updated 10 months ago