Configure SAML SSO (Deprecated)
Follow these instructions to connect Alloy to your Identity Provider (e.g. Okta, Onelogin, Google Auth, or other competitors) via SAML, allowing your users to seamlessly login in without creating or remembering a password for their Alloy accounts.
1. SAML Config Provided by Alloy
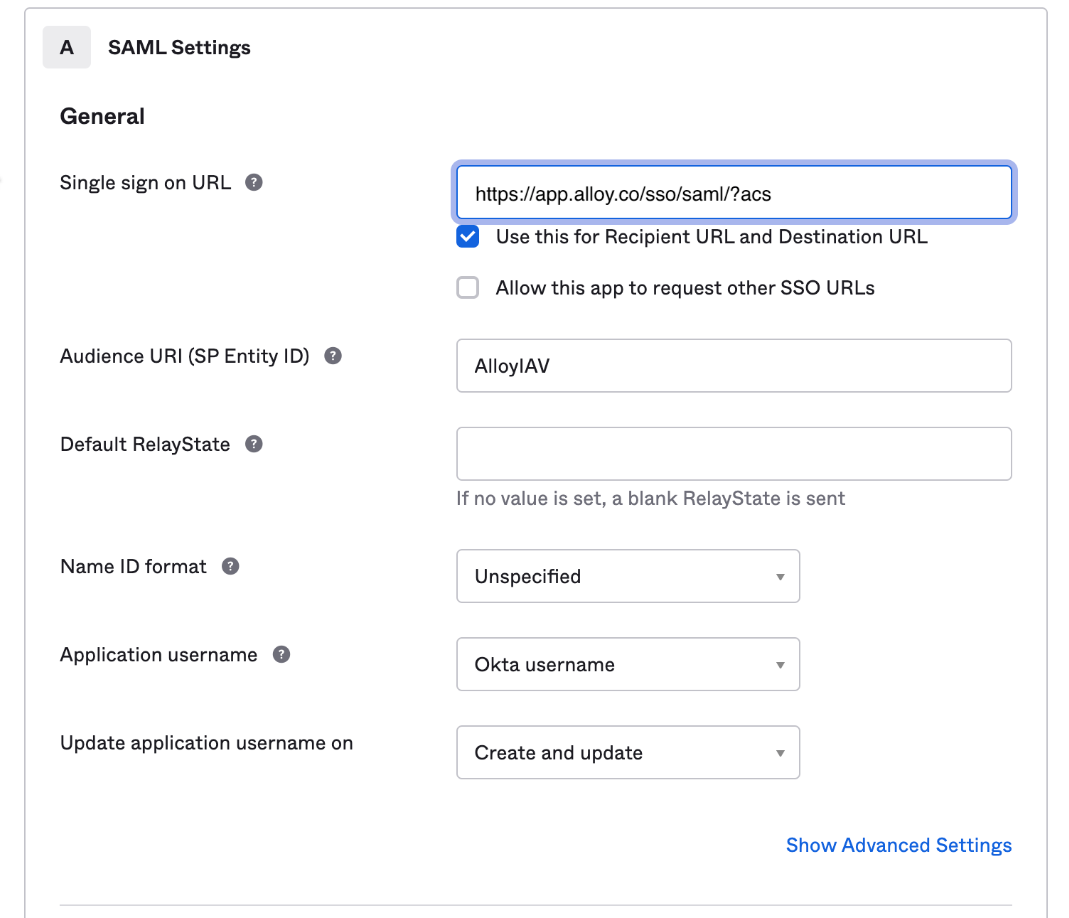
First, you will need to create a configuration for Alloy in your Identity Provider's dashboard. Usually, this is called an "application" or "integration," depending on the identity provider in question. The screenshots below will be using Okta as an example.
- Single sign on URL:
https://app.alloy.co/sso/saml/?acs - Audience URI (also called "SP Entity ID" / "Service Provider Entity ID"):
AlloyIAV - Default RelayState: Leave field blank
- Name ID format:
Unspecifiedis fine.
2. Attribute Statements
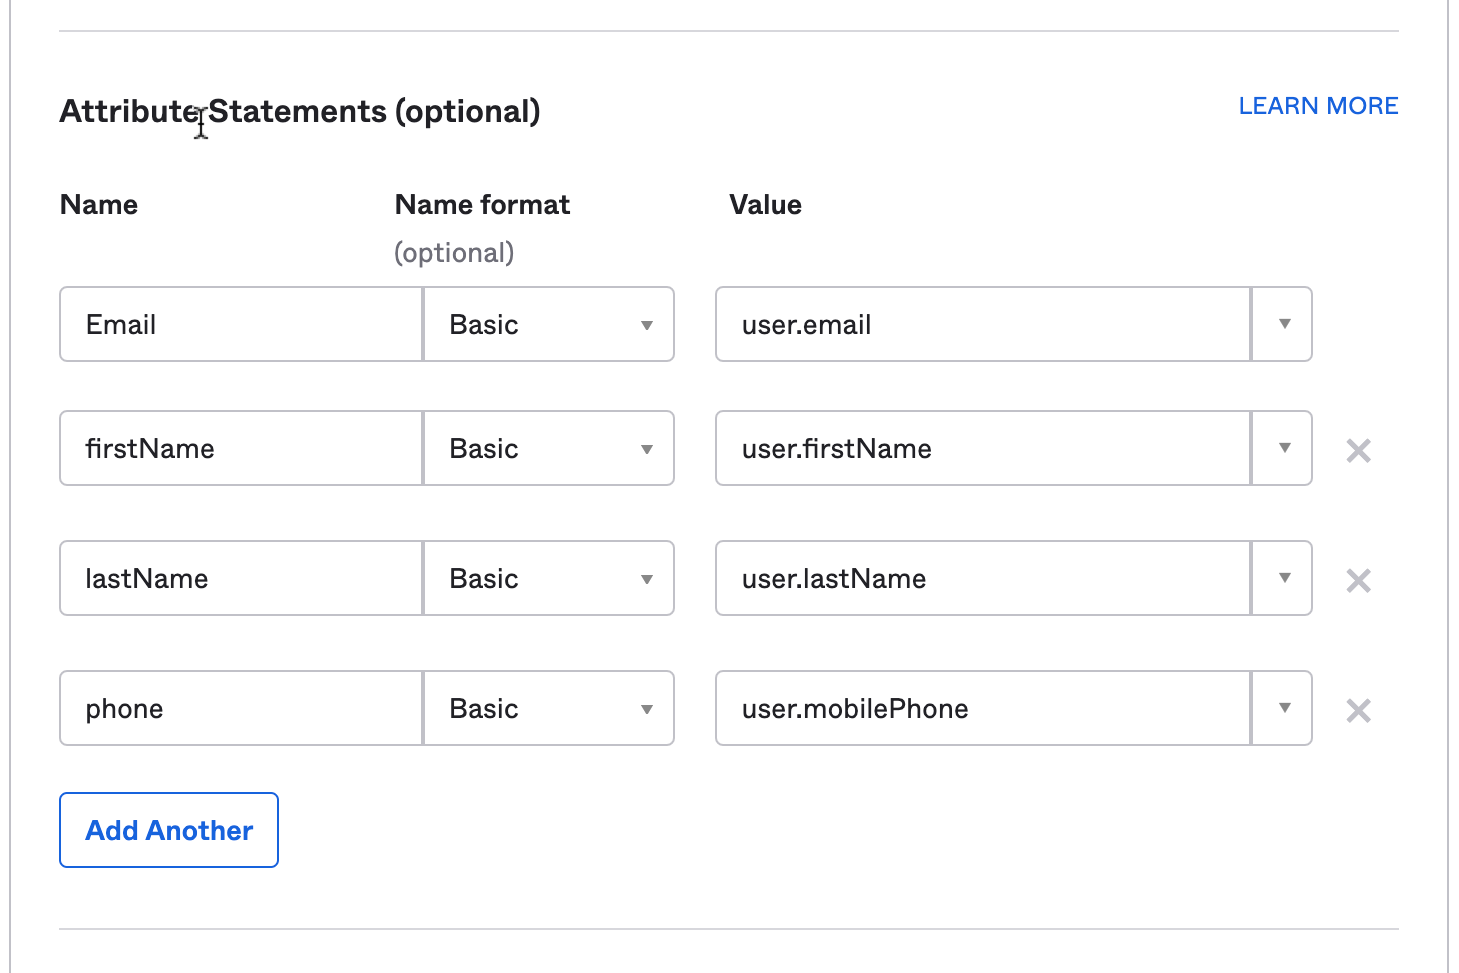
It is critical to configure the Identity Provider to map the user's email address, first name, last name, and phone number to attributes with these exact names (case sensitive):
(Please note: theValue field may vary depending on the Identity Provider. Those shown below are sample values using Okta as reference.)
Email: User's email address - in Okta:user.emailfirstName: User's first name - in Okta:user.firstNamelastName: User's last name - in Okta:user.lastNamephone: User's phone number - in Okta:user.mobilePhone
💡 IMPORTANT: Be certain that all of your user's have a phone number set up in their identity provider account. Not all IdPs require a phone number for account creation - for instance, Okta does not require this by default. If a particular user does not have a phone number set up, they will NOT be able to log in with SAML.
3. Providing IdP Metadata to Alloy
Once you have completed all the SAML fields and created an integration for Alloy, you will need to extract the Identity Provider Metadata XML document which has the configured SAML fields so that we can securely verify login requests coming from your identity provider. Once downloaded, you can send our Support team this XML file, and we will extract the information we need to enable SAML-based authentication for your organization.
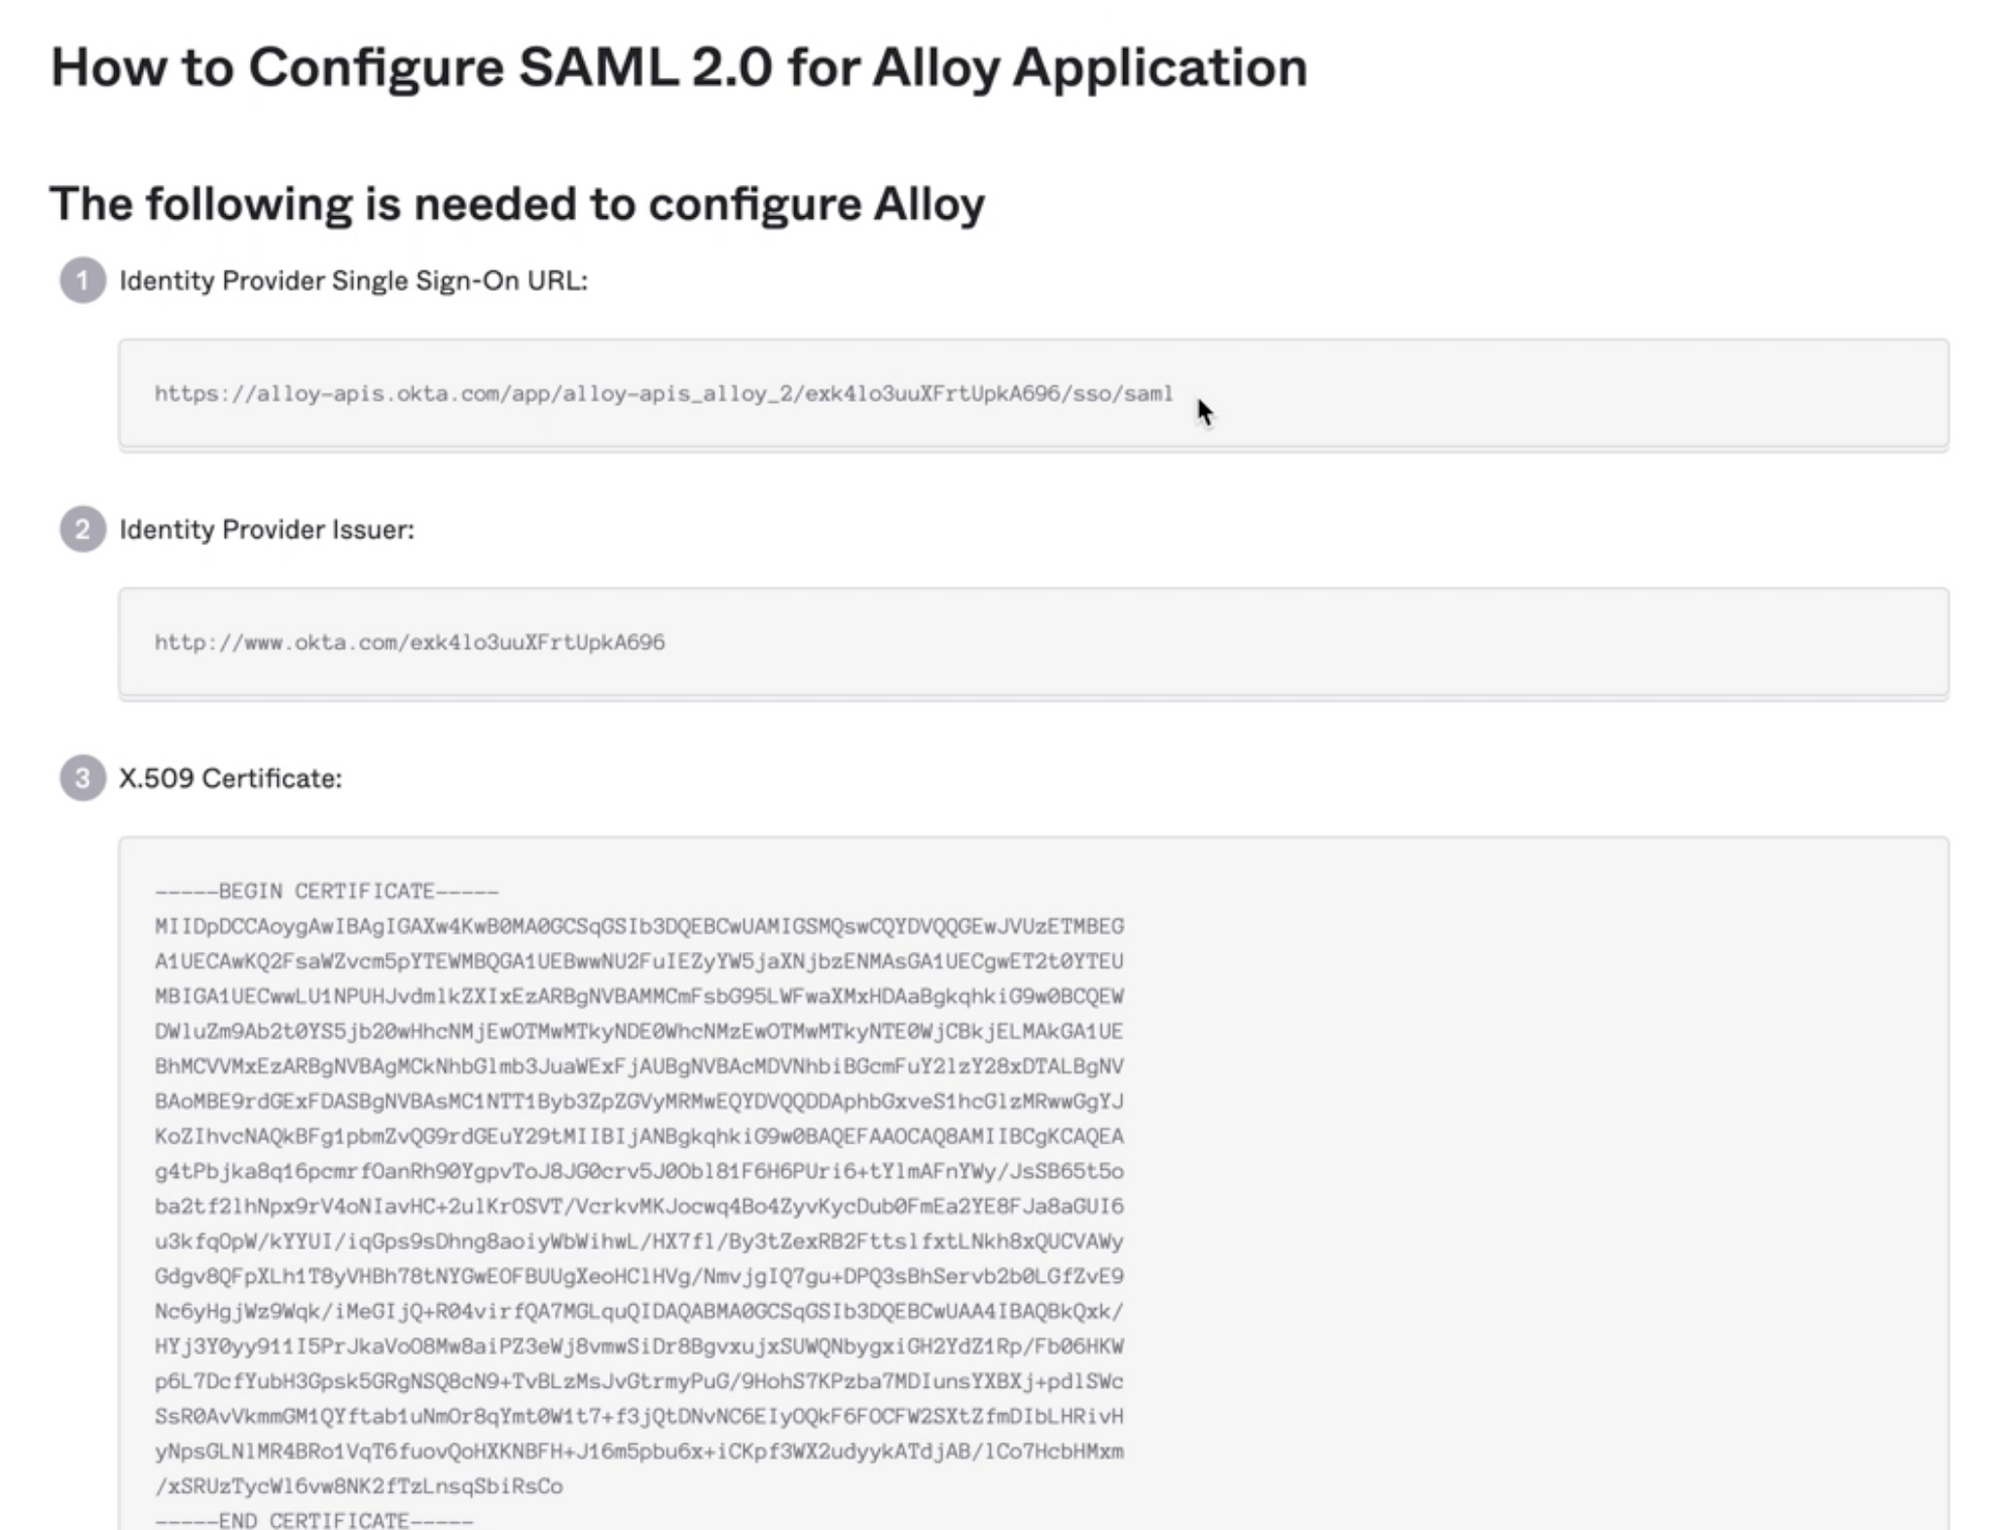
The IdP metadata fields as shown in Okta.
4. Configuring a Default Role
Before you can use SAML, you must configure a default role for your users in the Alloy settings. This role will determine the permissions that your user has when they first log in.
The first time a user logs in using SAML SSO, they will be added to the Alloy system as an "Agent", and will be given this default role. Agents with Admin permission can then go in and assign them a different role, if they need additional privileges.
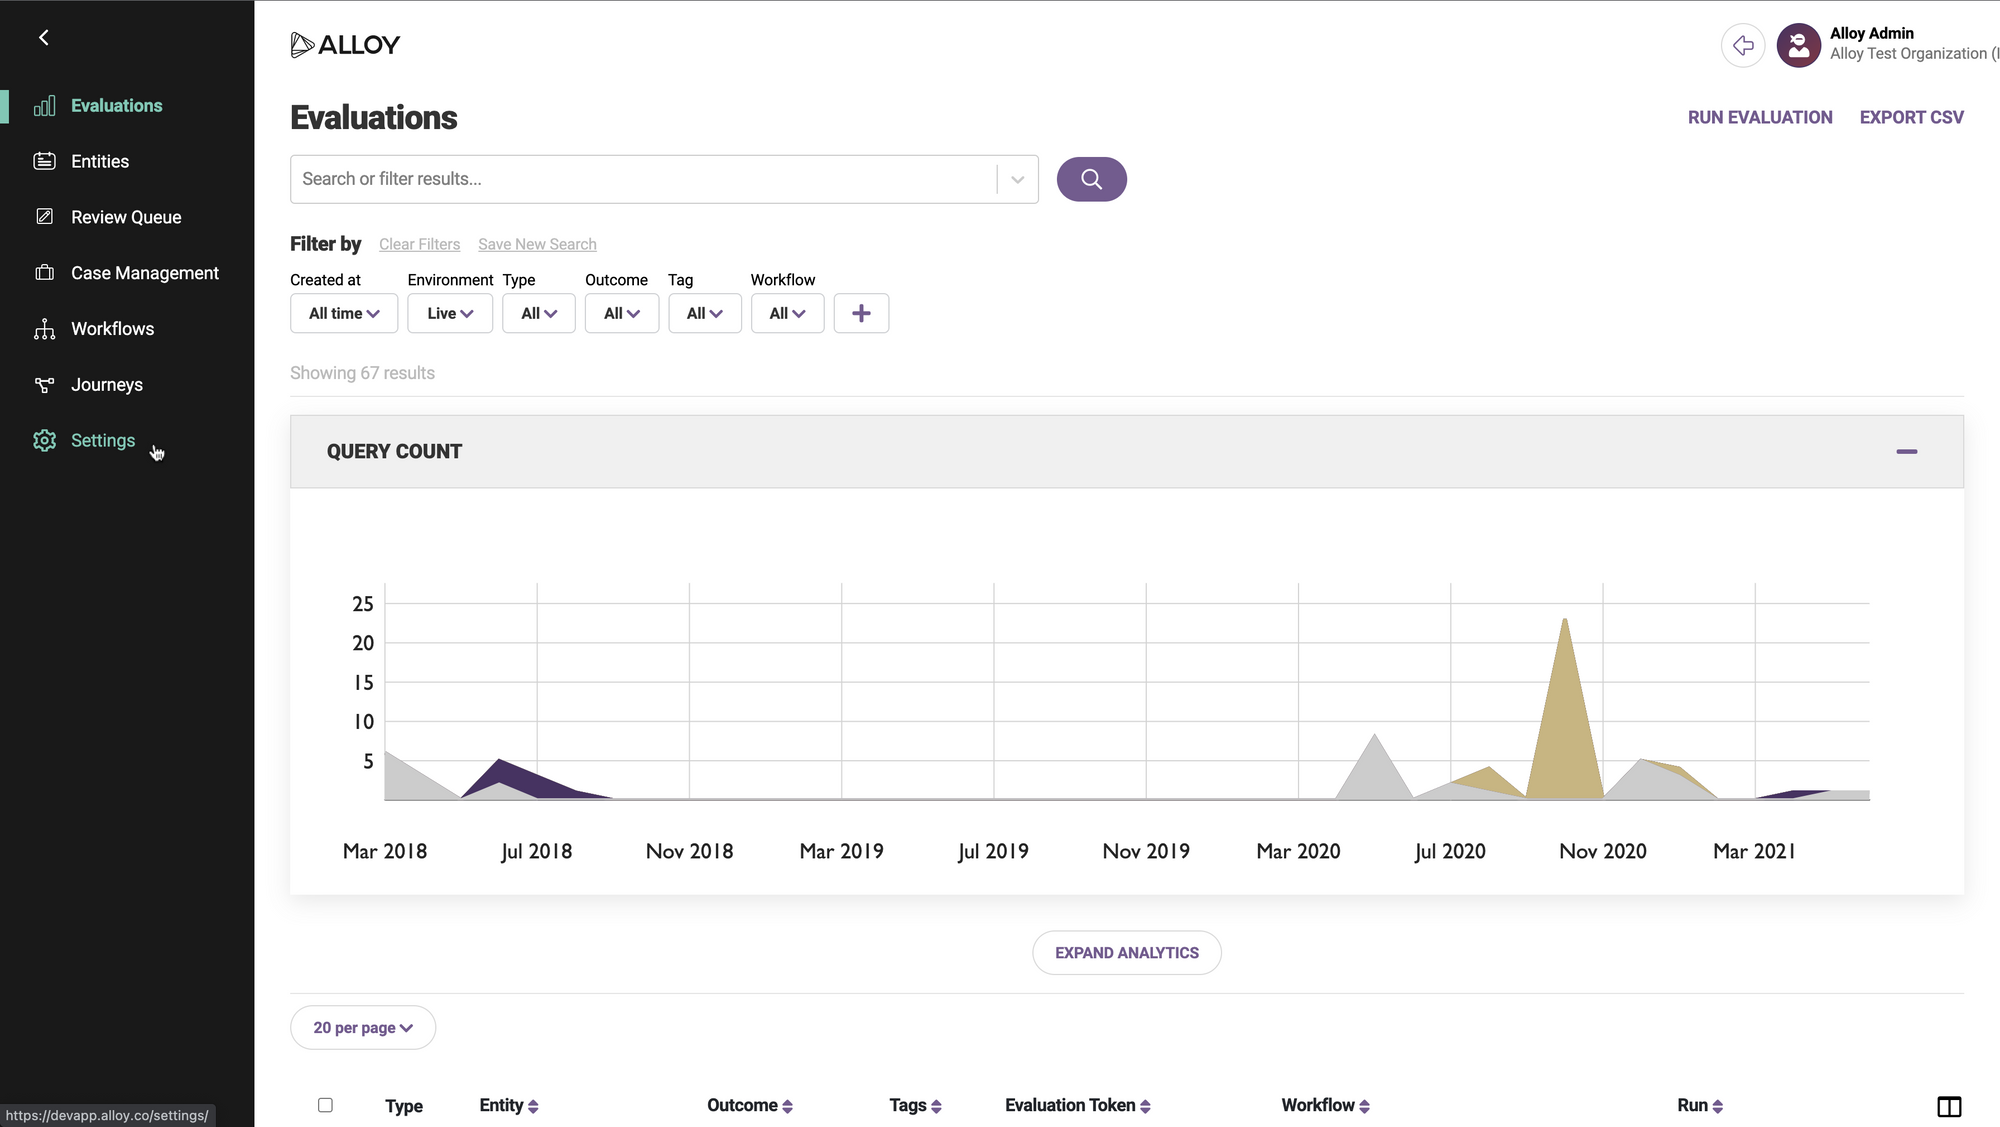
Be sure that you have Admin permission in Alloy, and log in to your dashboard.
Navigate to Settings in the sidebar, and then select Roles from the list.
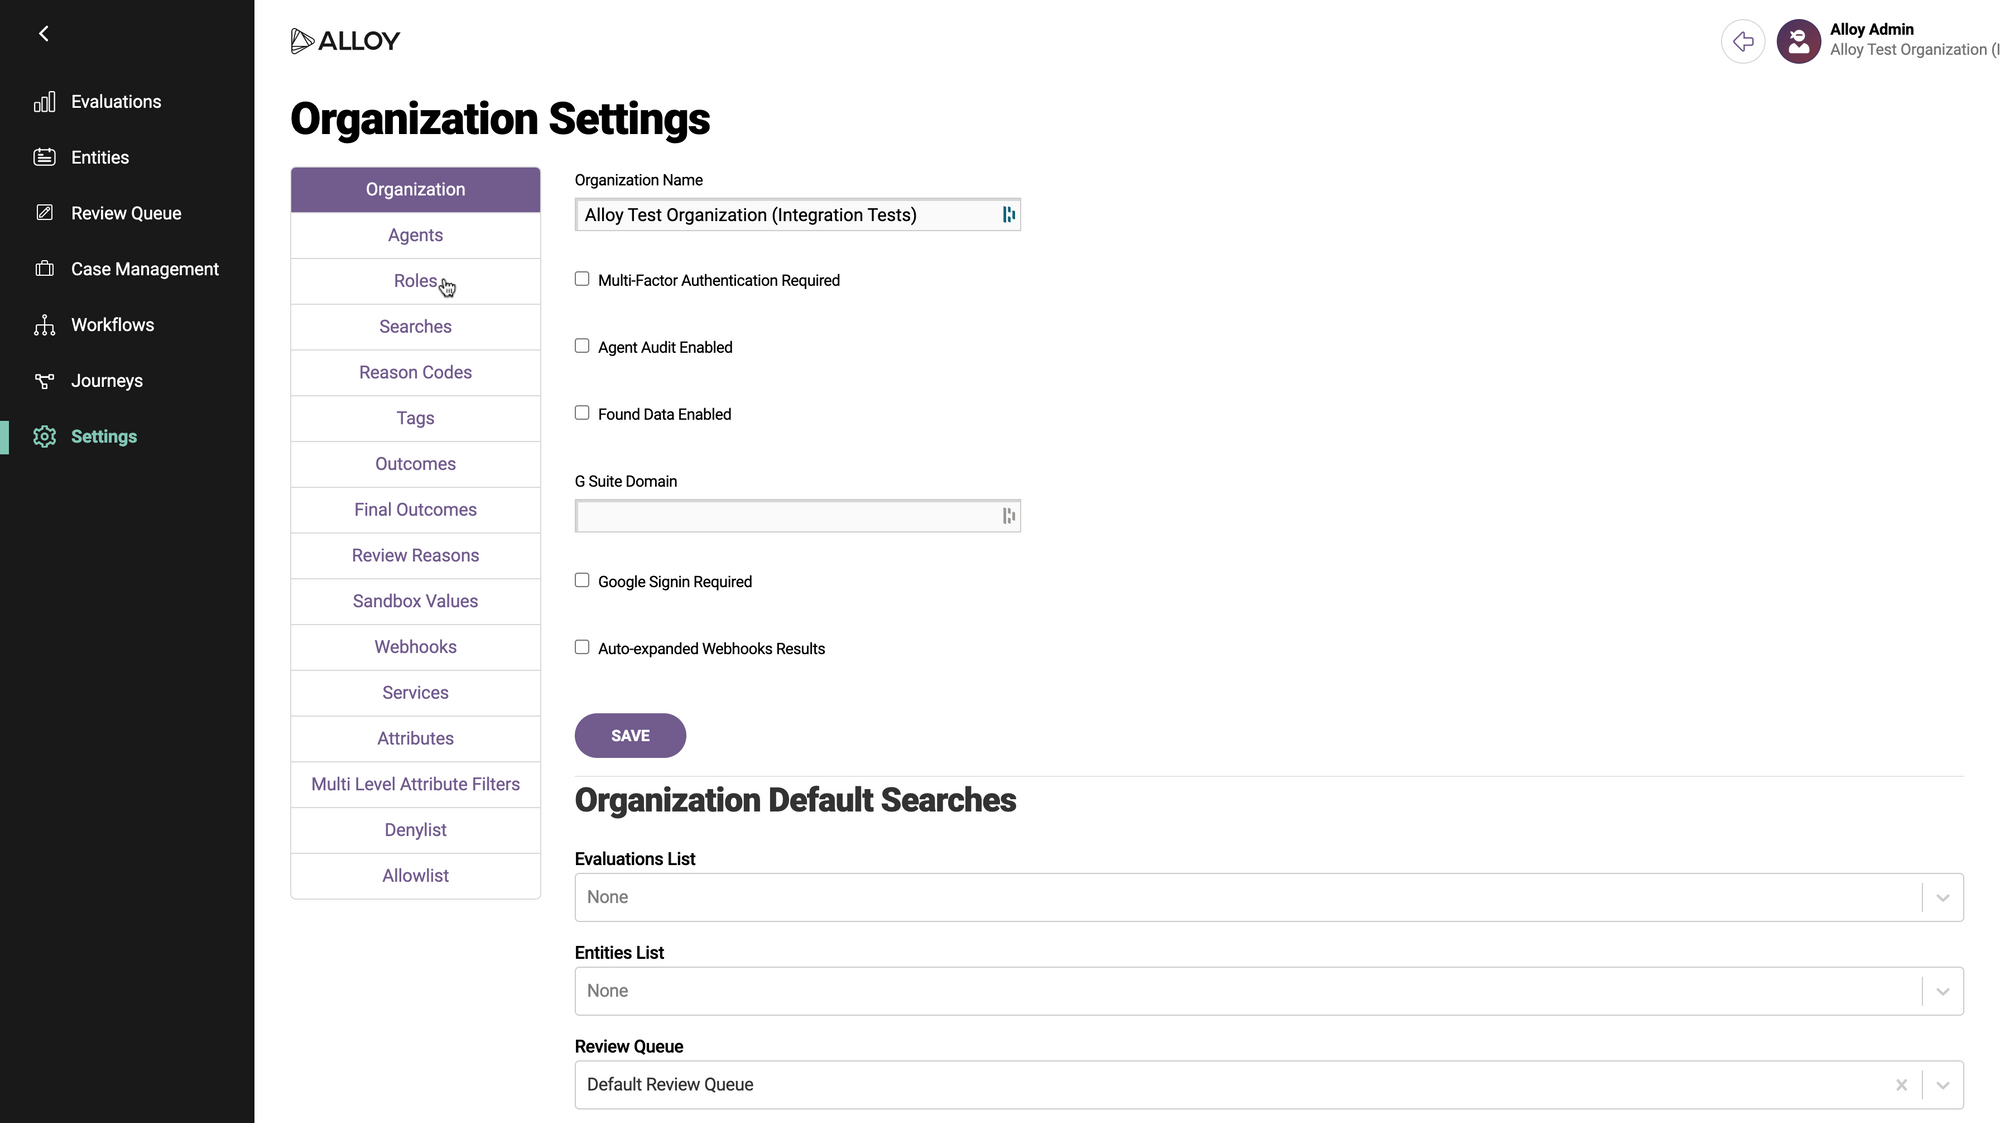
On the Roles page, you should see a list of roles. By default these include "Admin" and "User," but your organization may have configured different ones.
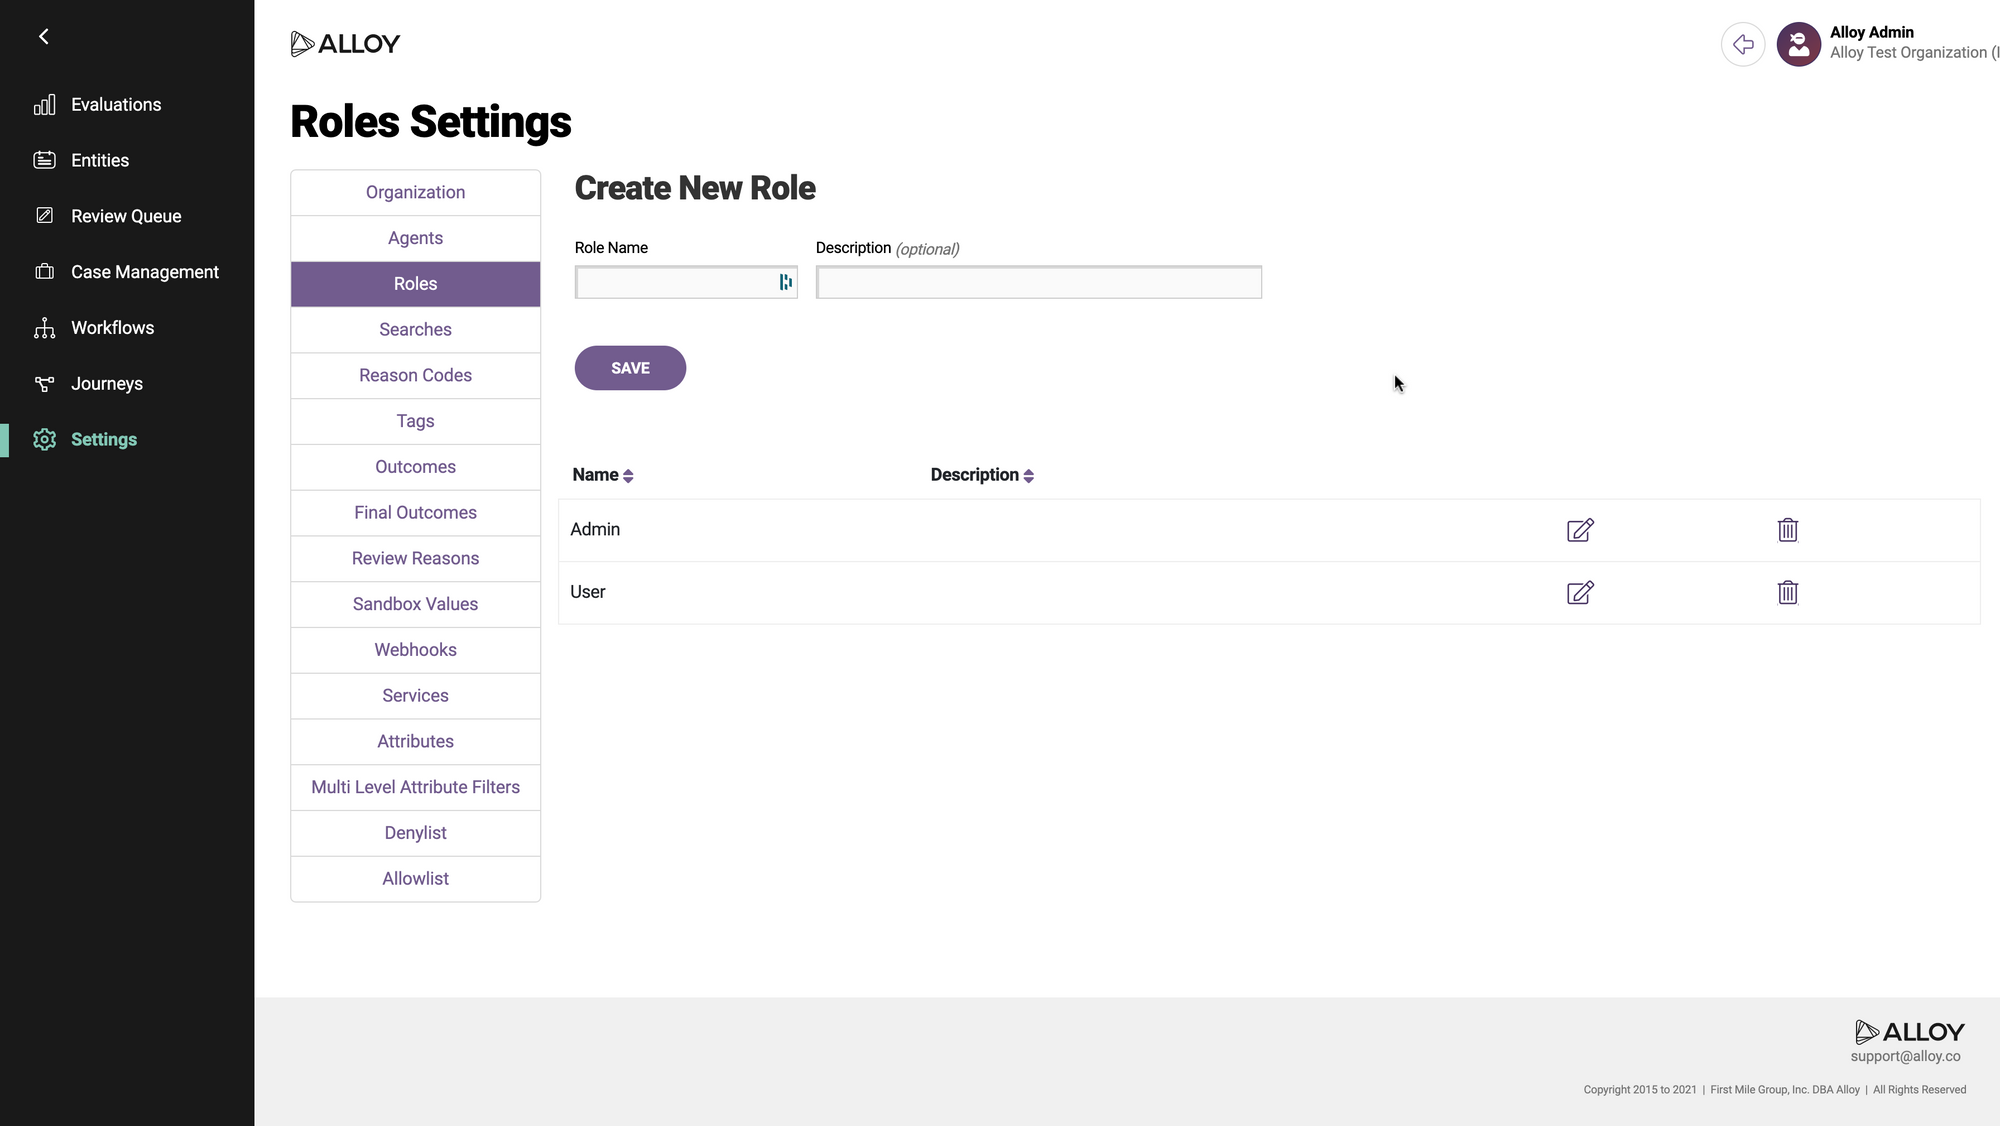
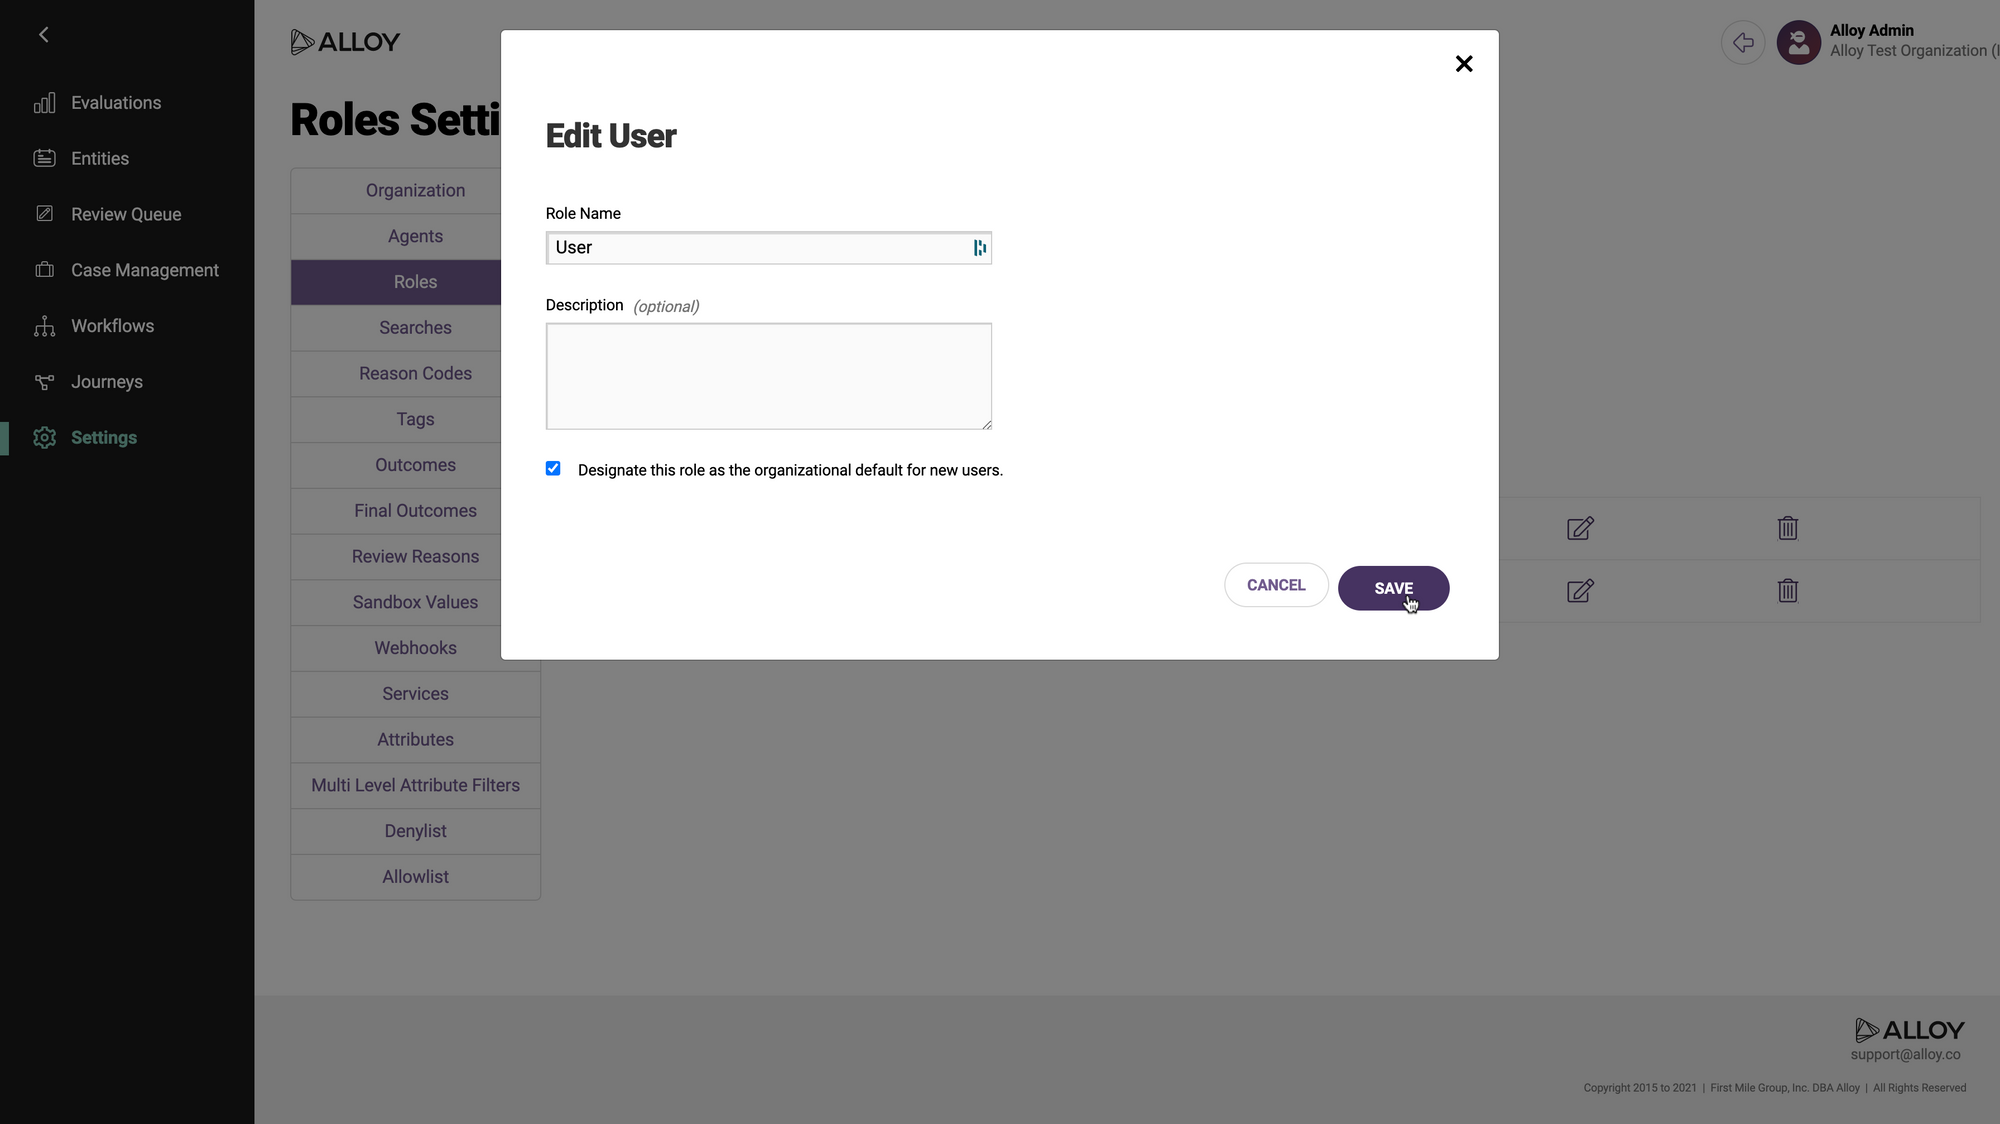
Select the role that you want to designate as the default for new SAML users. Click the icon with a pencil to edit the role. (You could also create a new role first, by filling out the form at the top and clicking "Save.")
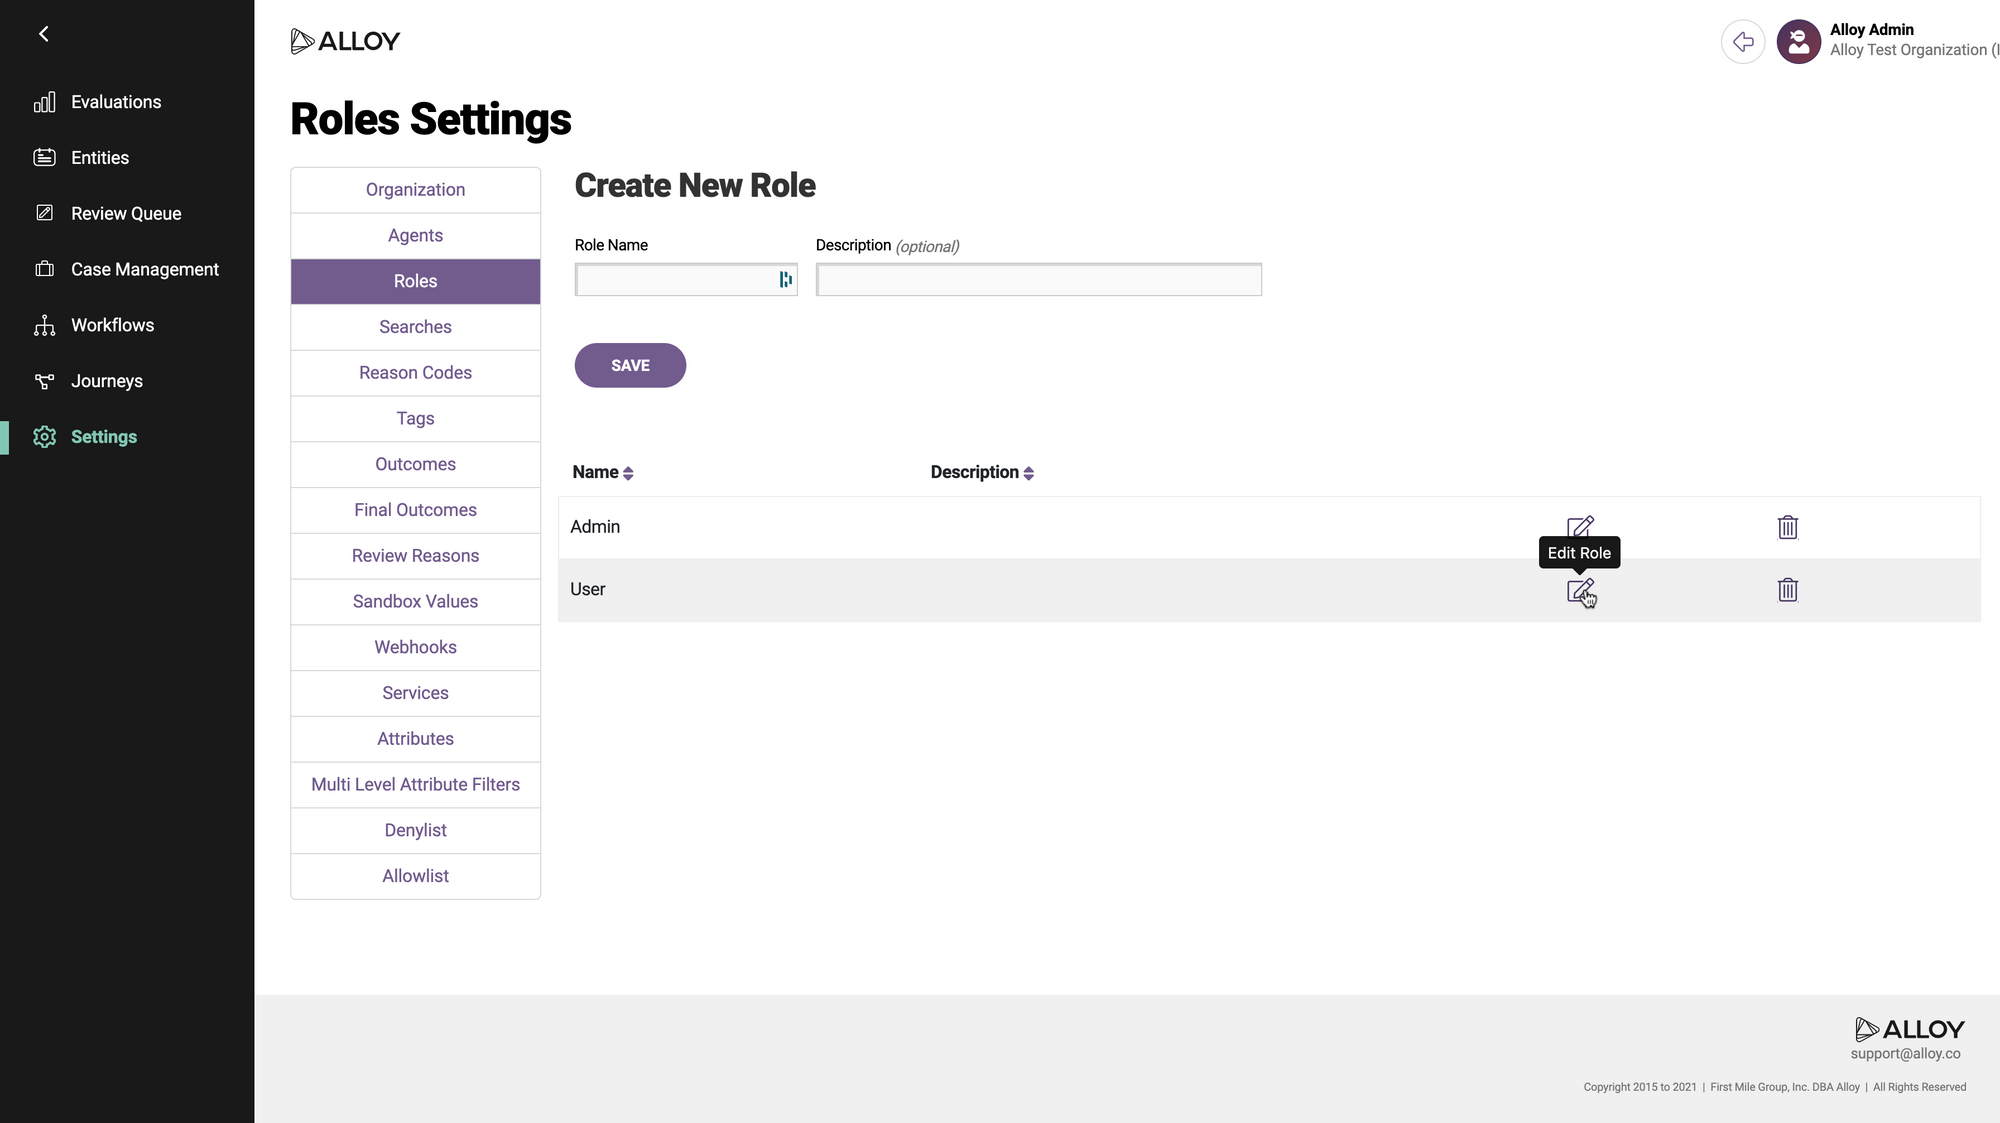
Probably you do not want to select the Admin role, unless you want all your users to have full control over your data and settings in Alloy.
Check the box labeled "Designate this role as the organizational default for new users," and apply your changes by clicking "Save."
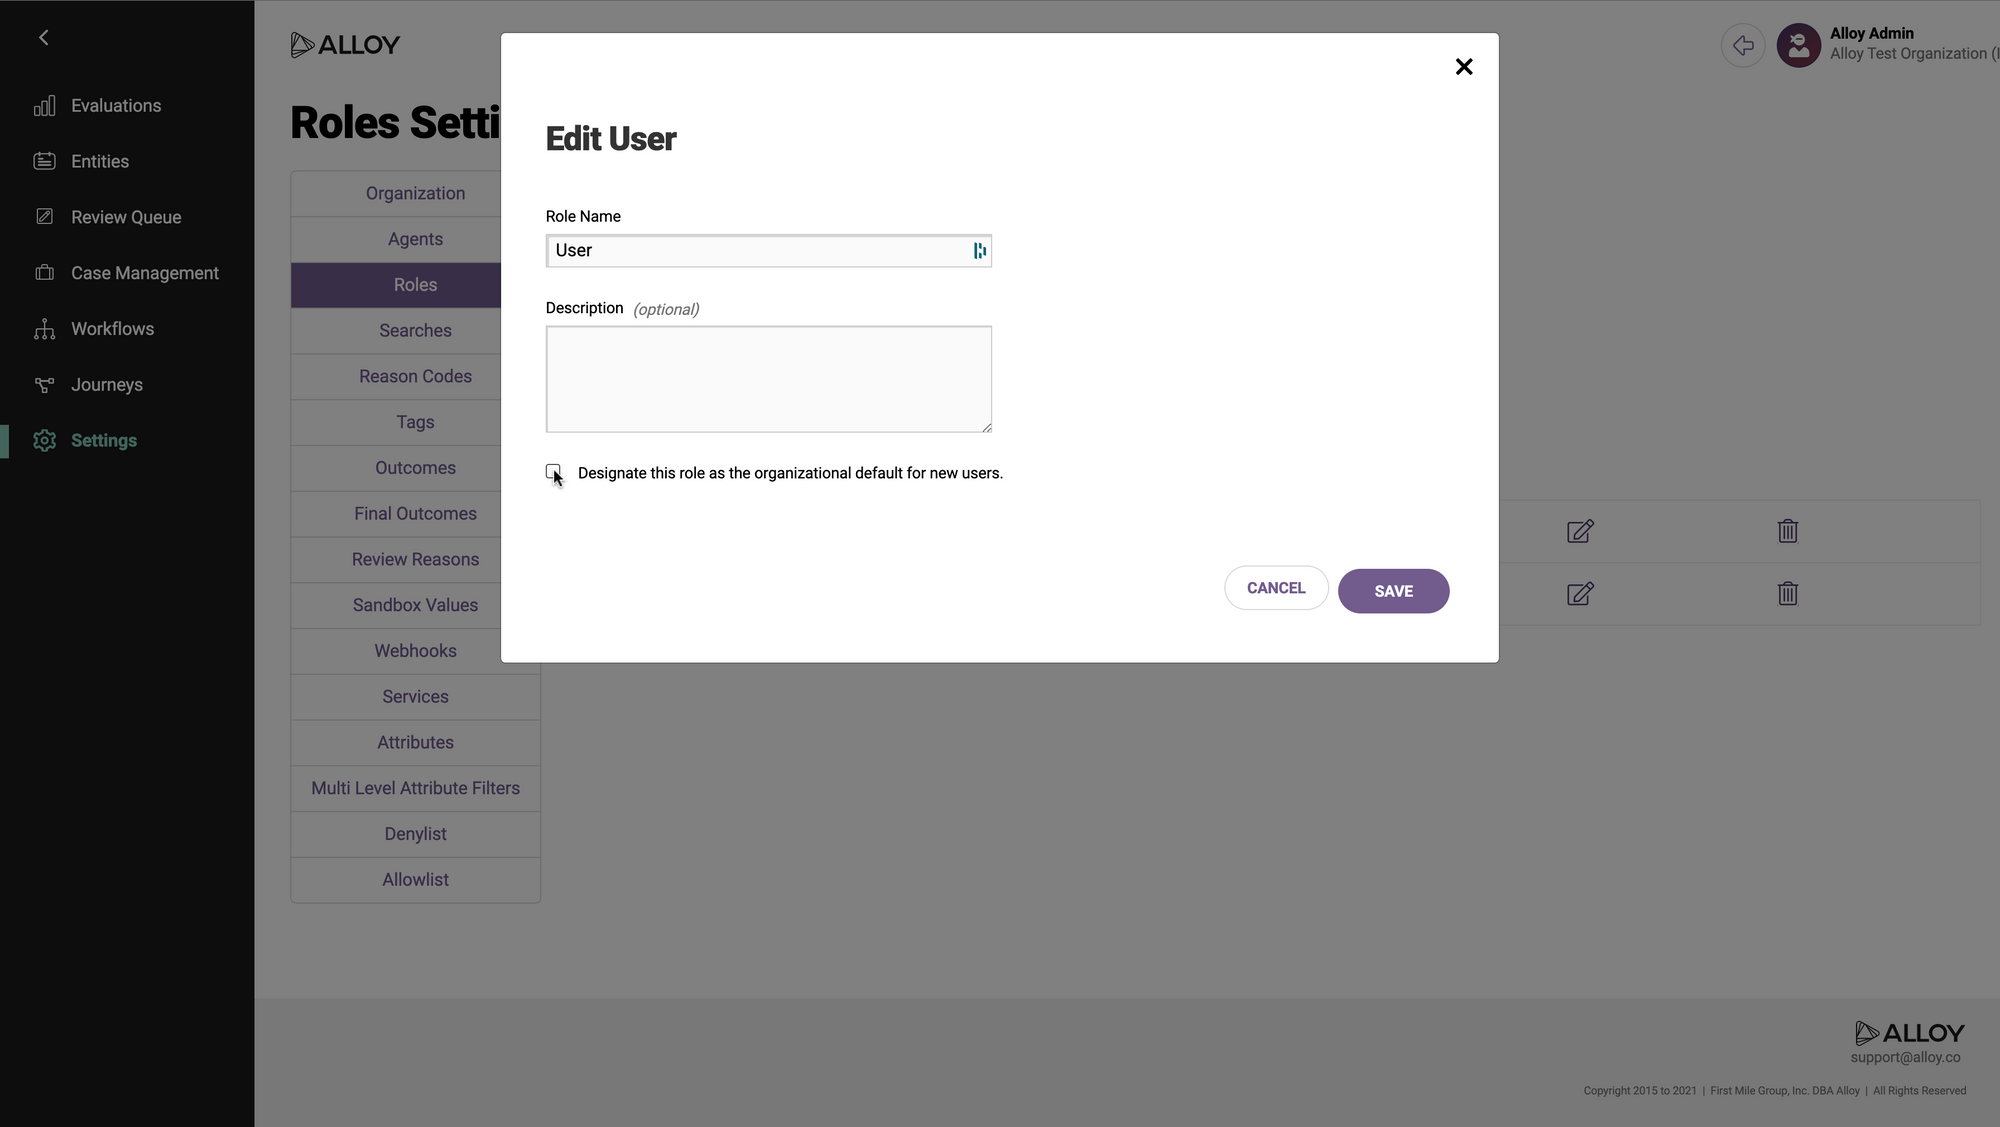
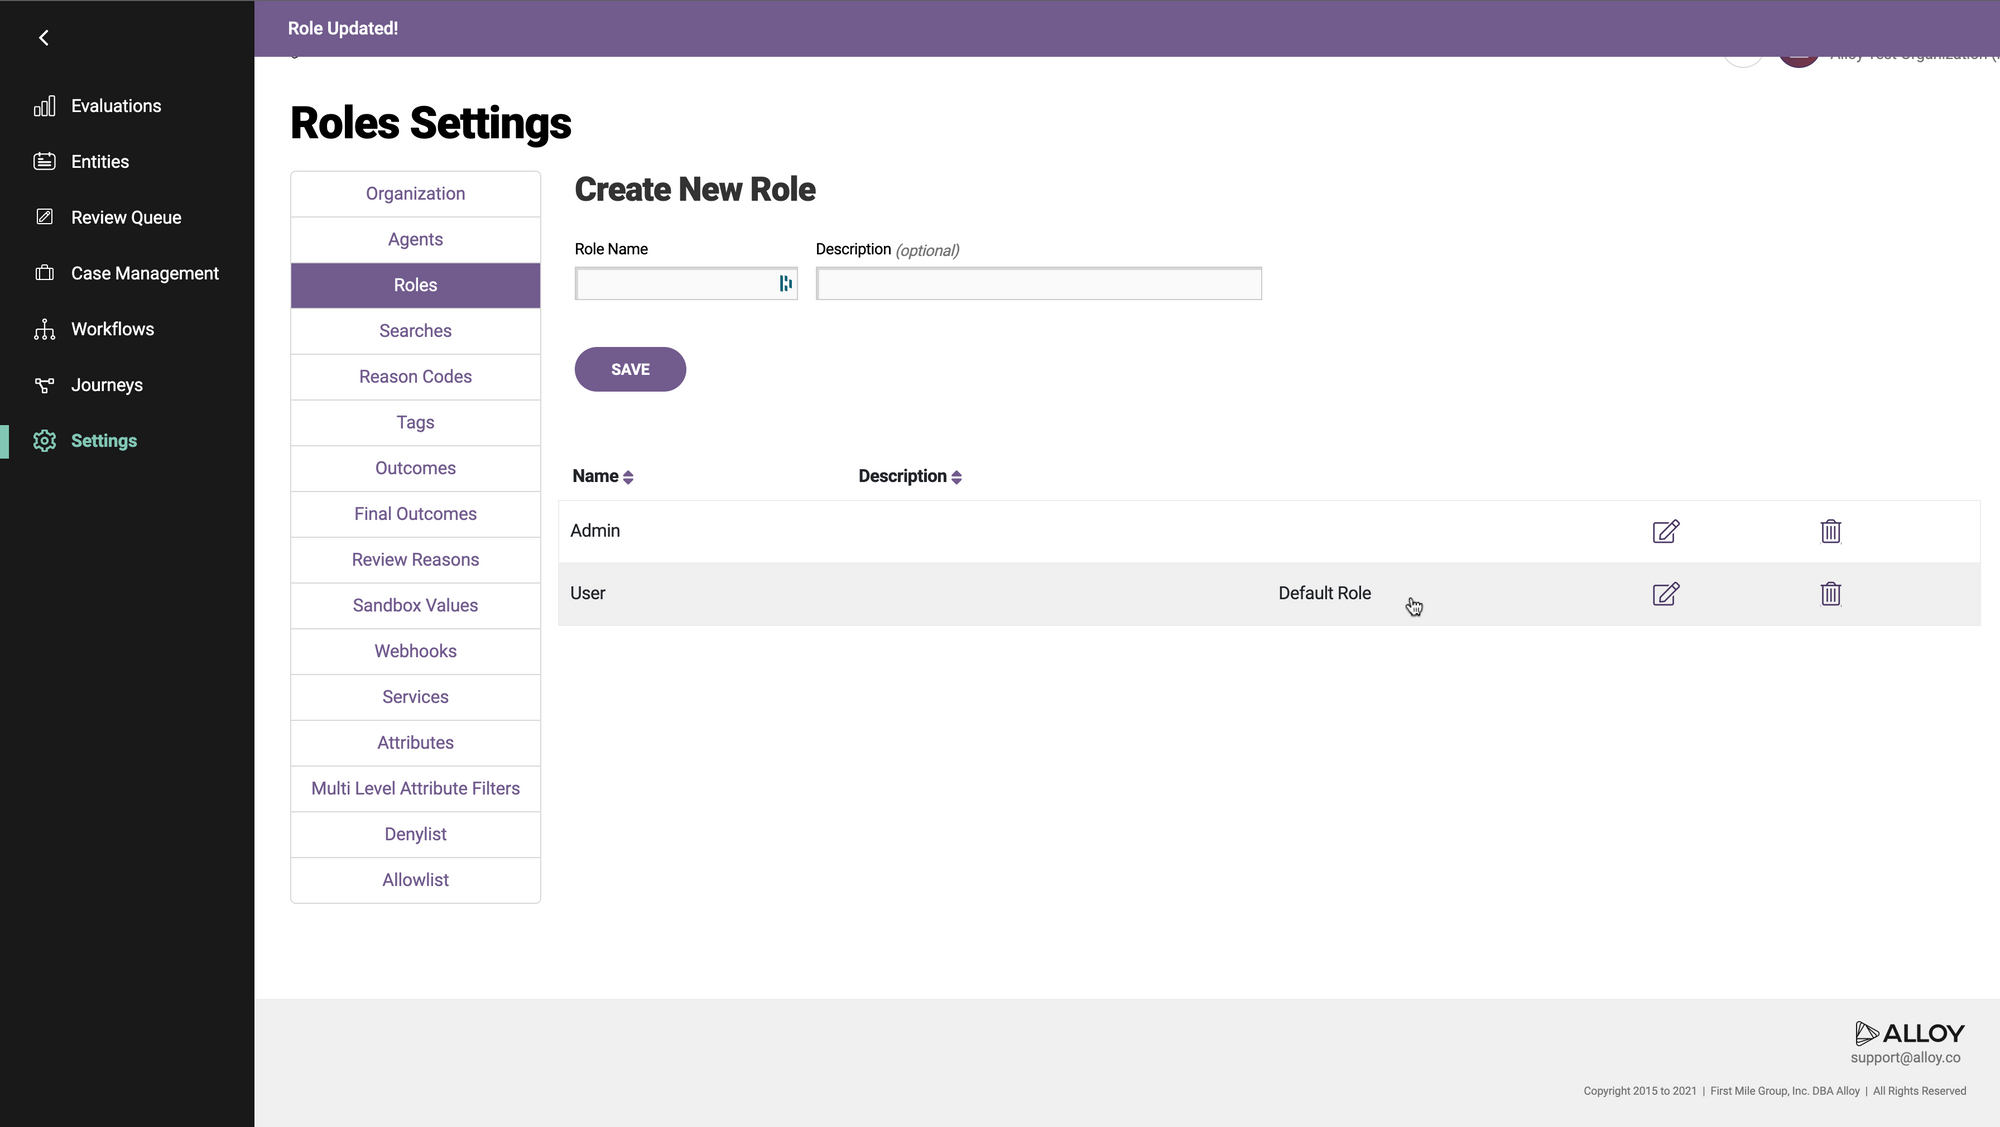
You have now set a default user role for your org, and are ready to use SAML. Notice the addition of the "Default Role" label that will tell you your default role, when you return to this page in the future.
Microsoft ADFS
In the AD FS dialog, head into the "Relying Party Trusts" section on the left panel to add a new party trust. This opens up a wizard to configure a new party trust.
- Click on "Claims aware" on the welcome window, and click Start
- Under “Select Data Source”, choose the last option to enter data about the relying party manually, and click “Next”.
- Enter the following information under each step of the wizard by (Click Next to move forward):
- Step: Specify Display Name
- Display name: Alloy SSO
- Click Next
- Step: Configure Certificate and click Next
- Step: Configure URL
- Choose the second option to “Enable support for the SAML 2.0 WebSSO protocol.
- Relying party SAML 2.0 SSO service URL: https://app.alloy.co/sso/saml/?acs.
- Click Next
- Step: Configure Identifiers
- Relying party trust identifier: AlloyIAV
- Click Add and the option will now show up as a valid identifier in the list view.
- Click Next
- Step: Choose Access Control Policy
- Choose an access control policy: Permit everyone
- Click Next
- Step: Ready to Add Trust and click Next to Finish
- Step: Specify Display Name
- Right-click on the newly added Relying Party Trust and choose “Edit Claim Issuance Policy”
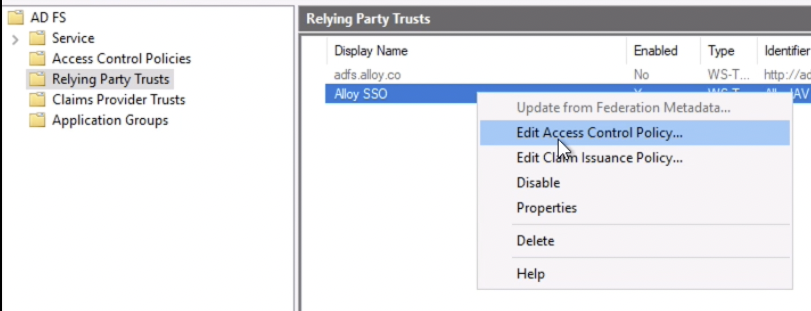
1. Click on “Add a new rule“
2. Step: Choose Rule Type and click Next
3. Step: Configure Claim Rule
    1. Claim rule name: Make Email Adress Available for NameID
    2. Attribute Store: Active Directory
    3. Under Mapping of LDAP attributes to outgoing claim types, add the following items, and choose Finish.
        1. E-Mail-Addresses -> E-Mail Address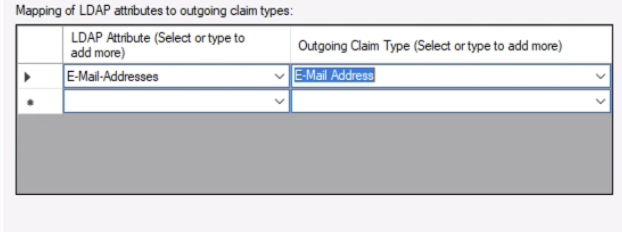
4. This takes you back to the Claim Issuance Policy window.
5. Select the new rule and choose “Add rule”
6. Step: Choose Rule Type: Transform an incoming claim
    1. Click Next
7. Step: Configure Claim Rule
    1. Claim rule name: Transform Email to NameID
    2. Under Rule template: Transform an Incoming Claim, choose the following options:
        1. Incoming rule type: **E-Mail Address**
        2. Outgoing claim type: **Name ID**
        3. Outgoing name ID format: **Email**
    3. Click Finish
8. This takes you back to the Claim Issuance Policy window.
9. Select the new rule and choose “Add rule”
10. Step: Choose Rule Type: Send LDAP Attributes as Claims
    1. Click Next
11. Step: Configure Claim Rule
    1. Claim rule name: Alloy required Attribute
    2. Attribute store: Active Directory
    3. Under Mapping of LDAP attributes to outgoing claim types, add the following items, and choose Finish.
        1. E-Mail-Addresses -> **Email**
        2. Given-Name -> **firstName**
        3. Surname -> **lastName**
        4. Telephone-Number -> **phone**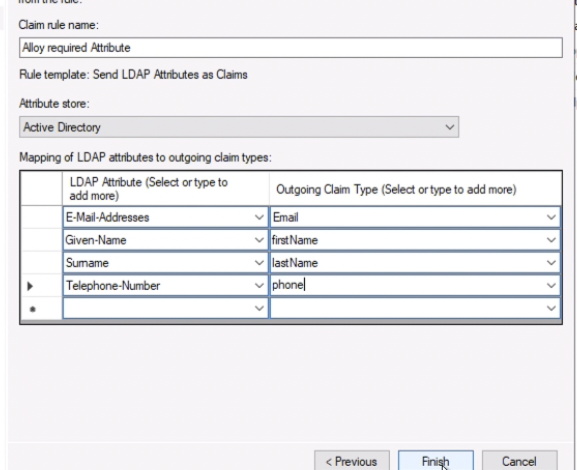
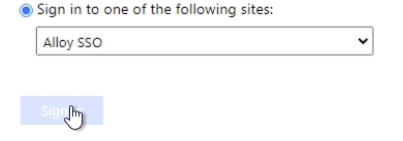
12. Click Apply and exit out of the dialog by clicking OK- Go to your browser to log into Alloy using ADFS using your Single Sign-On page, and sign in with the Active Directory user account credentials
FAQ
Unable to open the Idp initiated Single Sign-On page
If you are unable to open the IdpInitiatedSignon page (ex. https://<your hostname>/adfs/ls/IdpInitiatedSignon), you may need to check if you have enabled it by going to PowerShell and checking if is True,
(Get-AdfsProperties).enableidpinitiatedsignonpage
if it's False. turn it on by running
Set-AdfsProperties -EnableIdPInitiatedSignonPage $true
Obtaining the FederationMetadata XML file
You will be able to find the SAML FederationMetadata XML from the server that has the following URL format:
https://<your hostname>/FederationMetadata/2007-06/FederationMetadata.xml
Updated 5 months ago